Showing posts with label Main Dish. Show all posts

Monday, September 14, 2026

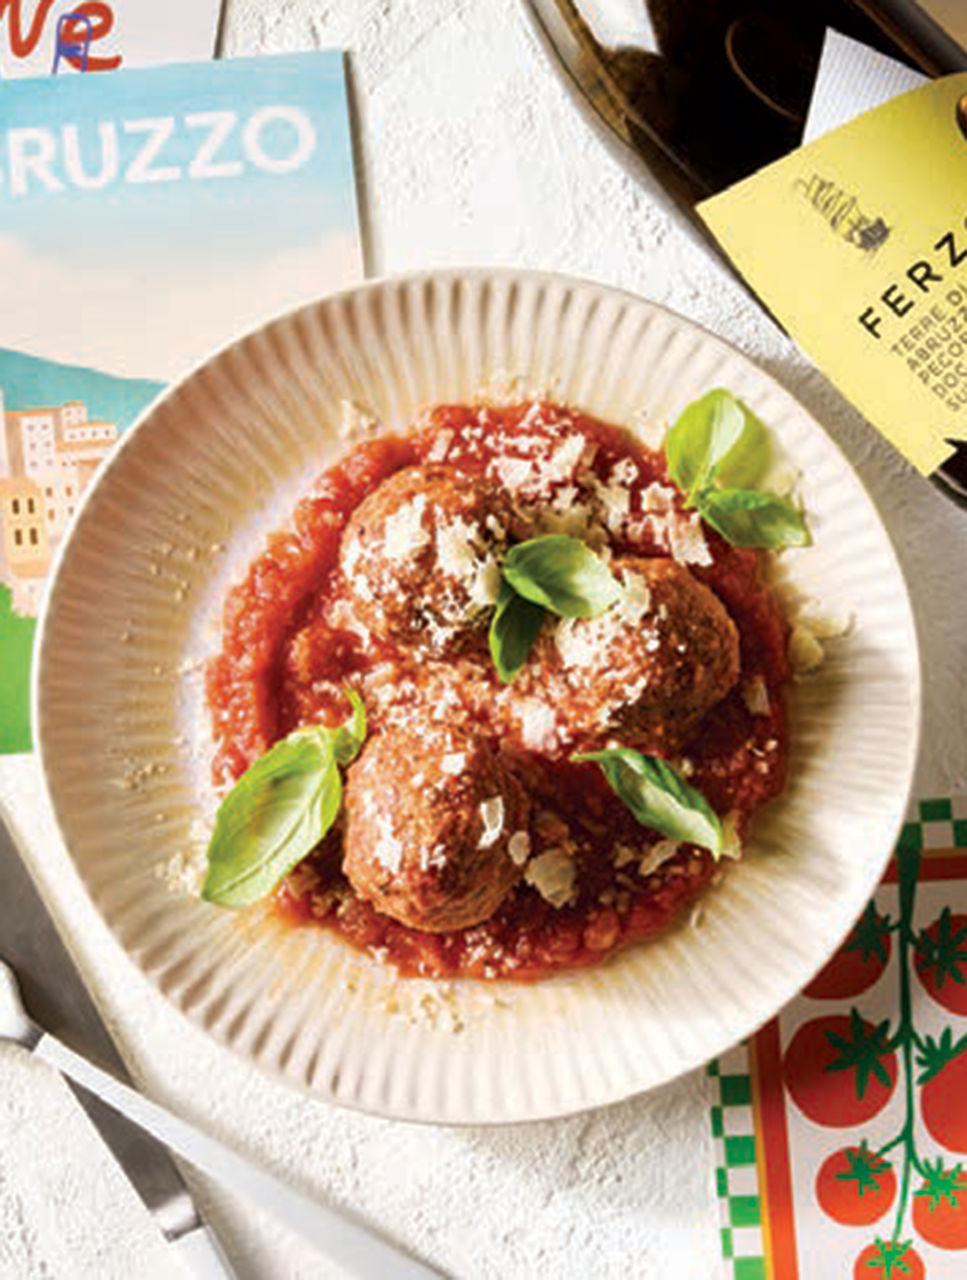
Cheese and Egg Balls

Cheese And Egg Balls
Pallotte Cacio E Uova
This dish is a rustic specialty born in the mountain villages of Italy’s Abruzzo region. Shepherds and farmers created them with simple, inexpensive ingredients they always had on hand. Today, this humble dish is celebrated as classic comfort food, especially in the highlands, where it is enjoyed with crusty bread to soak up the flavorful sauce.
Ingredients:
Pallotte or Egg Balls:
3 cups (750 mL) coarse fresh bread crumbs (see TIP)
2 large eggs
1 cup (250 mL) finely grated Pecorino Romano
1/2 cup (125 mL) finely grated Parmigiano-Reggiano, plus more to garnish
2 cloves garlic, minced
1/3 cup (80 mL) finely chopped flat-leaf parsley
1 tsp (5 mL) salt
1/4 tsp (1 mL) freshly ground pepper
Olive oil for frying
Tomato Sauce
1/2 cup (125 mL) onion, finely chopped
2 medium-size garlic cloves, finely minced
2 cups (500 g) tomato polpa, such as Mutti
Salt and freshly ground pepper to taste
1/4 cup (60 mL) small or torn basil leaves
Directions:
In a large mixing bowl, combine bread crumbs, eggs, cheeses, garlic, parsley, salt and pepper. Mix everything together with your hands until you get a dough-like consistency. (It should be moist but firm enough to shape into balls. If it feels too wet, add a little more bread crumbs.) Form into balls about 1 inch (2.5 cm) in diameter. You should get 10 to 12 balls.

Fill a large sauté pan about one third of the way with olive oil. Place over medium-high heat. When the oil is hot, carefully add balls to pan. Cook, gently turning them occasionally, until golden brown and crispy on all sides, 4 to 5 minutes. Transfer to a plate.

Pour off and strain all but 3 tbsp (45 mL) oil into a heatproof container to save for another use. Place pan over medium heat. Add onion. Cook, stirring occasionally, until translucent, about 2 minutes. Add garlic and cook 30 seconds more. Carefully add tomato polpa—it will splatter—and season with salt and pepper. Simmer sauce for 15 minutes.

Place pallotte (balls) into sauce and simmer for 10 minutes, very gently turning occasionally so they absorb flavours of sauce. Gently transfer to a large shallow bowl. Sprinkle with Parmigiano and basil.
Serves 4

TIP Fresh bread crumbs are made by crumbling stale rustic bread, crusts and all. If bread is hard, soak it in warm water for 5 minutes then squeeze out excess moisture before crumbling.

Tuesday, September 8, 2026

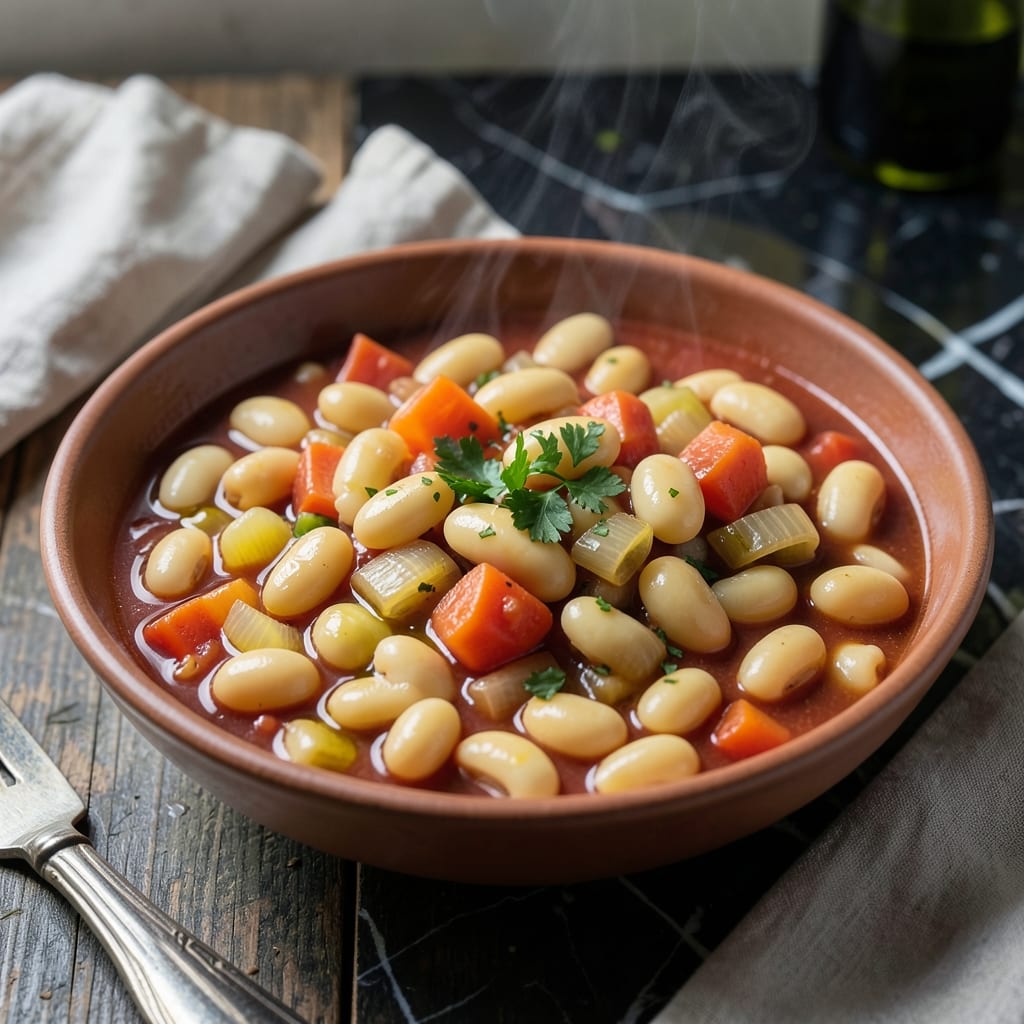
Pasta Fagioli Stanley Tucci White Bean Stew

Pasta Fagioli or White Bean Stew by Stanley Tucci
For a quick but wholesome lunch or dinner, try this recipe of beans, carrots and tomatoes.  The dish is full of nutrition,   Stanley Tucci is one of the most recognized chefs today.  He has published cookbooks and appears as a guest frequently on TV cooking programs.
Ingredients
1 1/2 cups Ditalini Pasta or small elbow macaroni
2 cans Cannelloni Beans, drained and rinsed
3 Tablespoons Extra-Virgin Olive Oil, divided for cooking and finishing
1 whole Yellow Onion, finely diced for base flavor
2 carrots, peeled and diced small
2 whole celery stalks diced for aromatic base
4 garlic cloves minced for flavor depth
1 can diced tomatoes, San Marzano preferred for sweetness
4 cups low sodium vegetable broth
2 teaspoon chopped Rosemary
2 teaspoons fresh thyme
1 Bay leaf
Parmesan Cheese rind
1 1/2 Kosher salt
1 teaspoon fresh ground pepper for finishing and seasoning.
Directions:

Build the Aromatic Base.

Heat 2 tbsp Extra-Virgin Olive Oil in a large Dutch oven over medium heat. Add the finely diced Yellow Onion, Carrots, and Celery Stalks. Cook for 8-10 minutes, stirring occasionally, until the vegetables soften and the onion becomes translucent.

The soffritto should develop a sweet aroma without browning. This foundation layer provides the depth of flavor characteristic of Stanley Tucci’s approach to Italian cooking. Season lightly with a pinch of the Kosher Salt to enhance the natural sweetness.

Step 2: Develop Flavor with Garlic and Herbs

Add the minced Garlic Cloves to the pot and cook for 1 minute, stirring constantly to prevent burning. The garlic should release its fragrance but not take on any color. Immediately add the chopped Fresh Rosemary and Fresh Thyme, stirring for another 30 seconds.

Pour in the Diced Tomatoes with their juices and cook for 3-4 minutes until the mixture thickens slightly. The tomatoes should break down and meld with the aromatics, creating a rich base for the stew.

Step 3: Simmer the Stew to Perfection

Add the drained and rinsed Cannellini Beans, Vegetable Broth, Bay Leaf, Parmesan Cheese Rind, remaining 1.5 tsp Kosher Salt, and 1 tsp Freshly Ground Black Pepper. Stir well to combine. Bring the mixture to a boil, then reduce heat to maintain a gentle simmer.

Partially cover the pot and let it cook for 20-25 minutes, stirring occasionally. The stew is ready when the beans are creamy and the flavors have melded together. The Parmesan Cheese Rind should have infused the broth with its rich, savory depth.

Step 4: Finish with Pasta and Final Touches

Stir in the 1.5 cups Ditalini Pasta and cook uncovered for 8-10 minutes, or until the pasta is al dente. The pasta should absorb some of the broth, thickening the stew to the perfect consistency. Stir frequently to prevent the pasta from sticking to the bottom of the pot.

Once the pasta is cooked, remove the Bay Leaf and Parmesan Cheese Rind. Drizzle with the remaining 1 tbsp Extra-Virgin Olive Oil and stir to incorporate. Let the stew rest for 5 minutesoff the heat before serving to allow the flavors to settle and the stew to reach its ideal thickness.

Pro Tips For Making Pasta Fagioli Recipe Tucci

  • Undercook the Pasta: Cook the ditalini 2 minutes less than package instructions—it’ll finish in the broth and soak up flavor without turning mushy. I learned this the hard way after ending up with a pot of gummy noodles.
  • Mash Some Beans: Crush about half the cannellini beans with a fork before adding them to thicken the soup naturally. Sounds weird, but it works and gives it that classic creamy texture.
  • Sweat the Veggies: Let the onion and carrots cook in olive oil for at least 8-10 minutes until soft and sweet—rushing this step leaves the soup tasting raw. My grandmother swore by this, and she was right.
  • Use Starchy Water: Reserve a cup of pasta water before draining and stir it into the soup at the end. It helps bind everything together and adds a silky richness you’d otherwise miss.

Wednesday, August 26, 2026

Mama Marie Bolognese


Mama Marie Bolognese

Some dishes speak louder than others. “I love simple, flavorful food—and this one was a no-brainer.” A longtime admirer of Italian cuisine wasn’t able to taste test Mama Marie’s Bolognese due to a work emergency but he was moved by the heartfelt story behind it and knew it was a dish that deserved to be shared. Great food is about more than flavor: It’s about bringing people together, whether over a plated dinner or a bowl of something timeless, like bolognese. Copied and altered from Edible San Diego Fall issue 2025.
Ingredients:
2 tablespoons extra-virgin olive oil
3 cloves garlic, minced
1 large white onion, chopped
1 package fresh basil, chopped
2 pounds lean ground meat, tri-tip, or 6 Italian sausages
3 28-ounce cans tomato sauce (ready-cut with basil)
1 12-ounce can tomato paste
1 28-ounce can tomato purée
1⁄2 bunch parsley, chopped
1 teaspoon dried oregano
1 teaspoon dried rosemary
Salt and pepper to taste
Italian seasoning to taste
4 bay leaves
1 teaspoon red pepper flakes
1⁄2 cup red wine
2 carrots, thinly sliced
1 lemon, juiced
1 teaspoon ground anise
Directions:
Make The Bolognese
Heat olive oil in a large pan over medium heat and infuse with garlic, onion, and basil for 2 minutes.
Add the meat of your choice and sear for an additional 2–3 minutes, allowing the meat to brown slightly.

Add all the tomato ingredients, parsley, oregano, rosemary, salt, pepper, Italian seasoning, and bay leaves. Stir well to blend the flavors.
Use the empty tomato paste can to measure 1 can of water, and the large tomato sauce can for an additional can of water. Add both to the sauce and mix thoroughly.

Let the sauce simmer on low heat for about 3 hours, stirring every 15–20 minutes to prevent sticking.

After 30 minutes of cooking, stir in red pepper flakes and red wine for depth of flavor.

One hour before serving, add thinly sliced carrots, fresh lemon juice, and ground anise. This will allow the carrots to melt into the sauce and enhance its sweetness. 

Serve with your favorite cooked pasta.  Serves 10 to 12.

Tuesday, August 18, 2026

Polenta With Cranberry Beans ~. Rancho Gordo


Polenta With Cranberry Beans
If you take advantage of any of my recommendations, I hope it will be to buy the Rancho Gordo Beans and any of their line of products.  The quality is unsurpassed 
In the Rancho Gordo library, we have a well-used copy of the book Fagioli: The Bean Cuisine of Italy (Rodale, 2014) by Judith Barrett, and this recipe is inspired by the book. When we tested it in the Rancho Gordo kitchen, it was a big hit. As we licked our bowls clean, we all agreed that it was a polenta dish with beans, not a bean dish with polenta, if that makes sense. 
Ingredients:
  • 1/4 cup olive oil
  • 1 large or 2 small red onions, finely chopped
  • 2 cloves garlic, peeled and finely chopped
  • 2 cups canned chopped tomatoes, with their juices
  • 1 tablespoon red wine vinegar
  • 2 tablespoons tomato paste
  • 1 cup chicken or vegetable broth
  • 10 fresh basil leaves, finely chopped
  • 4 fresh sage leaves, finely chopped
  • 4 to 5 cups cooked, drained Rancho Gordo Cranberry, Occhio della Capra or Borlotti Lamon beans
  • Salt and freshly ground pepper
  • 2 cups Rancho Gordo/Anson Mills polenta
  • 6 ounces pancetta, diced (optional)
    Chopped fresh basil or parsley for garnish
    Directions:
    In a large pan, heat the olive oil over medium heat. Add the onions and garlic and cook, stirring, until the onions begin to soften, about 3 minutes. Stir in the tomatoes and vinegar. Dissolve the tomato paste in the broth and add to the onions and tomatoes. Add the basil and sage. Season with salt and pepper and simmer until the sauce has thickened, 15 to 20 minutes.
    Add the beans to the tomato sauce. Cook, stirring, to combine and heat through, about 15 minutes.
  1. To prepare the polenta: In a heavy pot, combine the cornmeal with 1 tablespoon salt. Turn the heat to medium and gradually whisk in 9 cups cold water, stirring constantly, until the polenta begins to boil. Lower the heat and simmer, stirring frequently with a wooden spoon, until thick, about 45 minutes.

  2. If using pancetta: Place the pancetta in a small saucepan over low heat. Cook, stirring frequently, until the pancetta is brown and crisp, about 15 minutes. Use a slotted spoon to transfer the pancetta to a paper towel to drain.

  3. To serve, spoon the polenta into serving dishes. Ladle the beans over the polenta and top with the pancetta, if using. Garnish with fresh herbs.   
  4. Makes 6 servings

Thursday, August 6, 2026

Rahmschnitzel ~ German Cream Sauce

Rahmschnitzel ~ German Cream Sauce
Rahmschnitzel is a German Word and translated it means Cream Sauce. As in the kitchen of cooks, each tweaks the sauce to their own preference or taste. Sauces set apart European dishes apart from American preparations.
Ingredients:
Meat
1 to 2 pounds lean pork, veal, or poultry breasts (see notes for options)
salt
1 cup flour, for dredging
1/4 cup lard, butter, or oil, divided

Sauce
1/2 cup minced shallot or onion
1 cup chopped fresh mushrooms (optional)
1/4 cup white wine
1/2 cup chicken, vegetable, or pork stock
1/2 teaspoon white pepper
1 tablespoon capers (optional)
1 teaspoon Dijon mustard
1/2 cup heavy cream, or half and half
1/4 cup sour cream
1/4 cup minced chives or parsley

Directions:
Slice the pork or veal into cutlets about 1/4 to 1/2 inch thick. Keep poultry breasts whole. Put one in the freezer bag and pound it very thin, about 1/8 inch thick. You will need to use moderate force here to not pulverize the meat, tearing it. Periodically flip the meat to pound both sides, and use your palm to determine if the cutlet is evenly thin. Set aside and do this for the remaining cutlets.

You can trim off stray edges and bits on the cutlets, or just leave them as is. Salt both sides and prep your other ingredients.

Dredge your cutlets in flour, pressing it in well. Heat 3 tablespoons of lard or butter in a pan over medium-high heat, then fry the cutlets in batches, making sure they don't touch each other. If you have a bacon press, use it to press the cutlets down so they don't curl. Brown on both sides and set the meat on a plate as they're ready.

When the meat has all been cooked, wipe out the pan and add the remaining lard or butter. You might need an extra tablespoon. Cook the onion or shallot over medium-low heat. You want it soft and translucent, but not browned. This usually takes about 6 to 8 minutes. If you are using mushrooms, they go in here.

Add the white wine and use a wooden spoon to scrape up any browned bits. Turn the heat to high. Let the wine almost completely boil away, then add the mustard and stock. Mix well and add the white pepper.

Let this boil down by half. If you are using capers, they go in here.
Turn off the heat, and stir in the heavy cream. Then whisk in the sour cream, and taste the sauce for salt and temperature. If it cooled down too much, warm it gently. Don't let it even simmer again or it can break.

Coat the cutlets in the sauce, then serve with more sauce, topped with the chives or chopped parsley.

Monday, August 3, 2026

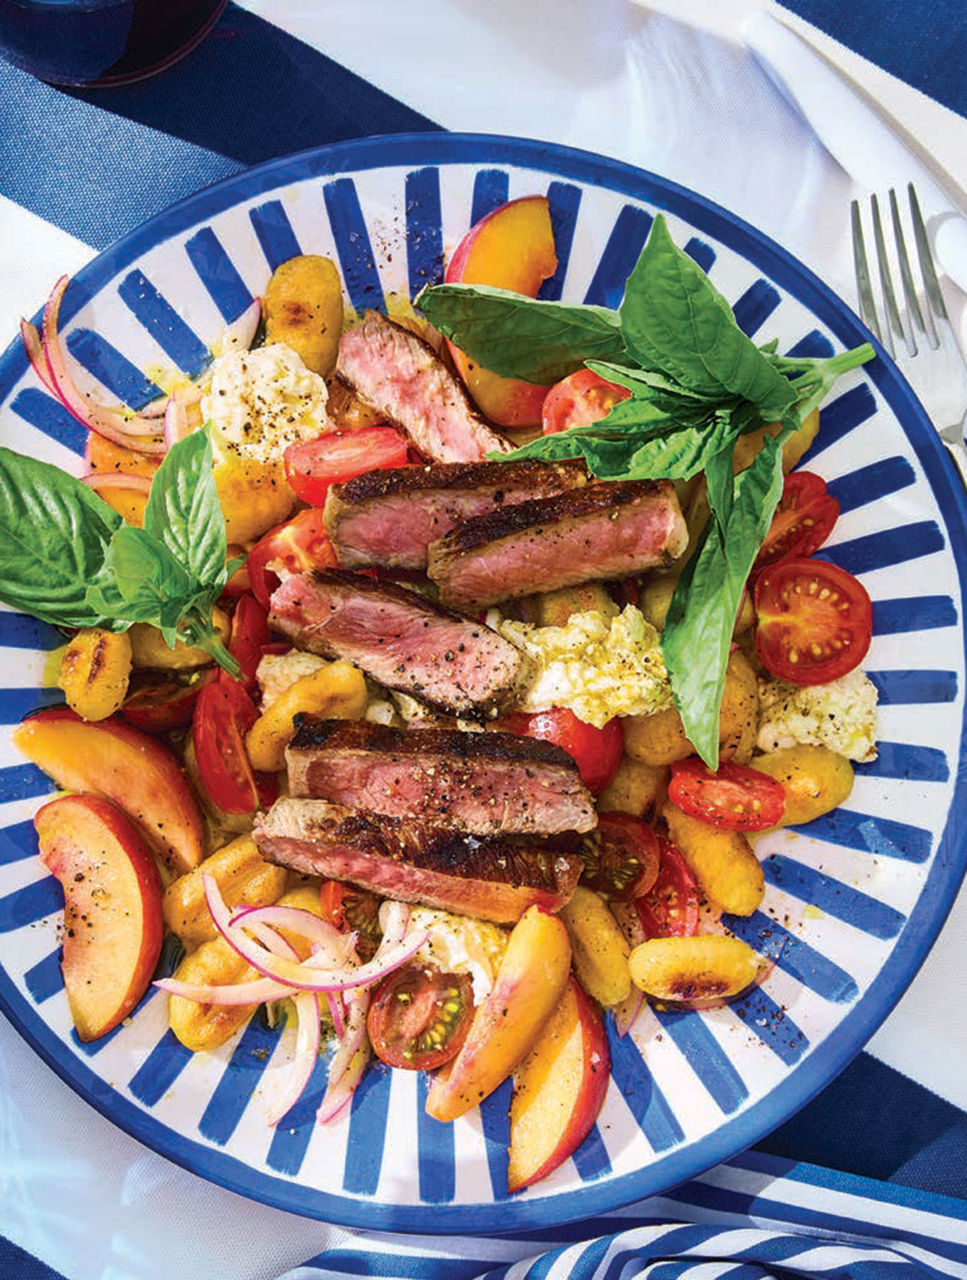
Steak, Tomato & Peach Panzanella With Fresh Mozzarella & Charred Scallion Dressing

Steak, Tomato & Peach Panzanella With Fresh
 Mozzarella & Charred Scallion Dressing
This hearty steak salad is built for summer entertaining, when peach and tomato seasons are in full swing. Instead of chunks of bread, the starchy element of this panzanella comes in the form of store-bought potato gnocchi, which are seared ahead of time for a crisp-soft texture. It’s a celebratory dish that 
requires very little effort.
Ingredients:
2 strip steaks, about 1 1/2 lbs (680 g) total
6 scallions
1/2 cup + 4 teaspoons EVOO divided + more for drizzling
Salt and freshly ground pepper to taste
2 tbsp (30 mL) white balsamic vinegar
1/4 small red onion, very thinly sliced
1 pkg (500 g) shelf-stable potato gnocchi
2 balls (125 g each) fresh mozzarella
4 cups (1 L) heirloom grape or cherry tomatoes, cut into bite-size pieces
3 ripe peaches, cut into wedges
1/2 cup (125 mL) loosely packed basil leaves
Directions:
Place steaks on a baking sheet and let sit at room temperature for 30 minutes.

Preheat grill to high.

Place green onions on baking sheet with steak. Drizzle both with olive oil. Season steaks with salt and pepper.

Grill steaks, covered, until nicely seared, 2 to 3 minutes per side. Reduce heat to medium. Cook, flipping once, until it’s done to your liking, about 2 minutes more for medium-rare. While steaks are cooking, grill scallions until softened and lightly charred in spots, about 1 to 2 minutes per side. 

Remove from heat and cool. When steaks are done, transfer to a wire rack set over a baking sheet. Cool completely. Slice steaks against grain. (Steaks can be prepared to this point and stored in an airtight container and refrigerated until ready to use, up to 1 day. Bring to room temperature before using.)

To make dressing, roughly chop cooled scallions. Place in a blender with 1/2 cup (125 mL) olive oil, vinegar, salt and pepper. Blend until smooth. Transfer to a glass jar, cover and refrigerate until ready to use, up to 1 day.

Place sliced red onion in a small bowl and cover with cold water. Let stand for 15 minutes. Drain and set aside.

In a medium bowl, toss gnocchi with remaining 4 tsp (20 mL) olive oil and salt to taste. Heat a large skillet over medium-high heat. Add gnocchi in a single layer and cook, undisturbed, until deeply golden on one side, 2 to 3 minutes. Toss and continue cooking until browned all over, another 2 to 3 minutes. Transfer to a plate and cool completely.

Before serving, drain mozzarella and let it sit at room temperature for 15 minutes.

Place tomatoes, peaches and soaked onion in a large mixing bowl. Toss gently with half of dressing. Tear mozzarella into rustic chunks and lightly season with salt. Add to bowl along with gnocchi. Toss and taste for salt and pepper. Arrange salad on a large serving platter and top with steak and basil. Serve with the remaining dressing on side.

Friday, July 10, 2026

Burrata With Polenta and Roasted Cherry Tomatoes

 Burrata with Polenta & Roasted Cherry Tomatoes

Soft polenta, sweet burst cherry tomatoes and creamy burrata come together for a satisfying dish that could be a vegetarian main for two or a satisfying side serving four alongside roast chicken. Feel free to swap in basil for mint, and the tomatoes on their own make for a terrific pasta sauce.

Ingredients:
2 cups (500 mL) cherry tomatoes
2 cloves garlic, roughly chopped
1/4 cup (60 mL) olive oil
1 tbsp (15 mL) honey
1 tbsp (15 mL) cider vinegar
1 tsp (5 mL) salt, divided
2 tbsp (30 mL) roughly chopped mint
1/2 cup + 1 tbsp (125 mL + 15 mL) cornmeal
1 3/4 cups (425 mL) water
1/2 cup (125 mL) whole milk
6 tbsp (90 mL) salted butter
3/4 cup (175 mL) finely grated Pecorino Romano cheese
1 container (250 g) burrata, drained
Torn mint, shaved Pecorino Romano
freshly ground pepper to serve
Directions:

Preheat oven to 325˚F (163˚C).

In a 9-inch- (23-cm-) square baking dish, mix tomatoes, garlic, olive oil, honey, vinegar and 1/2 tsp (2 mL) salt. Bake until soft and beginning to brown, 40 to 45 minutes. Remove from oven, cool slightly, then stir in chopped mint.

After tomatoes have been baking for 15 minutes, start polenta. In a medium-size saucepan, combine cornmeal, water, milk and remaining 1/2 tsp (2 mL) salt. Bring to a boil over high heat, stirring constantly with a wooden spoon until thickened. Reduce heat to low and cook, stirring and scraping bottom of pan every 5 minutes, until polenta no longer has gritty texture, about 30 minutes. 

Remove from heat and stir in butter and Pecorino Romano until melted and combined. Polenta should be thick, but pourable—if it’s too thick, stir in a small amount of water.

To serve, pour polenta into a round serving dish. Top with tomatoes, then push burrata down into centre of polenta. Garnish with torn mint, shaved Pecorino Romano and pepper.  Serves 4

Blogger's Suggestion:  When you remove the polenta from the heat, stir in Boursin Herb and Garlic Cheese for a creamy flavorful polenta.


Tuesday, July 7, 2026

Spaghetti With Sweet Corn Pesto


Spaghetti With Sweet Corn Pesto 

If you’re looking for a fresh summer pasta recipe, this Spaghetti with Sweet Corn Pesto is the ultimate crowd-pleaser. Juicy cherry tomatoes, fragrant basil, and a creamy corn pesto sauce come together for a dish that’s light, vibrant, and perfect for warm-weather dining.

Unlike traditional basil pesto, this version uses sweet corn kernels blended with garlic, Parmesan, and olive oil for a naturally sweet and savory sauce that pairs beautifully with pasta.

Try serving this dish with a simple green salad or alongside garlic bread for the perfect Italian-inspired summer meal.

Ingredients 
for Corn Pesto Pasta
7 tablespoons extra-virgin olive oil, divided
1/2 cup panko bread crumbs
1/4 teaspoon crushed red pepper flakes
Kosher salt and freshly ground black pepper
4 cups fresh corn kernels (from 5 to 7 ears of corn)
2 garlic cloves, smashed and peeled
1/2 cup grated Parmesan cheese
1 pound spaghetti
2 pints cherry tomatoes, halved
1 cup fresh basil leaves, torn, divided
Grated lemon zest, for serving (optional)

Directions: 
Toast the Breadcrumbs: In a large 12-inch skillet, heat 1 tablespoon olive oil over medium heat. Add panko, red pepper flakes, and 1/4 teaspoon salt. Toast until golden brown (3–5 minutes). Transfer to a bowl and let cool. 

Cook the Corn and Garlic: Wipe out the skillet. Add 3 tablespoons olive oil over medium heat. Add corn, garlic, and 1 teaspoon salt. Cook until the corn is tender and garlic softens (4–6 minutes). Let cool slightly.

Make the Sweet Corn Pesto : Reserve 1/2 cup of the corn kernels. Add remaining corn and garlic to a food processor with 1 1/2 teaspoons salt and 1/2 teaspoon pepper. Blend until coarse. With the machine running, stream in the remaining 3 tablespoons olive oil until smooth. Add Parmesan and pulse to combine.

Cook the Pasta: Bring a large pot of salted water to boil. Cook spaghetti until just al dente. Reserve 1 cup pasta water, then drain.

Combine Everything: Return the corn pesto to the pasta pot with 1/2 cup pasta water. Stir over medium-low heat until creamy. Add pasta, cherry tomatoes, reserved corn, and half the basil. Toss well, adding more pasta water if needed.

Serve & Garnish: Transfer to a serving bowl. Top with remaining basil, lemon zest, and half the breadcrumbs. Pass extra breadcrumbs at the table.  Serves 4 to 6

Make Ahead:
The spicy bread crumbs will keep for several days in a sealed container, and you can make the corn pesto a few hours in advance. 

You may just need to add additional pasta water when reheating the sauce. 

Recipe Tips & VariationsCheese Swap: Try Pecorino Romano for a sharper flavor.

Extra Protein: Add grilled shrimp or shredded rotisserie chicken.

Vegan Option: Use nutritional yeast instead of Parmesan.

Meal Prep: Make the corn pesto up to 3 hours ahead and refrigerate.

Monday, June 29, 2026

Chicken Bow Tie Pasta

Chicken Bow Tie Pasta
Bow Tie Pasta is also called Farfalle which is the Italian word for butterfly.  This quick dish will feed 4 to six.
Ingredients:  
1 package (16 ounces) bow tie pasta
5 tablespoons butter, divided
1 pound boneless skinless chicken breasts, cut into 1-inch pieces
1 teaspoon salt, divided
1 teaspoon pepper, divided
2 medium yellow summer squash or zucchini, cut into 1-inch pieces
3 tablespoons all-purpose flour
2 garlic cloves, minced
1-1/2 cups fat-free milk
3/4 cup grated Parmesan cheese

Directions:
In a 6-qt. stockpot, cook pasta according to package directions.

In a large cast-iron or other heavy skillet, heat 1 tablespoon butter over medium heat. Add chicken; cook and stir until no longer pink, 7-9 minutes. Add 1/4 teaspoon each salt and pepper; remove from pan. In same pan, heat 1 tablespoon butter over medium heat. Add squash; cook and stir until tender, 3-5 minutes. Remove from heat.

In a small saucepan, melt remaining 3 tablespoons butter over medium heat. Stir in flour and garlic until blended; gradually whisk in milk. Bring to a boil, stirring constantly until thickened, 1-2 minutes. Remove from heat; stir in cheese and the remaining salt and pepper.

Drain pasta; return to pot. Add chicken, squash and sauce; heat through, stirring to combine.

Wednesday, June 24, 2026

Roasted Cauliflower, Chickpeas and Dates. ~ Sheetpan Dinner

Roasted Cauliflower, Chickpeas and Dates
An ideal weeknight sheet pan dinner features: 1) a protein and vegetable that can be roasted at the same time; 2) a flavorful sauce that comes together in one bowl; and 3) a little pizzazz. Here, cauliflower and canned chickpeas are roasted until browned and tender (along with whole garlic cloves that become divinely sweet). Torn Medjool dates are added near the end of roasting, adding irresistible bites of slightly crisp, caramelized sweetness. While the oven works its magic, tahini is whipped until creamy to act as the bed for the main ingredients and bring all the Middle Eastern-inspired flavors together. If you don’t mind using another pan, toasted pine nuts make for a fabulous garnish.
Ready in 45 minutes.
Ingredients:
1 large cauliflower (or 1½ pounds medium-sized cauliflower florets)
7 fat garlic cloves
4½ tablespoons extra-virgin olive oil, divided, plus more for the dates Kosher salt (such as Diamond Crystal) and black pepper 2 (15-ounce) cans chickpeas, drained and rinsed 6 Medjool dates ½ cup tahini, well-stirred 2 tablespoons freshly squeezed lemon juice, plus more to taste ½ teaspoon ground cumin 1 to 2 teaspoons Aleppo pepper (or ¼ teaspoon crushed red pepper) 4 tablespoons ice cold water, plus more as needed 1 big handful flat-leaf parsley, chopped Warm pita, for servingDirections:                                                                                       Arrange racks in the top third and in the bottom third of the oven. Heat the oven to 425 degrees. 
  • Prep the cauliflower: Cut out the core from the cauliflower, then cut into medium florets, ideally cutting in half through the stem so you end up with a flat surface on one side. Smash down on 6 of the garlic cloves with the back of a chef’s knife to remove the peels and lightly flatten. 

    Transfer florets and smashed garlic to a large bowl. Drizzle with 3 tablespoons of olive oil, rubbing it into the florets’ nooks and crannies. Season with 1 teaspoon salt and several grinds of pepper until well seasoned. Spread out on a rimmed sheet pan, flat sides facing down.

    Prep the chickpeas: Pat the chickpeas dry with a towel, then transfer to the large bowl and toss with the remaining 1½ tablespoons olive oil, 1¼ teaspoons salt, and lots of black pepper. Spread out on a second rimmed sheet pan in a single layer. Save the bowl for the dates. 

    Roast the chickpeas on the top rack of the oven and the cauliflower on the bottom for 20 minutes, until the bottoms of the florets and garlic are nicely browned (if your oven runs hot, check the cauliflower at 15 minutes). 

    Meanwhile, tear the dates into pieces (not too small) and discard the pits. Add to the large bowl, toss the dates with just enough oil to lightly coat, then sprinkle with a pinch of salt. 

    After 20 minutes, remove both pans. Shake the pan of chickpeas around. Toss the cauliflower and flip the garlic pieces (if the garlic is soft and golden brown on both sides, remove and set aside). Scatter the dates across the pan of cauliflower. 

    Return to the oven, but switch the pans’ locations (i.e., cauliflower goes on the top rack). Roast for 7 to 10 minutes, until the cauliflower is tender and nicely browned, the dates are browned in spots and even a little charred, and the chickpeas are crisp and golden (if you want the chickpeas to be really crunchy, roast them for 5 to 10 minutes longer).

    While everything roasts, make the tahini whip: Finely grate the remaining clove of garlic into a medium bowl. Add the tahini, lemon juice, cumin, Aleppo pepper, ¼ teaspoon salt and 4 tablespoons ice water. Stir with a fork until thick and very creamy yet spreadable (see Tip). Taste, adding more lemon juice for brightness or salt to taste. 

    Assemble: Spread the tahini whip onto the bottom of a serving platter (or 4 shallow plates). Top with the roasted cauliflower, dates and chickpeas. Scatter the parsley on top and serve with warm pita.
    TIP
    The tahini whip is meant to have a thick, spreadable consistency, but if you prefer a looser consistency, use ⅓ cup tahini. You can also make the tahini whip several days in advance and store in the fridge, though you’ll want to whisk in more water, as it thickens considerably.

Tuesday, June 9, 2026

Rancho Gordo Zipper Cream Peas. ~ Rancho Gordo

A cooked bowl of Zipper Cream field peas
Rancho Gordo Zipper Cream Peas
Just as heirloom beans were a revelation after growing up with commodity beans, heirloom varieties of peas have opened up worlds of flavors we never knew existed. We were wrong. Peas are not beans, but they are worthy of your admiration, especially when they are as good as Zipper Cream field peas. The first bite of Zipper Creams is nice, a little like traditional Black Eyed Peas, but all of a sudden, a wonderful nutty glow takes over, and so far, everyone has been happy, even those who think they dislike Black Eyed Peas. We don't want to oversell them but we like them very much and they are staying in the Rancho Gordo family.
Ingredients:
1/2 lb uncooked Rancho Gordo Zipper Cream Peas, picked over and rinsed (you will use 1/2 cup cooked peas for this recipe and save the remaining for another use)
1 tbsp finely diced onion
1 bay leaf
1 sprig thyme
2 to 3 parsley stems
12 oz unsalted butter (softened)
1/2 tsp Kosher salt
1/2 tsp sherry vinegar
2 to 3 drops Liquid Smoke
Olive oil for serving
Sliced bread or cornbread for serving
Directions:
If time allows, soak peas for about 3 hours.  Cook in lightly salted water with the onion, bay leaf, thyme, and parsley stems until al dente tender but still holding their shape.  Drain, cool, and reserve 1/2 cup for the butter (save the rest in the refrigerator or freezer for another use.

Cut butter in pieces and let it soften to a smooth pomade consistency. Transfer to a stand mkixer with a paddle attachment.

Start the mixer on low and begin creaming the butter. Add the cooked peas gradually, mixing gently. The goal is a partially broken texture _ some peas fully incorporated, some still whole for speckling throughout.

Add the salt, sherry vinegar, and liquid smoke. Mix just until combined, then taste and adjust. The butter should be lightly smoky, slightly tangy, and rich but balanced.

Transfer to a serving dish, drizzle with olive oil, and finish with a single drop of liquid smoke on top for aroma. Serve at room temperature with bread or cornbread. Serves 8 to 10


Friday, June 5, 2026

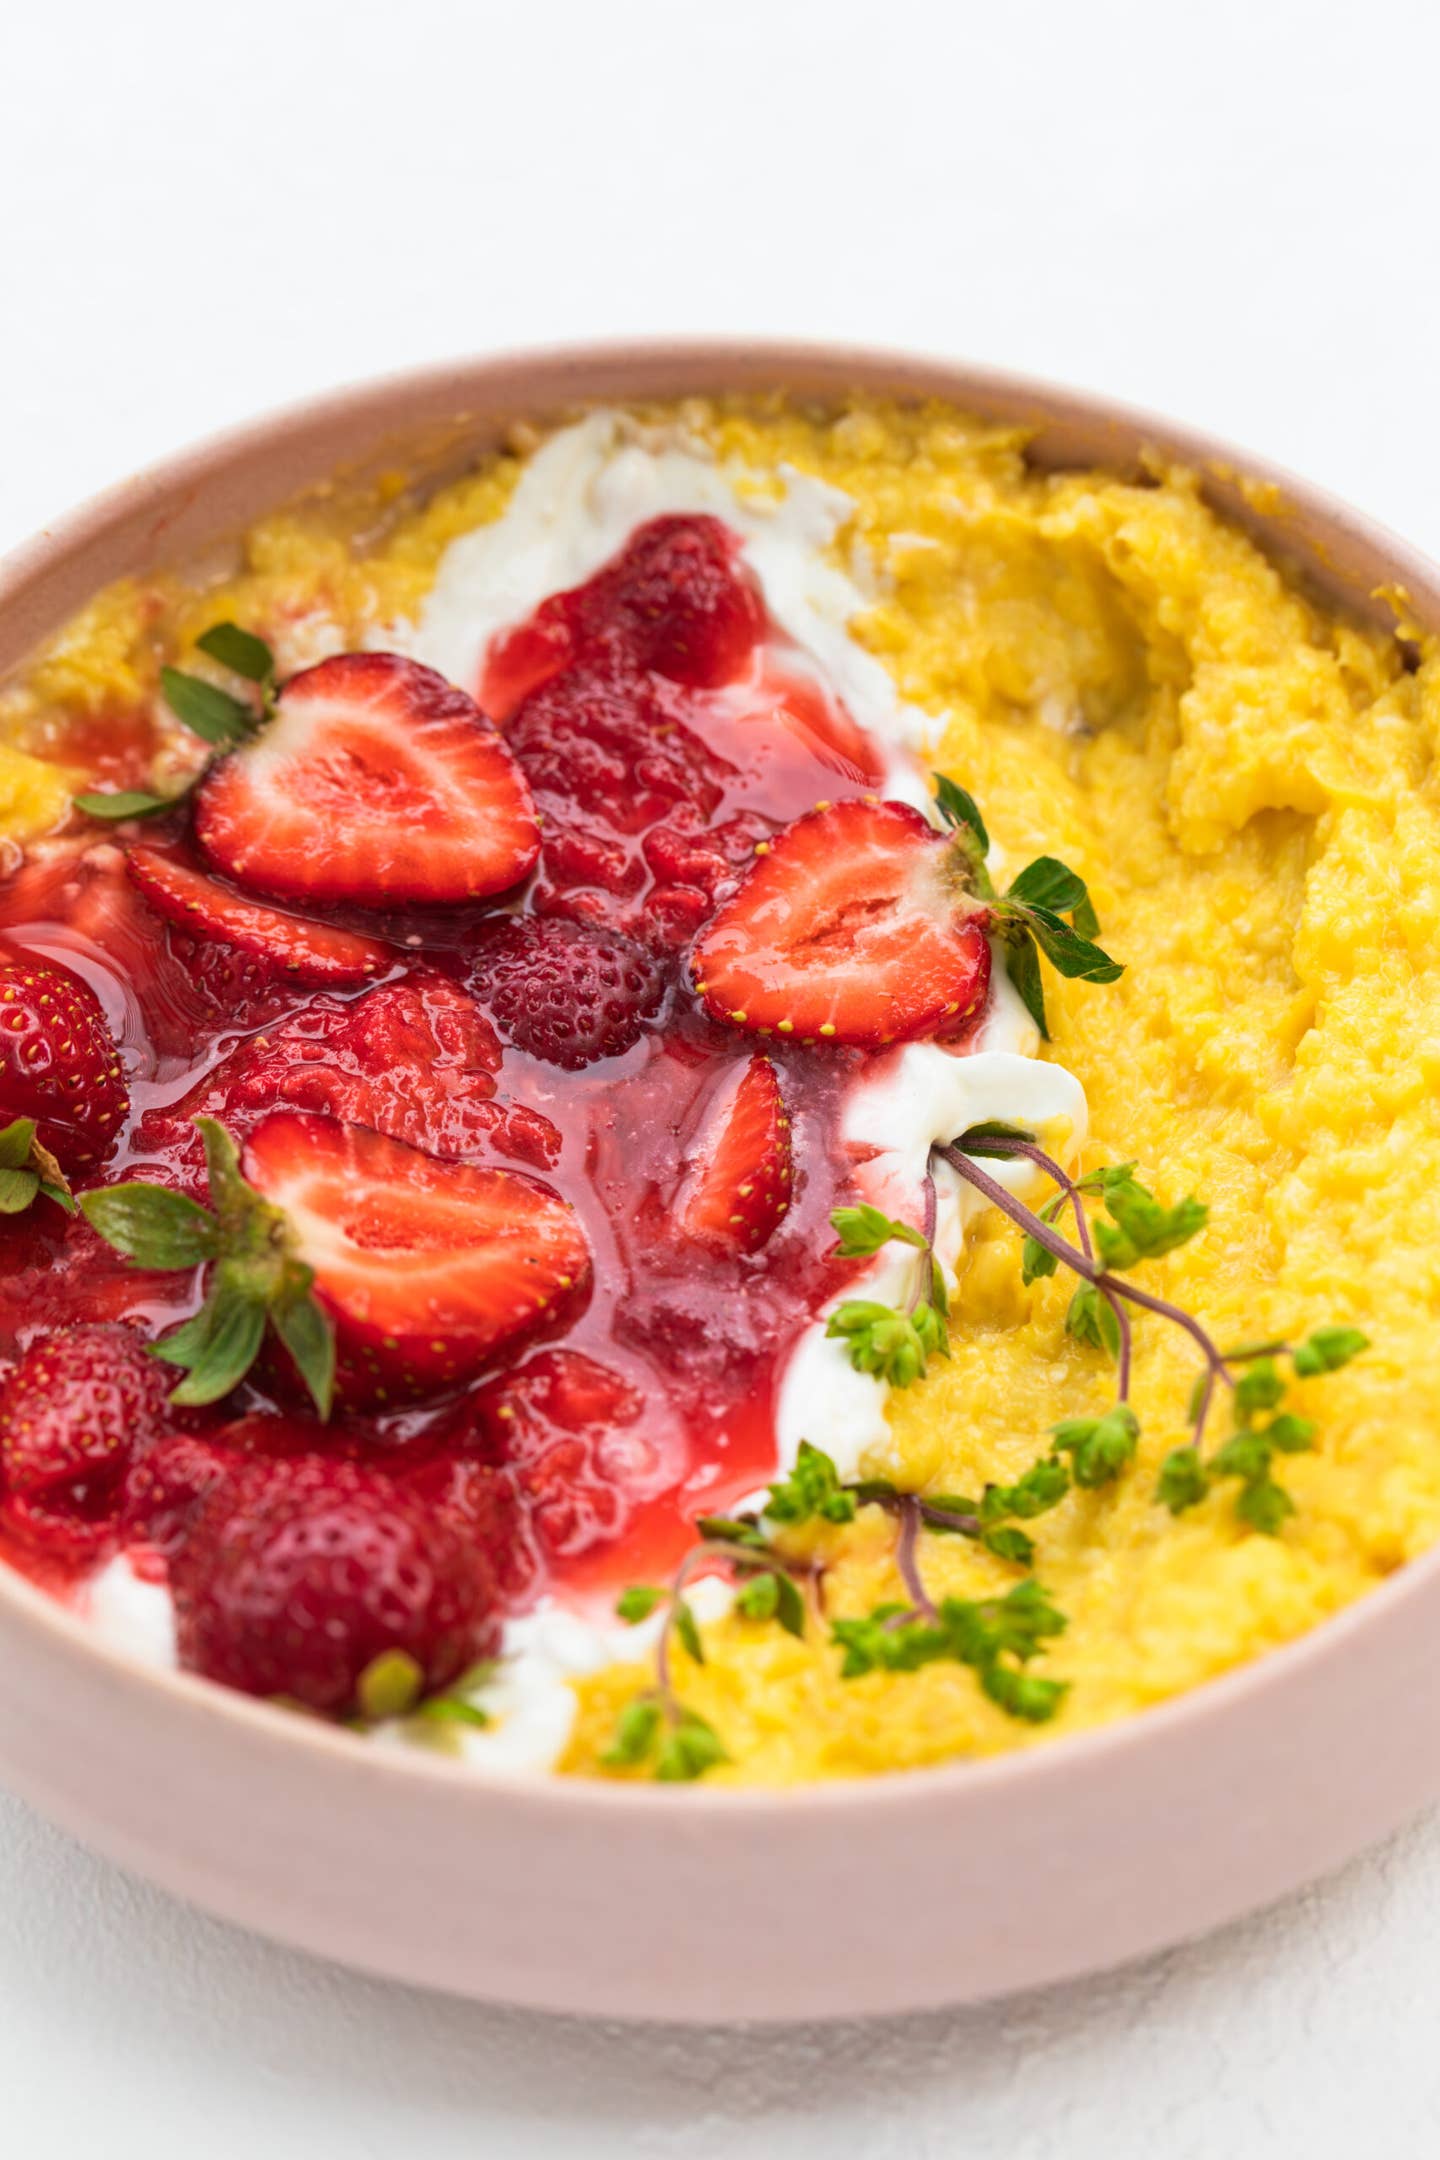
Sweet Corn Polenta With Sour Cream And Crushed Strawberries

This is not a traditional polenta recipe. In fact, it’s not polenta at all. You may now be wondering why I called this recipe Sweet Corn Polenta. Well, that’s because the starches in the corn act as a thickening agent, and cooking it results in a pudding that looks like polenta, but tasteslike the sweetest, butteriest, freshest summer corn you’ve ever had. The trick is a box grater. That’s right, you’re gonna grate the corn like it’s a block of cheese, all the way down to a nub. Be sure to extract as much corn milk as possible - that’s the good stuff (and the thickener).

This process does get a little messy. I have found that grating over a large rimmed baking sheet is the best answer to that. You can serve this dish hot, at room temperature, or even chilled. And if you need to feed more people, simply add an ear of corn per person and increase the butter a tad. Now, go forth and prepare to launch a new summer love affair - this time, corn is your muse.
Serves 4-6

Ingredients:
6 ears fresh corn, shucked
3 tablespoons unsalted butter
Kosher salt
Crushed strawberries, for serving (recipe above)
Sour cream, for serving
Directions:
Grate each ear of corn on the large side of a box grater. Be sure to grate all the way down to the cob and extract as much of the corn milk as possible. Once finished, you should have about 3 cups of grated corn.  A suggestion: freezing the cob of corn before grating.

Add the grated corn to a pot, along with the butter, and season with salt. Bring the mixture to a simmer over medium high heat (the butter will melt as it heats), stirring often. Once it starts to bubble, reduce the heat to medium low, and continue to simmer for another 2 - 3 minutes, stirring constantly, until it reaches a thick, pudding-like consistency.

Season with more salt, to taste. To serve, spread the polenta in a shallow bowl, then top it with generous dollops of sour cream and ladle the strawberries on top (recipe below)
Crushed Strawberries  makes about 2 cups

If you happen to have leftovers, the strawberries can be spooned over yogurt, mixed into pancake batter, drizzled over ice cream, or used for any type of strawberry snacking your heart desires.
Ingredients:
1 pound strawberries, husked
⅓ cup sugar
⅛ teaspoon kosher salt
¼ teaspoon sherry vinegar
Directions:
Combine the strawberries, sugar, salt and vinegar in a large bowl. Cover and macerate for at least 1 hour, up to overnight, then mash with a potato masher.

Monday, May 25, 2026

Individual Meatloaves With Vegetables

                                           
                      Individula Meatloaves With Vegetables
Meatloaf with a German influence.  Serve with a salad and dinner is ready.  A great prepare ahead!
Ingredients:
2 lbs ground beef
2 potatoes grated
1 cup grated carrot
1 onion grated
1 red pepper diced
1/2 cup chopped parsley
2 eggs
1 teaspoon salt
1/2 teaspoon pepper
1/2 teaspoon paprika 
Directions:
Prepare a baking sheet with sides with parchment paper.  Preheat oven to 400*F

Place meat in mixing bowl,  add ingredients in the order listed.  Mix with hands and form into serving sizes.

Bake at 400*F for 35 minutes and serve!

Form each serving egg shape but all with same thickness.  

Monday, May 18, 2026

One Pan Shrimp And Asparagus With Creamy Polenta

One Pan Shrimp And Asparagus With Creamy Polenta

This is a delicious meal packed with nutrition and goes together quickly. It is a one pan meal with lemon and basil, ready in 20 minutes. Serve it over creamy polenta, rice, or risotto. Trader Joes 
carries wild caught shrimp from the deep waters of Argentina, that I recommend.
Ingredients:
16 ounce peeled and defined shrimp
2–3 tablespoons olive oil
1 large shallot- diced
4–6 garlic fat cloves- roughly chopped
16 ounces asparagus (one large bunch), woody ends removed, cut into     

inch 1/2 inch pieces.
1/2 teaspoon salt and pepper, more to taste
1/4 teaspoon red pepper flakes
1 lemon – use the zest, plus juice to taste.
10 basil leaves, cut into ribbons (or try Thai Basil!)
Serve over creamy polenta, rice, quinoa or on its own.

Directions:
Thaw frozen shrimp in a bowl of cold water, drain, and pat dry. Season both sides with a little salt and pepper. 

Saute. Heat the olive oil in an extra-large skillet over medium heat. Sauté shallot and garlic, stirring until fragrant, about 2-3 minutes. Add the lemon zest and chili flakes, and sauté for 1 minute. Add the asparagus, season with salt and pepper. Stir frequently until tender crisp. ( If your asparagus is very thick, add a splash of water, cover and steam for a few minutes).

Sear the shrimp. Scoot asparagus to the sides (or to a side plate) add a little more olive oil to the pan, and add shrimp to the middle of the pan, searing each side.

Combine. Stir the whole thing together, squeeze in some lemon juice, and cover the pan for 1-2 minutes, until the asparagus is tender and vibrant green and the shrimp is cooked through.

Season. Add the basil ribbons, then taste, adjust salt and lemon to taste – find the balance.

Serve. Divide among bowls and top with lemon zest and chili flakes, or feel free to serve over rice or creamy polenta.

Notes:
A note on shrimp– I prefer frozen wildshrimp that is peeled and deveined. Trader Joe’s carries large Argentinian red shrimp, which are my favorite- affordable and good quality.  Serves 6 to 8

Leftovers will keep for 3 days in an airtight container in the refrigerator.

I particularly love shrimp recipe this over our creamy polenta.

For extra richness, add a pat of butter at the very end of cooking. I’ll often add this to another’s portion after I take mine out. This way, they are happy with this buttery shrimp, and I’m happy with my lighter olive oil version.

Friday, April 24, 2026

Spinach Stuffed Chicken Breasts


Spinach Stuffed Chicken Breasts
Juicy, cheesy, and full of flavor, this Spinach Stuffed Chicken is the perfect keto-friendly dinner. Each serving has 3.2g net carbs and a whopping 47g of protein, making it a satisfying weeknight meal that's both healthy and indulgent.

Ingredients
 

4 medium chicken breasts, boneless and skinless
8 ounces (226.8 g) frozen chopped spinach, thawed and drained
1/4 cup (59.15 ml) butter, divided
4 garlic cloves, minced, divided
Salt and pepper
1/2 cup (118.29 ml) whole milk ricotta
1/2 cup (118.29 ml) shredded mozzarella
1/4 cup (59.15 ml) grated Parmesan
1/2 tsp (0.5 tsp) paprika
Directions:
Preheat the oven to 350ºF. Squeeze as much moisture as possible out of the spinach. 
In a medium bowl, combine the spinach, ricotta, mozzarella, Parmesan, and 2 cloves of the minced garlic. Season with salt and pepper and mix well to combine.
Using a sharp knife, slice each chicken breast horizontally through the center, but don't cut all the way through. Open each breast like a book.
Stuff each chicken breast with 1/4 of this mixture and secure the opening with several toothpicks. Season the top and bottom of the breasts with paprika, salt, and pepper.
Heat a large ovenproof skillet over medium heat. Add the butter to the pan and let melt. Once hot, add the remaining garlic and then add the chicken breasts. Cook until golden brown on the outside, about 3 to 4 minutes per side.
Place the entire skillet in the oven and cook until the chicken reaches 165ºF on an instant read thermometer, about 20 minutes.

Want to prep your stuffed chicken breast ahead of time? No problem!       
Proceed through Steps 1 to 3.      Then refrigerate the chicken breasts for up to 8 hours before cooking. Be sure to cook thoroughly and make sure the breasts AND the filling reach an internal temperature of at least 165ºF.