Showing posts with label Kosher Salt. Show all posts

Monday, July 27, 2026

Black Lentil Crackers ~. Gliuten Free

Black Lentil Crackers  ~  Gluten Free
These crackers are gluten free.  The dough made without wheat flour is super crisp and full of texture.  Chia seeds and their gel producing quality produce the dough.  To make them studier for dipping, rice flour is added.  The flavor as is tastes great but, za'tar, cumin, oregano, or smoked paprika can be added.
Ingredients:
1 cup rice flour
1/4 cup chickpea flour
1/2 cup black lentils, soaked overnight and drained
1/2 cup sunflower seeds
1/4 cup chia seeds
1/4 cup sesame seeds
2 teaspoons kosher salt
1 teaspoon fresh rosemary
2 tablespoons EVOO
Boiling water
Directions:
In a medium bowl mix the rice flour and the chickpea flour, black lentils, sunflower seeds,  chia seeds, salt, fresh rosemary, and EVOO.  

Pour 1 cup of boiling water over mixture and stir to thoroughly mix.  Allow to stand for 10 minutes.  Cover and refrigerate for at least 1 hour.

Preheat oven at 350*F with rack set in lower 3rd of oven.  

Scoop the dough onto a standard sheet of parchment paper, 12" x 17".  Place another sheet 12" x 17" on top and roll out the dough.  If the dough comes out of the sheets, pinch it off and place it back in where needed.

Peel off the top layer of parchment paper and transfer the dough still on the bottom sheet of parchment paper to a cookie sheet with sides.  Bake on the lower third rack of the oven until it feels dry to the touch and lightly browns, about 1 hour.

Remove from oven and turn over on baking sheet: peel the paper.  Return it to the oven to brown the other side, about 15 minutes.  Remove to a cooling rack and let cool.  It should crisp up as it cools.

Break it up in large pieces and serve immediately or store in airtight container at room temperature for up to 1 week.

NOTE:  I made the chickpea flour and the rice flour in my Vita Mix.   The garbanzo flour was about a 2 to 1 when ground.  The rice was about 1 1/4 to 1  When ground fine, strain through a fine sieve and place in a sealed container until ready to use.


Wednesday, June 24, 2026

Roasted Cauliflower, Chickpeas and Dates. ~ Sheetpan Dinner

Roasted Cauliflower, Chickpeas and Dates
An ideal weeknight sheet pan dinner features: 1) a protein and vegetable that can be roasted at the same time; 2) a flavorful sauce that comes together in one bowl; and 3) a little pizzazz. Here, cauliflower and canned chickpeas are roasted until browned and tender (along with whole garlic cloves that become divinely sweet). Torn Medjool dates are added near the end of roasting, adding irresistible bites of slightly crisp, caramelized sweetness. While the oven works its magic, tahini is whipped until creamy to act as the bed for the main ingredients and bring all the Middle Eastern-inspired flavors together. If you don’t mind using another pan, toasted pine nuts make for a fabulous garnish.
Ready in 45 minutes.
Ingredients:
1 large cauliflower (or 1½ pounds medium-sized cauliflower florets)
7 fat garlic cloves
4½ tablespoons extra-virgin olive oil, divided, plus more for the dates Kosher salt (such as Diamond Crystal) and black pepper 2 (15-ounce) cans chickpeas, drained and rinsed 6 Medjool dates ½ cup tahini, well-stirred 2 tablespoons freshly squeezed lemon juice, plus more to taste ½ teaspoon ground cumin 1 to 2 teaspoons Aleppo pepper (or ¼ teaspoon crushed red pepper) 4 tablespoons ice cold water, plus more as needed 1 big handful flat-leaf parsley, chopped Warm pita, for servingDirections:                                                                                       Arrange racks in the top third and in the bottom third of the oven. Heat the oven to 425 degrees. 
  • Prep the cauliflower: Cut out the core from the cauliflower, then cut into medium florets, ideally cutting in half through the stem so you end up with a flat surface on one side. Smash down on 6 of the garlic cloves with the back of a chef’s knife to remove the peels and lightly flatten. 

    Transfer florets and smashed garlic to a large bowl. Drizzle with 3 tablespoons of olive oil, rubbing it into the florets’ nooks and crannies. Season with 1 teaspoon salt and several grinds of pepper until well seasoned. Spread out on a rimmed sheet pan, flat sides facing down.

    Prep the chickpeas: Pat the chickpeas dry with a towel, then transfer to the large bowl and toss with the remaining 1½ tablespoons olive oil, 1¼ teaspoons salt, and lots of black pepper. Spread out on a second rimmed sheet pan in a single layer. Save the bowl for the dates. 

    Roast the chickpeas on the top rack of the oven and the cauliflower on the bottom for 20 minutes, until the bottoms of the florets and garlic are nicely browned (if your oven runs hot, check the cauliflower at 15 minutes). 

    Meanwhile, tear the dates into pieces (not too small) and discard the pits. Add to the large bowl, toss the dates with just enough oil to lightly coat, then sprinkle with a pinch of salt. 

    After 20 minutes, remove both pans. Shake the pan of chickpeas around. Toss the cauliflower and flip the garlic pieces (if the garlic is soft and golden brown on both sides, remove and set aside). Scatter the dates across the pan of cauliflower. 

    Return to the oven, but switch the pans’ locations (i.e., cauliflower goes on the top rack). Roast for 7 to 10 minutes, until the cauliflower is tender and nicely browned, the dates are browned in spots and even a little charred, and the chickpeas are crisp and golden (if you want the chickpeas to be really crunchy, roast them for 5 to 10 minutes longer).

    While everything roasts, make the tahini whip: Finely grate the remaining clove of garlic into a medium bowl. Add the tahini, lemon juice, cumin, Aleppo pepper, ¼ teaspoon salt and 4 tablespoons ice water. Stir with a fork until thick and very creamy yet spreadable (see Tip). Taste, adding more lemon juice for brightness or salt to taste. 

    Assemble: Spread the tahini whip onto the bottom of a serving platter (or 4 shallow plates). Top with the roasted cauliflower, dates and chickpeas. Scatter the parsley on top and serve with warm pita.
    TIP
    The tahini whip is meant to have a thick, spreadable consistency, but if you prefer a looser consistency, use ⅓ cup tahini. You can also make the tahini whip several days in advance and store in the fridge, though you’ll want to whisk in more water, as it thickens considerably.

Tuesday, June 16, 2026

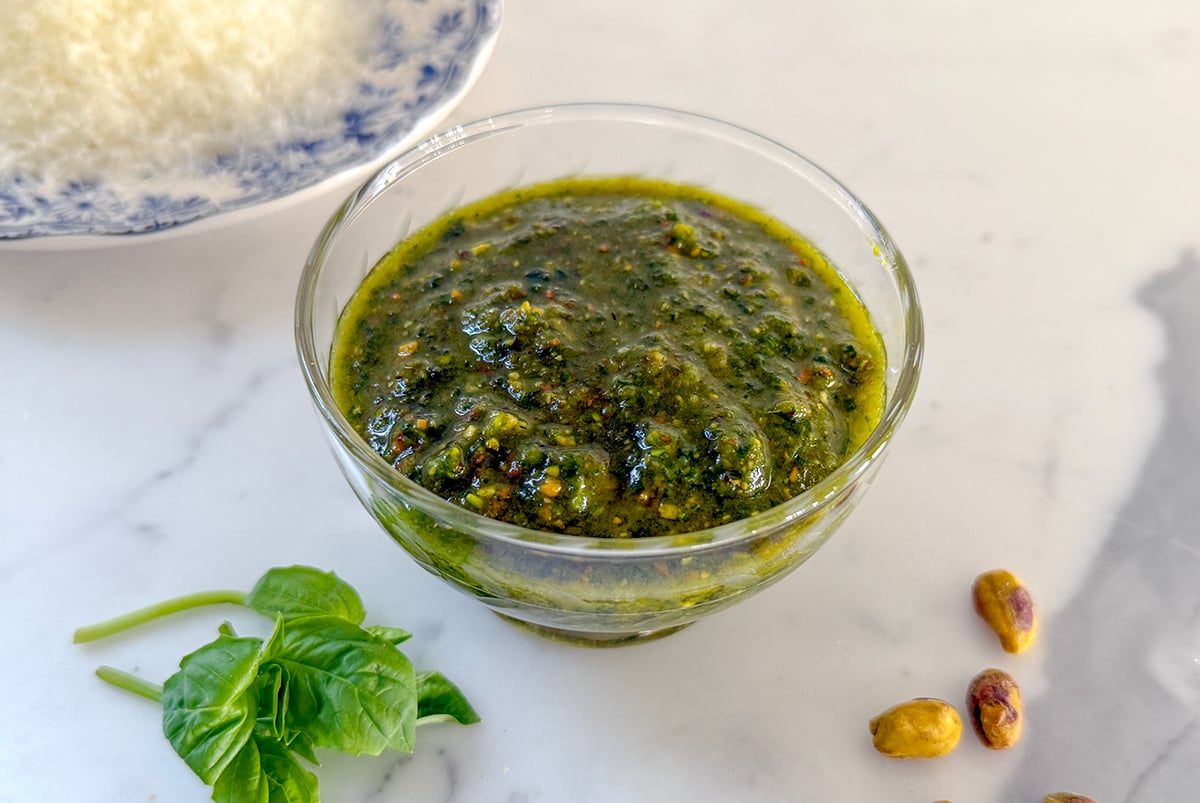
Pistachio Basil Pesto

Pistachio Basil Pesto.
Pistachio pesto is a fun twist on the classic basil pesto! The rich, bright flavor of pistachios shines through with just a handful of other ingredients. Homemade pesto is so much better than store-bought and comes together in minutes!
Ingredients:
2 cups fresh basil leaves
3 garlic cloves
1 teaspoon Kosher salt
1/3 cup raw pistachios, raw or roasted
1/3 cup parmesan cheese, grated  
Directions:
In the bowl of a food processor, add the basil, garlic, and salt. Process until the ingredients are finely chopped, stopping to scrape down the bowl a few times as you go.

Add the pistachios and process until they are finely ground, again stopping to scrape down the bowl as you go. You can leave the nuts more coarsely ground if you prefer. 

With the processor running, add the oil in a steady stream through the drip hole in the top of the processor. Process until the pesto is glossy and fairly smooth. Stop and scrape down the bowl once or twice.

Transfer the pesto to an airtight container and store in the refrigerator or freezer. When you're ready to use the pesto, stir in the parmesan cheese just before serving.


    Monday, March 2, 2026

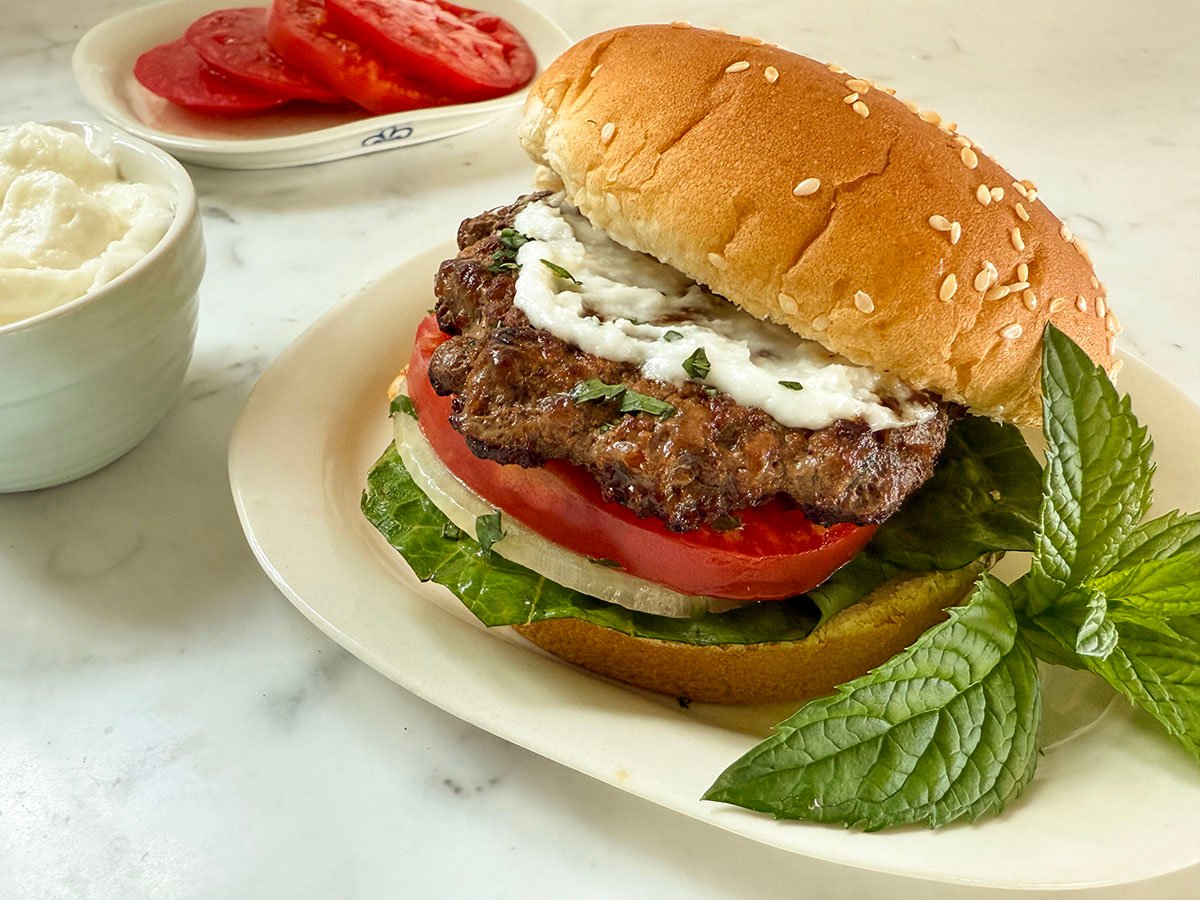
    Lamb Burgers

     
    Lamb Burgers
    Lamb burgers are such a delicious, great alternative to traditional beef patties! Mix with fresh herbs, garlic, and seasonings for an incredibly flavorful burger.
    Ingredients
    1 pound ground lamb
    1 clove garlic, minced or grated
    2 tablespoons chopped fresh mint
    1 teaspoon dried mint
    1 teaspoon kosher salt
    1/4 teaspoon ground black pepper
    1 teaspoon extra virgin olive oil

    Toppings:
    4 leaves lettuce
    1 large tomato, thinly sliced
    1 medium sweet onion, thinly sliced
    1/4 cup garlic sauce, or other favorite sauce
    1 tablespoon chopped fresh mint
    1 teaspoon dried mint
    4 hamburger buns

    Directions:
    In a medium bowl, combine the ground lamb, garlic, chopped mint, dried mint, salt and pepper. Do not overwork the mixture; it's okay if the meat has a just-ground look to it rather than a smooth look, to keep the burgers from becoming too dense.

    Divide the mixture into four meatballs (about 4 oz. each), again without overworking the meat (these should not be smooth). Gently flatten each ball to about an inch thick, and collect back to the patties any meat that may be falling away from the patties. If making ahead, cover and chill these for up to 2 days (bring to room temp before cooking).

    Coat the cooking surface with the oil before heating. Heat a skillet, griddle, or grill to medium high. Cook the patties until they are cooked through to 160°F, flipping them over halfway through cooking (6-8 minutes total, depending on the thickness of the patties). Cook the burgers couple or even one at a time if needed, depending on the size of your cooking surface.

    Layer the bottom half of each bun with lettuce, onion, and tomato. Place a patty on each. Top each patty with a dusting of dried and fresh mint. Top with sauce and serve immediately.


    Monday, February 9, 2026

    Lentil Salad With Roasted Red Peppers

    Lentil Salad With Roasted Red Peppers
    This simple salad of French lentils with kale tossed with a zippy lemon vinaigrette and topped with tangy goat cheese is as fast as it is delicious.  This salad can be served warm, cold, or room temperature.
    Ingredients:
    2 1/2 cups chicken stock
    1 cup dried French lentils, rinsed
    1 tablespoon kosher salt, divided
    3 tablespoons lemon juice
    1 tablespoon minced shallot
    1/8 teaspoon black pepper
    5 tablespoons olive oil
    2 tablespoons finely chopped fresh flat-leaf parsley
    1 tablespoon finely chopped fresh dill
    1 tablespoon mustard seeds
    1 bunch lacinato kale, stemmed and chopped (about 6 cups)
    2/3 cup drained jarred roasted red bell peppers, coarsely chopped
    4 ounces goat cheese, crumbled
    Directions:
    1. Bring stock, lentils, and 2 teaspoons salt to a boil in a medium saucepan over medium-high. Reduce heat to medium-low; cover and simmer until lentils are tender, about 25 minutes.

    2. Meanwhile, whisk together lemon juice, shallot, black pepper, and remaining 1 teaspoon salt in a small bowl. Slowly whisk in olive oil until thickened and well combined. Whisk in parsley and dill. Set vinaigrette aside.

    3. Heat a small skillet over medium; add mustard seeds, and toast, stirring often, until seeds begin to pop, 1 to 2 minutes. Stir seeds into lentil mixture. Add kale, and stir until wilted; if needed, cover saucepan and let stand 1 to 2 minutes. Pour lentil mixture through a fine wire-mesh strainer; discard liquid.

    4. Transfer lentil mixture to a large bowl, and stir in 1/4 cup vinaigrette. Top with roasted red bell peppers and goat cheese, and drizzle with remaining vinaigrette.  Serves 4

    Thursday, January 22, 2026

    Homemade Rolls With Cinnamon Honey Butter

    Homemade Rolls With Cinnamon Honey Butter
    The aroma of freshly baked dinner rolls whets the appetite and is satisfied slathered with the cinnamon honey butter.  One is never enough!  Made quickly and so easy!
    Ingredients;
    Rolls
    1 1/2 cups whole milk
    4 cups all-purpose flour, divided
    2 envelopes (about 4 1/2 teaspoons) instant rapid-rise yeast
    1/4 cup granulated sugar
    2 large eggs, divided
    1 teaspoon kosher salt
    2 tablespoons salted butter, softened
    Cinnamon Honey Butter
    1/2 cup butter, softened
    1/4 cup confectioners' sugar
    1 tablespoon honey
    1 1/2 teaspoons Ground Cinnamon
    1/2 teaspoon Vanilla Extract

    Directions:
    Heat milk until very warm, but not simmering (about 100°F to 105°F on an instant read thermometer). Turn off heat.

    Place 3 cups of the flour, yeast, sugar, 1 of the eggs, and salt in bowl of a stand mixer fitted with dough hook attachment. Add warm milk to the flour mixture. Knead on medium speed 2 minutes, scraping down sides of bowl as needed. Add remaining flour, 1/2 cup at a time, kneading 2 minutes after each addition. Add butter, kneading just until dough is soft and pillowy and begins to pull away from sides of bowl.

    Tip: If the dough seems too wet, you may need more flour. Add additional flour in 1/4 cup increments until the dough has pulled away from the sides of the bowl while kneading.

    Cover bowl with plastic wrap. Let rest 30 minutes or until doubled in size. Remove plastic wrap. Press down center of dough to deflate, then gently fold in edges of dough to form a ball.

    Spray 13x9-inch baking dish with no stick cooking spray. Divide dough into 15 equal portions and shape into balls. Arrange evenly in prepared baking dish. Cover with plastic wrap. Let rest 30 minutes, or until doubled in size.

    Meanwhile, for the Cinnamon Honey Butter, mix all ingredients in small bowl until well blended and smooth. Set aside or refrigerate until ready to serve.

    Preheat oven to 375°F. Beat remaining egg in small bowl. Brush tops of rolls with egg wash. Bake 16 to 18 minutes, or until golden brown. Remove from oven and brush warm rolls with melted butter. Serve with Cinnamon Honey Butter.

    Wednesday, January 14, 2026

    Weekday Cassoulet


    Weekday Cassoulet

    A cassoulet formerly took days of preparation.  This recipe is quick to prepare resulting in a tasty dish.  Serves 4.

    Ingredients

    4 Tablespoons EVOO, divided

    1 onion, chopped 

    4 sweet Italian sausages, about 1 pound total 

    1 stalk celery, thinly sliced

    2 garlic cloves, smashed and chopped

    Kosher salt

    Freshly ground black pepper

    Two (15.5-ounce) cans cannellini or white northern beans (undrained)

    1 cup water

    1 teaspoon white wine vinegar

    1 cup panko, coarse fresh bread crumbs, or cracker crumbs

    1/3 cup chopped fresh parsley


    Directions:

    Heat 2 tablespoons of the oil in a medium skillet over medium-high heat. Prick sausages all over with the tip of a knife. Add the sausages to the skillet and cook, turning occasionally, until brown all over, 5 to 7 minutes. Transfer to a cutting board.

    Add onion, celery, and garlic to the skillet and season with salt and pepper. Cook, stirring often, until softened, about 5 minutes. Add beans and their liquid, the water, and season with salt and pepper. Bring to a simmer. Slice sausages and return to the skillet. Stir in the vinegar and remove from heat.

    Preheat broiler with rack in the top position. In a small bowl, stir panko, parsley, and remaining 2 tablespoons olive oil. Season the bread crumbs with a little salt and pepper and scatter over beans and sausage. Transfer the skillet to the oven and broil (watch carefully! Broilers vary like crazy) until the top is golden brown, 1 to 2 minutes. Let cool slightly before serving.

    Monday, January 12, 2026

    Poultry Brine

    My Go-to Poultry Brine. 
    2 cups water
    6 oz. Lager Beer.
    2 tbsp. kosher salt.
    2 tbsp. minced garlic.
    2 tbsp. sugar.
    Mix in a ziplock bag, add poultry, brine in the fridge for a least 2 hours, more for thicker meats.
    You may have to adjust the amount by weight for a whole turkey.

    Friday, December 26, 2025

    Classic Tiramisu


                                                                       Classic Tiramisu
    Meet my friend James who is a "can do anything" in the kitchen.  When his wife and I left for a club program, I took the first photo but when we returned later, his finished dessert was on the counter.  His secret ingredient added was a purchased flavor enhancer, Pistachio Paste.  James shared the recipe he used.  This Classic Italian Tiramisu is seriously one of the easiest desserts to make! It's picture perfect with a sweet mascarpone filling, espresso dipped lady fingers and all the cocoa powder on top! 
    Ingredients:
    ¼ cup Dutch Processed cocoa powder, plus more for dusting
    1 cup brewed espresso (optional to add a few tablespoons of dark rum)

    1 tablespoon vanilla extract
    5 large egg yolks, cold (I use pasteurized eggs)
    ½ cup white sugar
    ¼ teaspoon kosher salt
    16 ounces mascarpone cheese, chilled
    1.75 cups heavy cream, chilled  (1 3/4 cups)
    3 tablespoons Pistachio Paste
    28 hard ladyfinger cookies
    Directions:
    Whisk together the cocoa powder, espresso and vanilla in a bowl and set aside

    In a mixer or using a hand mixer, beat the egg yolks and sugar until pale and thick, about 5 minutes. Add in the salt, mascarpone cheese and continue to whip until smooth. Add the chilled heavy cream and continue to whip, until light, creamy, smooth and can hold a soft peak.

    Dunk each ladyfinger in the espresso mixture to absorb the liquid and start to line a 7x11 oval baking dish with the cookies. Top the first layer of cookies with ½ of the whipped mascarpone mixture and use the back of a metal spoon to spread it into an even layer. Dust with cocoa powder. Repeat for another layer and then finish by dusting with cocoa powder on top. Cover with plastic wrap and chill for at least 2 hours before serving.

    How to Store Tiramisu
    You can store tiramisu covered with plastic wrap for 3-4 days. The flavors of the tiramisu marry and develop as it keeps, especially once it's been stored overnight.

    How to Freeze Tiramisu
    I do not recommending freezing tiramisu since. The no-bake and nature of other ingredients do not make it a great candidate for freezing.

    Tips and Tricks

    ALL the ingredients for the filling must be cold. So when you read the recipe below, pay attention to the few things that need to be taken directly from the fridge. 

    Get the ladyfingers from an Italian market if possible!!

    Mascarpone is essential. There is no substitution for it - so while you're out looking for the ladyfingers, grab the Mascarpone. 

    No espresso on hand - no problem! Use coffee! 

    Dunking the ladyfingers is an art form - you need enough to get a good flavor and texture, but you don't want them to fall apart. Just a quick dunk will do - nothing more than 1-2 seconds!

    NOTE - DO NOT SERVE IT RIGHT AWAY! 

    While it will be delicious, the cocoa powder needs time to soften up and infuse into the cream topping otherwise you'll inhale straight cocoa powder and let me tell you from experience, it's not cute lol.


    Monday, November 10, 2025

    Figgy Pudding

    Figgy Pudding. NY Times
    Also known as plum pudding or Christmas pudding, figgy pudding is a traditional British dessert served on Christmas. (“Pudding” in the United Kingdom is what “dessert” is called elsewhere.) Many families boast their own recipes, but in general, this rich cake-like dessert is made with a mix of dried fruits soaked in liquor, warm spices, fresh breadcrumbs, nuts and sometimes candied citrus. Beef suet, which is available online, is the traditional fat used, but it can be substituted with butter.  Figgy pudding preparations often begin the Sunday before Advent, on Stir-up Sunday, when family members take turns stirring the pudding. Figgy pudding requires planning, so start shopping for ingredients at least one month before Christmas. After the initial steam, the pudding rests at least 3 weeks for the flavors to meld. The pudding can also be made months in advance, stored in the freezer and reheated before serving. The final presentation of drizzling it with liquor and setting it on fire is worthy of a grand holiday celebration.
    9 hours cooking  3 weeks resting. 10 servings
    Ingredients:
    For The Pudding
    1cup/150 grams dried currants, (see Tip 1)
    1cup/150 grams raisins
    1cup golden raisins or sultanas
    3/4 cup brandy plus more for serving
    5 ounces/150 grams packaged, not fresh, beef suet, or
        ¾ cup/172 grams unsalted butter
    120 grams fresh white bread (3 to 4 slices)
    8 tablespoons unsalted butter softened at room temperature
    1cup/150 grams packed dark brown sugar
    ½cup/70 grams all-purpose flour
    ½teaspoon baking powder
    1teaspoon pumpkin pie spice (see Tip 3)
    ½teaspoon kosher salt (such as Diamond Crystal)
    1medium tart apple, preferably Granny Smith
    2 large eggs
    1tablespoon black treacle or molasses, to taste (optional)
    ½teaspoon lemon zest
    ⅓cup/50 grams blanched slivered almonds
    Unsalted butter, for greasing
    Hard sauce, ice cream, fresh heavy cream or English custard, for serving (optional)

    For The Hard Sauce
    8 tablespoons/115 grams unsalted butter, softened at room temperature
    ¾ cup/93 grams confectioners’ sugar, plus more to taste
    2 to 3 tablespoons brandy, to taste.

    Directions:
        Set aside a 2 liter pudding or a heat-proof bowl as well as a lidded pot of similar size.

        Place the currants and both types of raisins in a medium bowl. Add the brandy, mix, cover with plastic wrap and set aside at room temperature to soak overnight. Place the suet or butter in the freezer to make grating easier later.

      The following day, cube the bread, including the crust, transfer it to a food processor and pulse until you have fine crumbs. (Alternatively, you can shred the bread by hand.

      Transfer the bread crumbs to a large mixing bowl. Add the brown sugar, flour, baking powder, pumpkin spice and salt; mix, breaking up any clumps of brown sugar. Peel the apple, then grate it and the suet (or butter) on the large hole of a box grater over the dry ingredients. Add the eggs, black treacle and lemon zest. Mix well with a wooden spoon; the mixture will be thick. Stir in the almonds and the brandy-soaked currants and raisins, along with any of the liquid.

    At this point, the pudding can be steamed; or covered and refrigerated for up to 1 week for the flavors to deepen, and then steamed. To steam: Generously butter the pudding mold and transfer the mixture to it, filling the mold only ¾ of the way (the pudding will expand as it cooks). Pack down the mixture and smooth the top.   

    Cut a round piece of parchment that will fit on top of the pudding mixture; butter one side and place it, buttered-side-down, on top. Cover the top of the mold with another piece of parchment that has a little overhang. Secure the parchment tightly to the rim of the mold with a rubber band or string, then trim the overhang. (Two sets of hands make this job easier.) Repeat with another piece of parchment paper. (This is important to do even if your mold comes with a lid. If a lid is included, place it over the parchment and cover the top of the lid tightly with foil. If you don’t have a lid, cover the parchment with 2 pieces of foil. You want to ensure you have a water-tight seal on the mold as it steams.)

    Place the steamer basket in the pot. (If not using a steamer basket, place an inverted heat-proof plate or trivet, a folded cotton kitchen towel, or a couple of layers of aluminum foil on the bottom of the pot. Anything heat-proof that the pudding mold can safely sit on to prevent direct contact with the heat source will work.) Fill the pot ¼ of the way with water and bring to boil. Bring a separate kettle or small pot of water to boil. Carefully lower the pudding mold into the steamer basket, or rest it on top of whatever is in the bottom of the pot to prevent scorching. The water should come halfway up the sides of the mold. If it doesn’t, slowly add more boiling water from the kettle along the sides of the pot. Cover the pot, adjust the heat to medium-low or low —the water should be at a constant gentle simmer, but not boiling — and steam the pudding for 6 hours.

    Check the pudding every 30 minutes to make sure the water is always at the halfway mark, adding more boiling water as needed. After 6 hours, carefully remove the mold from the pot and cool to room temperature. Store the pudding, covered in its mold, in the fridge for at least 3 weeks and up to 6 weeks, or in the freezer for up to one year (see Storage Tips).

    Prepare the hard sauce, if using: Two days and up to 1 week before serving, place the butter in the bowl of a stand mixer fitted with the paddle attachment. (Alternatively, use a hand-held beater and a mixing bowl.) Beat on medium until light and creamy, about 2 minutes. Add the confectioners’ sugar and beat on medium just until smooth. Taste and add more sugar, if desired. Add the brandy, to taste, 1 tablespoon at a time, and mix by hand with a spatula until combined. Transfer to a serving dish, smooth the top, cover and refrigerate until hard.

    About 2 hours before serving the pudding, reheat the pudding by steaming as directed in Step 7, this time for 1 hour. Remove the mold from the pot and peel off all the coverings, being mindful of the steam. Place a serving dish over the mold and invert the pudding. Don’t remove the mold right away. Give it a little time and a jiggle to help release the pudding.
                                                                                                              Pour 2 to 3 tablespoons of brandy in a heat-proof ladle. Hold the ladle over the pudding and carefully light it. As soon as the brandy catches fire, pour it over the pudding. The pudding will light up in a blue haze; it will extinguish quickly on its own.                                                                                                                                                                       Slice the pudding and serve it warm with hard sauce, ice cream, or drizzled with heavy cream or custard. The pudding will keep in the fridge for up to 1 week, wrapped well in parchment and again in plastic wrap or aluminum foil.                                                           TIPS                                                                                       Feel free to substitute a variety of dried fruits for the currants and raisins, such as diced figs, apricots or cherries.                                                                                                                                                       Beef suet, a fat used in many British recipes, is traditional here. It comes packaged in a hard block or pellets. Fresh suet has a strong, meatier odor and taste, so it is not recommended here.                                                                                                                      Traditionally, an English spice mix is used that includes many of the spices used in American pumpkin spice mix, as well as ground coriander and mace. If you like, you can add a tiny pinch of those to the pumpkin spice.                                                                                                                                                                                                                                             If you’d like to remove the steamed pudding from the mold before storing it, wrap it very tightly with plastic wrap, then in foil. Before reheating, unwrap the pudding and transfer it back to the mold.


    Step 1

    Set aside a 2-liter pudding mold or similarly sized heat-proof bowl, as well as a lidded pot or steamer large enough to hold the mold. (A tall pot, like a stock pot or a pasta pot with a steamer basket, works well.)
    Step 2


    Place the currants and both types of raisins in a medium bowl. Add the brandy, mix, cover with plastic wrap and set aside at room temperature to soak overnight. Place the suet or butter in the freezer to make grating easier in Step 4.
    Step 3


    The following day, cube the bread, including the crust, transfer it to a food processor and pulse until you have fine crumbs. (Alternatively, you can shred the bread by hand.)

    Step 4


    Transfer the bread crumbs to a large mixing bowl. Add the brown sugar, flour, baking powder, pumpkin spice and salt; mix, breaking up any clumps of brown sugar. Peel the apple, then grate it and the suet (or butter) on the large hole of a box grater over the dry ingredients. Add the eggs, black treacle and lemon zest. Mix well with a wooden spoon; the mixture will be thick. Stir in the almonds and the brandy-soaked currants and raisins, along with any of the liquid.


    Step 5


    At this point, the pudding can be steamed; or covered and refrigerated for up to 1 week for the flavors to deepen, and then steamed. To steam: Generously butter the pudding mold and transfer the mixture to it, filling the mold only ¾ of the way (the pudding will expand as it cooks). Pack down the mixture and smooth the top.
    Step 6


    Cut a round piece of parchment that will fit on top of the pudding mixture; butter one side and place it, buttered-side-down, on top. Cover the top of the mold with another piece of parchment that has a little overhang. Secure the parchment tightly to the rim of the mold with a rubber band or string, then trim the overhang. (Two sets of hands make this job easier.) Repeat with another piece of parchment paper. (This is important to do even if your mold comes with a lid. If a lid is included, place it over the parchment and cover the top of the lid tightly with foil. If you don’t have a lid, cover the parchment with 2 pieces of foil. You want to ensure you have a water-tight seal on the mold as it steams.)
    Step 7


    Place the steamer basket in the pot. (If not using a steamer basket, place an inverted heat-proof plate or trivet, a folded cotton kitchen towel, or a couple of layers of aluminum foil on the bottom of the pot. Anything heat-proof that the pudding mold can safely sit on to prevent direct contact with the heat source will work.) Fill the pot ¼ of the way with water and bring to boil. Bring a separate kettle or small pot of water to boil. Carefully lower the pudding mold into the steamer basket, or rest it on top of whatever is in the bottom of the pot to prevent scorching. The water should come halfway up the sides of the mold. If it doesn’t, slowly add more boiling water from the kettle along the sides of the pot. Cover the pot, adjust the heat to medium-low or low —the water should be at a constant gentle simmer, but not boiling — and steam the pudding for 6 hours.
    Step 8


    Check the pudding every 30 minutes to make sure the water is always at the halfway mark, adding more boiling water as needed. After 6 hours, carefully remove the mold from the pot and cool to room temperature. Store the pudding, covered in its mold, in the fridge for at least 3 weeks and up to 6 weeks, or in the freezer for up to one year (see St
    1. orage 


      Tips).Step 9

    2. Prepare the hard sauce, if using: Two days and up to 1 week before serving, place the butter in the bowl of a stand mixer fitted with the paddle attachment. (Alternatively, use a hand-held beater and a mixing bowl.) Beat on medium until light and creamy, about 2 minutes. Add the confectioners’ sugar and beat on medium just until smooth. Taste and add more sugar, if desired. Add the brandy, to taste, 1 tablespoon at a time, and mix by hand with a spatula until combined. Transfer to a serving dish, smooth the top, cover and refrigerate until hard.

    3. Step 10

      About 2 hours before serving the pudding, reheat the pudding by steaming as directed in Step 7, this time for 1 hour. Remove the mold from the pot and peel off all the coverings, being mindful of the steam. Place a serving dish over the mold and invert the pudding. Don’t remove the mold right away. Give it a little time and a jiggle to help release the pudding.

    4. Step 11

      Pour 2 to 3 tablespoons of brandy in a heat-proof ladle. Hold the ladle over the pudding and carefully light it. As soon as the brandy catches fire, pour it over the pudding. The pudding will light up in a blue haze; it will extinguish quickly on its own.

    5. Step 12

      Slice the pudding and serve it warm, topped with hard sauce or ice cream, or drizzled with heavy cream or custard. The pudding will keep in the fridge for up to 1 week, wrapped well in parchment and again in plastic wrap or aluminum foil.

    TIPS
    • Tip 1: Feel free to substitute a variety of dried fruits for the currants and raisins, such as diced figs, apricots or cherries.
    • Tip 2: Beef suet, a fat used in many British recipes, is traditional here. It comes packaged in a hard block or pellets. Fresh suet has a strong, meatier odor and taste, so it is not recommended here.
    • Tip 3: Traditionally, an English spice mix is used that includes many of the spices used in American pumpkin spice mix, as well as ground coriander and mace. If you like, you can add a tiny pinch of those to the pumpkin spice.
    • Tip 4: If you’d like to remove the steamed pudding from the mold before storing it, wrap it very tightly with plastic wrap, then in foil. Before reheating, unwrap the pudding and transfer it back to the mold.