Showing posts with label Vanilla Extract. Show all posts

Thursday, April 30, 2026

Cowgirl Cookies

Cowgirl Cookies

Big, hearty, and packed with goodness—Cowgirl Cookies are the ultimate “everything-in-one” cookie. Loaded with oats, chocolate chips, coconut, and crunchy nuts, these cookies are chewy, rich, and full of old-fashioned comfort. They’re the kind of cookies grandma would bake in big batches… and they disappear just as fast! You’ll love these cookies for their chewy texture, rich flavor, and loaded mix-ins. They’re perfect for sharing, gifting, or keeping all to yourself.

Ingredients:
1 cup butter, softened
1 cup brown sugar
1/2 cup granulated sugar
2 large eggs
2 teaspoons vanilla extract
1 1/2 cups all-purpose flour
1 teaspoon baking soda
1/2 teaspoon salt
2 cups old-fashioned oats
1 cup chocolate chips
1/2 cup white chocolate chips (optional)
1/2 cup chopped pecans or walnuts
1/2 cup shredded coconut
Directions:

Preheat your oven to 350°F (175°C) and line a baking sheet with parchment paper.

In a large bowl, cream together butter, brown sugar, and granulated sugar until light and fluffy.

Add eggs and vanilla, mixing until well combined.

In another bowl, whisk flour, baking soda, and salt.

Gradually add dry ingredients to the wet mixture.

Stir in oats, chocolate chips, nuts, and coconut until evenly combined.

Scoop dough onto baking sheet (about 2 tablespoons per cookie).

Bake for 10–12 minutes, until edges are golden and centers are slightly soft.

Let cool on the pan for a few minutes before transferring.

Tips for Perfect Cookies

  • Don’t overbake—centers should stay soft for that chewy texture.
  • Chill the dough for 30 minutes if you want thicker cookies.
  • Add a sprinkle of sea salt on top for a gourmet touch.

Saturday, April 4, 2026

Coconut Cream Cake


Coconut Cream Cake
This is a recipe I have been waiting to create.   Easter will be a perfect occasion. 
Ingredients

Filling
1/2 cup sugar
1/4 cup cornstarch
1/8 teaspoon table salt
4 large egg yolks
1 cup half-and-half
1 cup coconut milk
1 cup sweetened flaked coconut
3 tablespoons butter
1 teaspoon vanilla extract
1/4 teaspoon coconut extract
Cake Layers
1 cup butter, softened
2 cups sugar
4 large eggs
3 cups cake flour
1 tablespoon baking powder
1/2 teaspoon table salt
1/2 cup milk
1/2 cup coconut milk
1 teaspoon vanilla extract
1/2 teaspoon coconut extract
Shortening (for greasing pans)
1 cup heavy cream
Fluffy Coconut Frosting
Garnish 
Toasted coconut shavings

Directions:
Prepare Filling: Whisk together first 3 ingredients in a heavy saucepan. Whisk egg yolks and next 2 ingredients in a glass bowl. Gradually whisk egg mixture into sugar mixture. Cook over medium heat, whisking constantly, 6 to 7 minutes or until mixture just starts to bubble. Cook, whisking constantly, 1 more minute; remove from heat.

Whisk flaked coconut and next 3 ingredients into sugar-egg mixture; transfer to a medium bowl. Place plastic wrap directly on warm filling to prevent film from forming. Let stand 30 minutes; chill 4 to 24 hours.

Meanwhile, prepare Cake Layers: Preheat oven to 350°. Beat 1 cup butter at medium speed with a heavy-duty electric stand mixer until creamy. Gradually add 2 cups sugar, beating until light and fluffy. Add 4 eggs, 1 at a time, beating just until blended after each addition.

Stir together cake flour and next 2 ingredients in a bowl. Stir together milk and 1/2 cup coconut milk in a measuring cup. Add flour mixture to butter mixture alternately with milk mixture, beginning and ending with flour mixture. Beat at low speed just until blended after each addition. Stir in 1 tsp. vanilla and 1/2 tsp. coconut extract. Spoon 
batter into 2 greased (with shortening) and floured 9-inch cake pans.

Bake at 350° for 25 to 30 minutes or until a wooden pick inserted in center comes out clean. Cool in pans on wire racks 10 minutes. Remove from pans to wire racks, and cool completely (about 1 hour).

Beat 1 cup heavy cream at high speed with an electric mixer until stiff peaks form. Gently fold whipped cream into chilled Filling.

Assemble cake: Split each layer in half horizontally with a serrated knife to make 4 layers. Place 1 layer, cut side up, on a serving platter; spread with 1 1/3 cups Filling. Repeat with remaining Cake Layers  and Filling, ending with a Cake Layer, cut side down. Spread top and sides of cake with Fluffy Coconut Frosting.


Monday, March 30, 2026

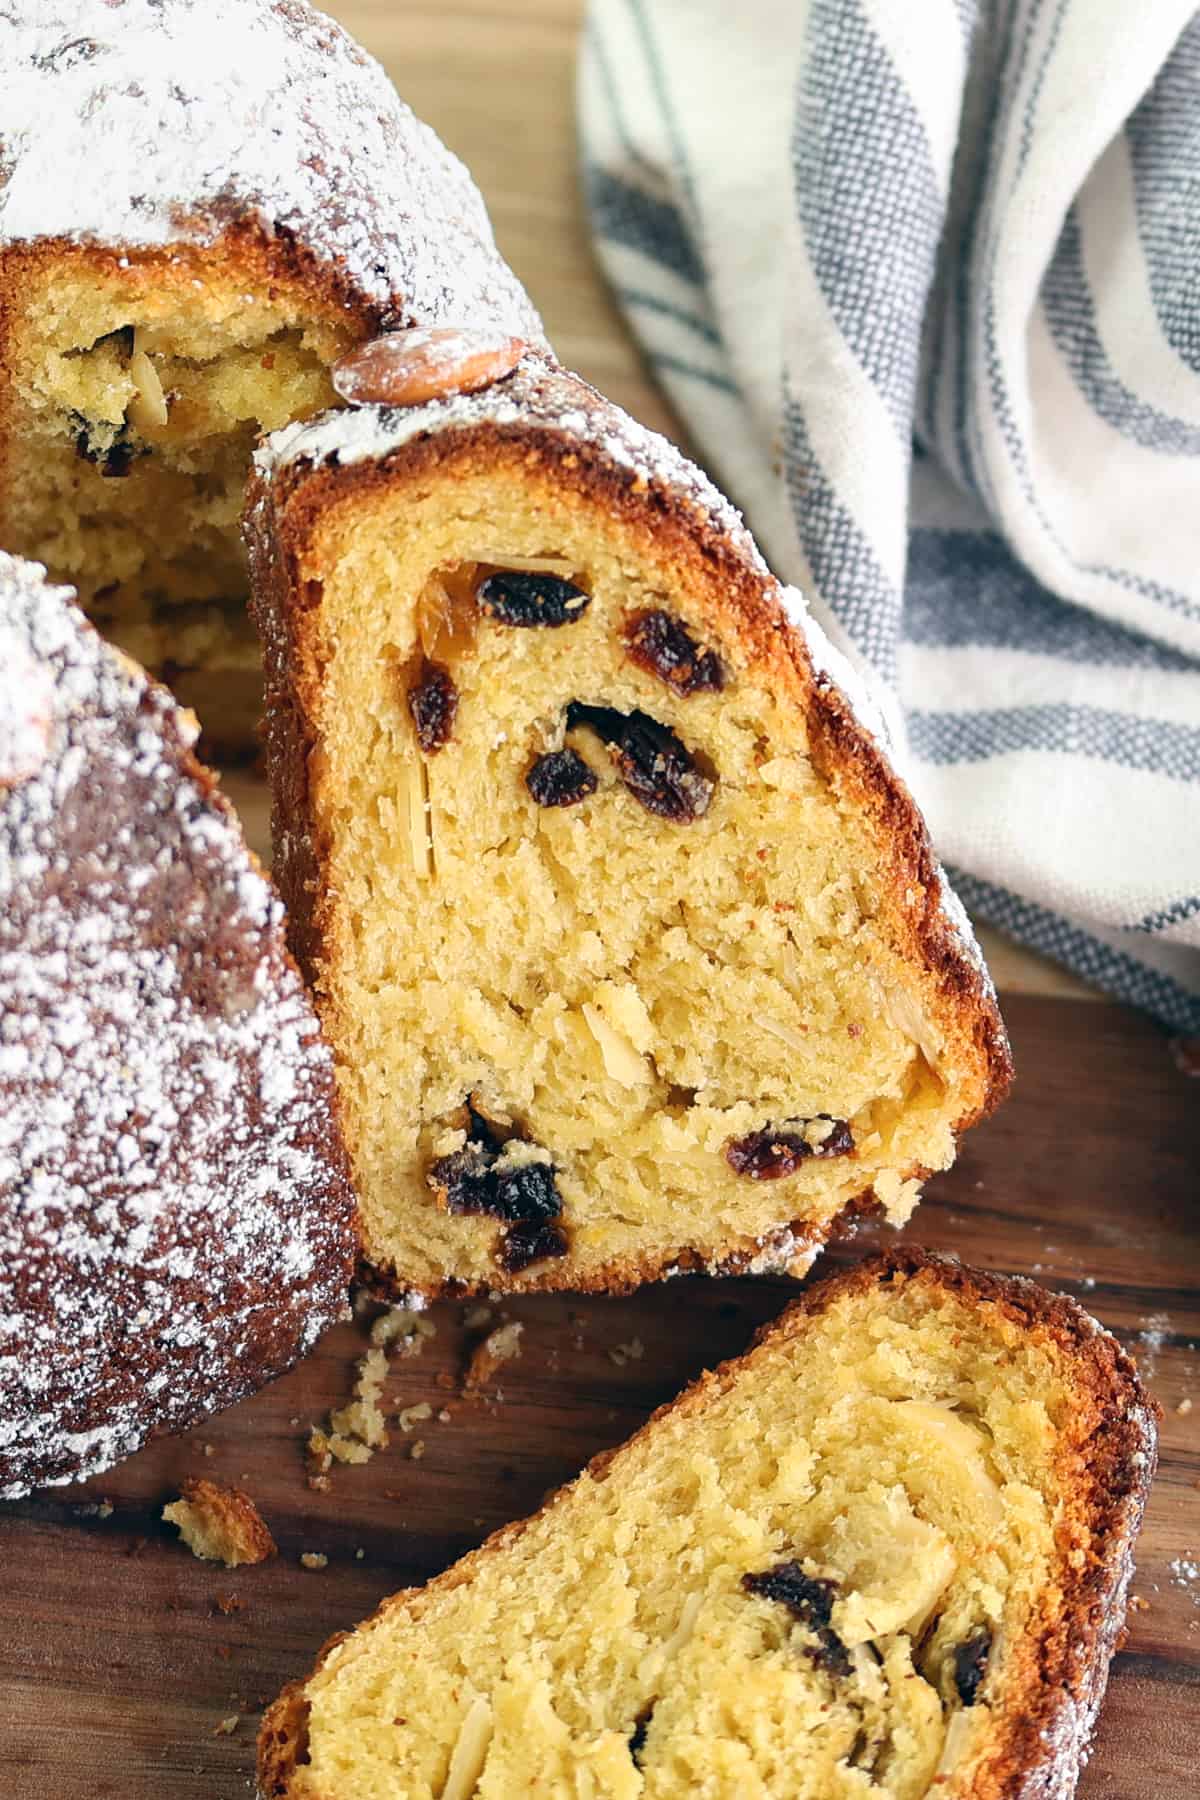
Gigelhupf or Gugelhupf Cake

 
                                  Gugelhupf  or Kugelhopf Cake                                                                                                                           Combining the delicious flavors of lemon, rum, raisins, almonds and butter in a wonderfully fragrant yeasted cake, look no further for a thoroughly traditional Gugelhupf recipe! Also known as Kugelhopf, this special cake has been known and loved for literally centuries throughout Germany, France, Austria and Switzerland.
Ingredients:
12 whole blanched almonds 
   (to blanch/remove the skins, place the almonds in boiling water, let
    sit for one minute, drain, and squeeze the almonds between your  
    fingers to slip the skins off)
1 cup heavy cream
2 1/4 teaspoons active yeast
1/2 cup granulated sugar
4 cups all-purpose flour
1/2 teaspoon salt
2/3 cup unsalted butter
1/3 cup lard or butter
5 large egg yolks
1 1/2 teaspoon vanilla extract
zest one lemon
3/4 cup raisins 
1 tablespoon rum
1/3 cup slivered almonds
12 whole almonds
    Directions:
    Butter a 8.5 inch Kugelhopf pan or a bundt pan  (8 to 9 cup capacity).
    Place the raisins and rum in a small bowl, stir to combine, and let the raisins soak for at least an hour or overnight.
    Place the lukewarm cream in a bowl or cup and stir in the yeast along with one tablespoon of the sugar. Let sit for 10-15 minutes until nice and frothy.

    In the bowl of a stand mixer fitted with a paddle attachment, cream butter, lard (if using) and sugar until pale and fluffy. Add lemon zest and vanilla and beat until combined. Add egg yolks and beat until combined.
    Add half of the flour and yeast mixture and mix until combined. Add the remaining half of the flour and yeast mixture and the salt and mix until combined. Once the mixture comes together continue to knead with the paddle attachment for 10 minutes, scraping down the sides as needed. If the mixture is too dry, add some additional egg yolk. If it's too wet, add some additional flour. Cover loosely with plastic wrap and put in a warm place (like a warm oven) to rise for up to two hours or until doubled in size.

    Roll out onto clean non-stick work surface. Press or roll out to for a rectangle about 1/4 inch thick. 
    Sprinkle evenly with the raisins and almonds. Roll it up from the widest side. Bring the ends together to form a circle, pressing the ends together, and place it into the Kugelhopf mold. Press gently down to ensure the dough is evenly spread in the pan. Cover loosely with plastic wrap and put in a warm place (like a warm oven) to rise for about another hour or until the dough has risen just barely above the mold. 
    In the meantime, preheat the oven to 350 F.

    Bake the Gugelhupf until it is nicely browned and a toothpick inserted into the middle comes out clean, about 30-40 minutes. Let the cake sit in the pan for 10 minutes and then invert onto a wire rack to cool completely. Dust with powdered sugar.

    Serve immediately. Best eaten the same day.
    To store leftovers, wrap well in plastic wrap (will keep up to 3 days) or freeze. (See blog post for ideas on how to use leftover Kugelhopf.)


Thursday, January 22, 2026

Homemade Rolls With Cinnamon Honey Butter

Homemade Rolls With Cinnamon Honey Butter
The aroma of freshly baked dinner rolls whets the appetite and is satisfied slathered with the cinnamon honey butter.  One is never enough!  Made quickly and so easy!
Ingredients;
Rolls
1 1/2 cups whole milk
4 cups all-purpose flour, divided
2 envelopes (about 4 1/2 teaspoons) instant rapid-rise yeast
1/4 cup granulated sugar
2 large eggs, divided
1 teaspoon kosher salt
2 tablespoons salted butter, softened
Cinnamon Honey Butter
1/2 cup butter, softened
1/4 cup confectioners' sugar
1 tablespoon honey
1 1/2 teaspoons Ground Cinnamon
1/2 teaspoon Vanilla Extract

Directions:
Heat milk until very warm, but not simmering (about 100°F to 105°F on an instant read thermometer). Turn off heat.

Place 3 cups of the flour, yeast, sugar, 1 of the eggs, and salt in bowl of a stand mixer fitted with dough hook attachment. Add warm milk to the flour mixture. Knead on medium speed 2 minutes, scraping down sides of bowl as needed. Add remaining flour, 1/2 cup at a time, kneading 2 minutes after each addition. Add butter, kneading just until dough is soft and pillowy and begins to pull away from sides of bowl.

Tip: If the dough seems too wet, you may need more flour. Add additional flour in 1/4 cup increments until the dough has pulled away from the sides of the bowl while kneading.

Cover bowl with plastic wrap. Let rest 30 minutes or until doubled in size. Remove plastic wrap. Press down center of dough to deflate, then gently fold in edges of dough to form a ball.

Spray 13x9-inch baking dish with no stick cooking spray. Divide dough into 15 equal portions and shape into balls. Arrange evenly in prepared baking dish. Cover with plastic wrap. Let rest 30 minutes, or until doubled in size.

Meanwhile, for the Cinnamon Honey Butter, mix all ingredients in small bowl until well blended and smooth. Set aside or refrigerate until ready to serve.

Preheat oven to 375°F. Beat remaining egg in small bowl. Brush tops of rolls with egg wash. Bake 16 to 18 minutes, or until golden brown. Remove from oven and brush warm rolls with melted butter. Serve with Cinnamon Honey Butter.

Friday, December 26, 2025

Classic Tiramisu


                                                                   Classic Tiramisu
Meet my friend James who is a "can do anything" in the kitchen.  When his wife and I left for a club program, I took the first photo but when we returned later, his finished dessert was on the counter.  His secret ingredient added was a purchased flavor enhancer, Pistachio Paste.  James shared the recipe he used.  This Classic Italian Tiramisu is seriously one of the easiest desserts to make! It's picture perfect with a sweet mascarpone filling, espresso dipped lady fingers and all the cocoa powder on top! 
Ingredients:
¼ cup Dutch Processed cocoa powder, plus more for dusting
1 cup brewed espresso (optional to add a few tablespoons of dark rum)

1 tablespoon vanilla extract
5 large egg yolks, cold (I use pasteurized eggs)
½ cup white sugar
¼ teaspoon kosher salt
16 ounces mascarpone cheese, chilled
1.75 cups heavy cream, chilled  (1 3/4 cups)
3 tablespoons Pistachio Paste
28 hard ladyfinger cookies
Directions:
Whisk together the cocoa powder, espresso and vanilla in a bowl and set aside

In a mixer or using a hand mixer, beat the egg yolks and sugar until pale and thick, about 5 minutes. Add in the salt, mascarpone cheese and continue to whip until smooth. Add the chilled heavy cream and continue to whip, until light, creamy, smooth and can hold a soft peak.

Dunk each ladyfinger in the espresso mixture to absorb the liquid and start to line a 7x11 oval baking dish with the cookies. Top the first layer of cookies with ½ of the whipped mascarpone mixture and use the back of a metal spoon to spread it into an even layer. Dust with cocoa powder. Repeat for another layer and then finish by dusting with cocoa powder on top. Cover with plastic wrap and chill for at least 2 hours before serving.

How to Store Tiramisu
You can store tiramisu covered with plastic wrap for 3-4 days. The flavors of the tiramisu marry and develop as it keeps, especially once it's been stored overnight.

How to Freeze Tiramisu
I do not recommending freezing tiramisu since. The no-bake and nature of other ingredients do not make it a great candidate for freezing.

Tips and Tricks

ALL the ingredients for the filling must be cold. So when you read the recipe below, pay attention to the few things that need to be taken directly from the fridge. 

Get the ladyfingers from an Italian market if possible!!

Mascarpone is essential. There is no substitution for it - so while you're out looking for the ladyfingers, grab the Mascarpone. 

No espresso on hand - no problem! Use coffee! 

Dunking the ladyfingers is an art form - you need enough to get a good flavor and texture, but you don't want them to fall apart. Just a quick dunk will do - nothing more than 1-2 seconds!

NOTE - DO NOT SERVE IT RIGHT AWAY! 

While it will be delicious, the cocoa powder needs time to soften up and infuse into the cream topping otherwise you'll inhale straight cocoa powder and let me tell you from experience, it's not cute lol.


Thursday, December 18, 2025

Carrot Cake Scones

Carrot Cake Scones
These carrot cake scones are loaded with all of the good stuff – plenty of shredded carrots, coconut, pecans, raisins and some candied ginger for a fiery kick. Finished with a tangy cream cheese glaze, these scones are not too sweet and they're perfect for breakfast.
Ingredients:
2 ¼ cups all-purpose flour
¼ cup light brown sugar
½ tsp salt
1 tbsp baking powder
1 tsp cinnamon
¼ tsp nutmeg
⅛ tsp cloves
1 cup grated carrots
½ cup raisins
½ cup shredded sweetened coconut
½ cup chopped nuts (we used pecans)
3 tbsp crystallized ginger, finely chopped (optional)
½ cup heavy cream + more for brushing the scones
1 large egg
1 ½ teaspoons vanilla extract
½ cup unsalted butter, frozen
Optional: 2 tablespoons coarse (turbinado) sugar for
topping
Cream cheese glaze recipe follows:

Directions: 
Preheat the oven to 350˚F. In a large bowl. whisk
together the flour, brown sugar, salt, baking powder,
cinnamon, nutmeg and cloves.

Add in the grated carrots, raisins, coconut, nuts, and
ginger, tossing to coat in the flour mixture.

In a separate medium bowl, whisk together the heavy
cream, egg, and vanilla.

Using a box grater, grate the frozen butter into the
bowl with the flour mixture. Gently work the
ingredients together with a spatula or your hands so
butter is evenly distributed, but don’t over-mix.

Add in the heavy cream mixture and gently mix just
until a shaggy dough forms. Avoid over-mixing – you
should still be able to see the butter pieces throughout
the dough.

Transfer the dough to a clean, lightly floured surface.
Using floured hands, shape the dough into a roughly
10-inch disk. Using a sharp knife or bench scraper, cut
the dough into 8 triangle wedges.

Transfer the scones to a parchment paper-lined baking
sheet. Place the scones in the freezer for 15 minutes,
or in the refrigerator for 30 minutes to chill.

Before baking, brush the tops with more heavy cream,
then sprinkle with coarse sugar. Bake for 20-25
minutes, until light golden brown on top.


Cream Cheese Glaze (optional):
1 tablespoon cream cheese, softened to room temp
1 tablespoon unsalted butter, softened to room temp
1/2 cup powdered sugar
2 tablespoons heavy cream

Mix ingredients until you have a lump free glaze.

Sunday, December 14, 2025

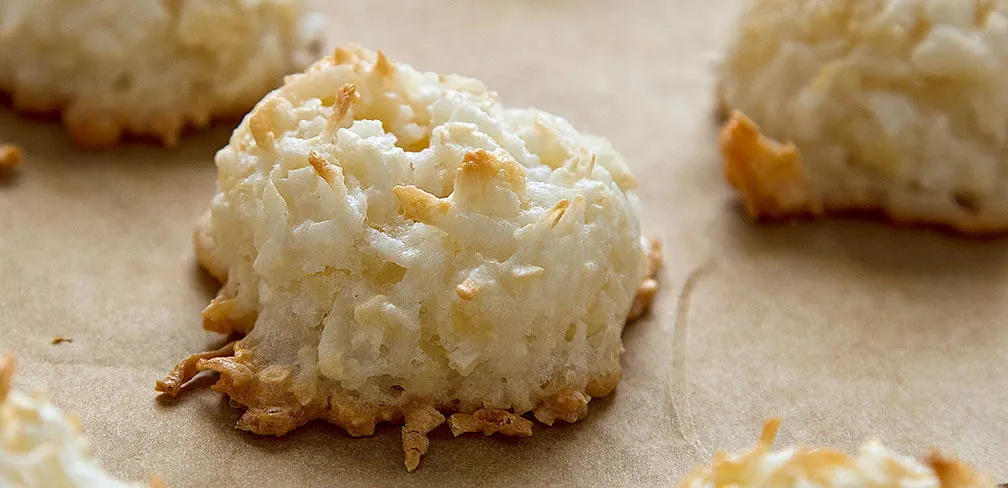
Odense Almond Paste Coconut Macaroon

Coconut Macroons
This is the most requested recipe of Odense Almond Paste Company!
Ingredients

  1. 1/2 cup egg whites, room temperature
  2. 1 teaspoon pure vanilla extract
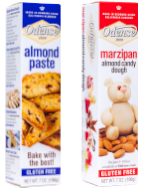
  3. 1-7 oz box Odense Almond Paste (grated using large hole side of a box grater)
  4. 2 cups confectioner's sugar
  5. 1-14 oz package sweetened flaked coconut
  6. Optional: Melting chocolate, to drizzle over cookies
Time 20 minutes to asssemble per tray
Yield: 35 cookies

Directions

Preheat oven to 325°F. Line cookie sheets with parchment.
In large bowl beat egg whites and extract a bit firmer than soft peaksIn separate bowl beat grated Almond Paste (grated using large hole side of a box grater), sugar and coconut until the texture of small crumbs or use food processor. Gently fold egg whites into almond mixture.


Pressing dough firmly together, drop tablespoons of dough 1 inch apart onto cookie sheets (small scoop with wire release works well).
Bake 18 to 20 minutes, or until brown on bottom and firm to touch.  Cool pans on wire rack.  When cookies are cool enough to handle, transfer to a wire rack and cool completely. Store in an air tight container and between sheets of wax paper, or freeze up to ten weeks


Find Odense Almond Paste & Marzipan in stores near you or online.

Saturday, September 13, 2025

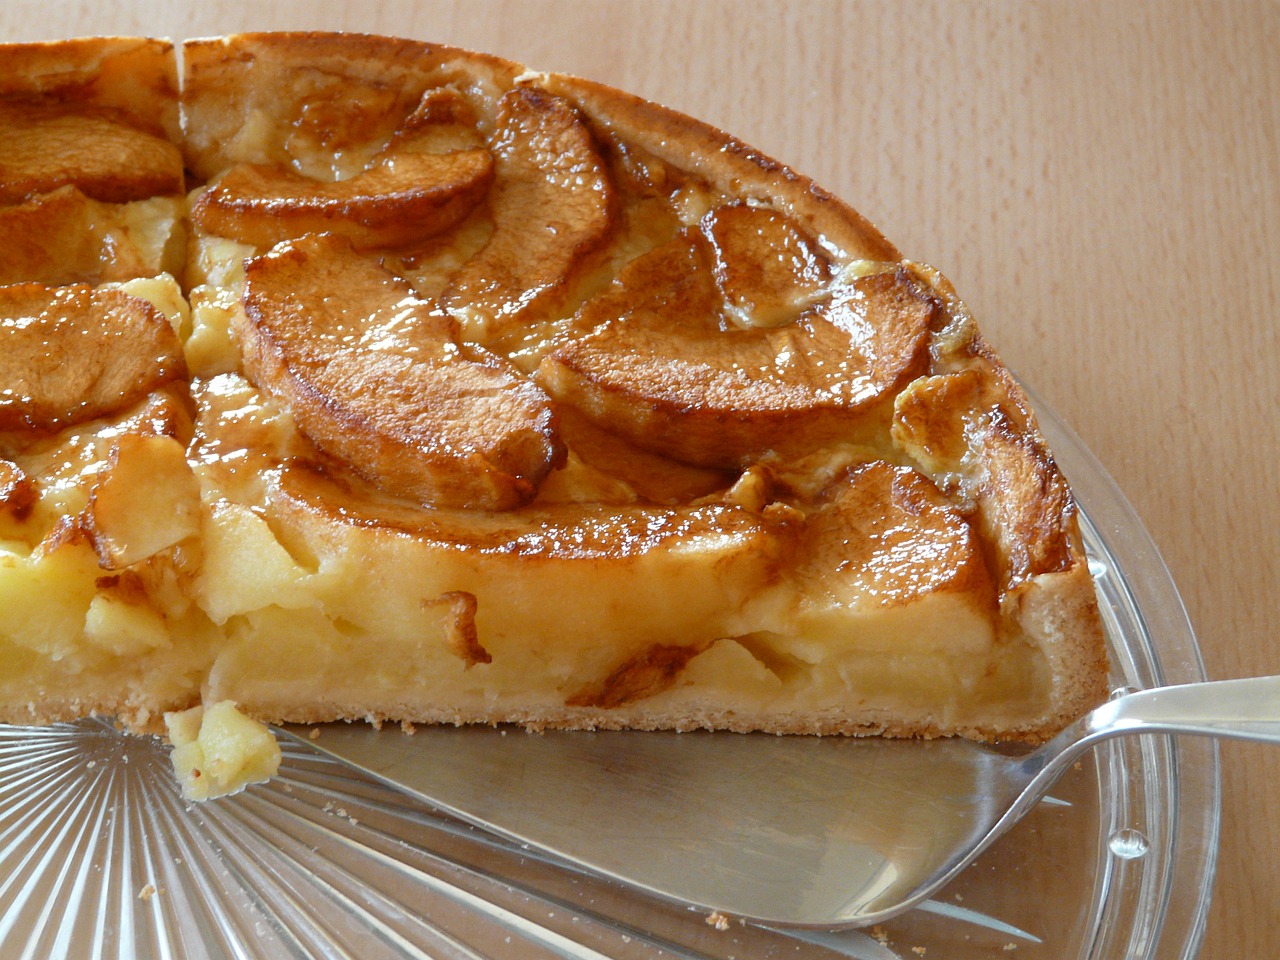
German Apple Custard Cake

German Apple Custard Cake
The German Apple Cake – easy recipe – is perfect for baking with beginners or if you don’t have much time for baking a cake. You have found a very easy recipe for a delicious Apple Custard Cake. 
Ingredients:
Cake:
1 1/2 cups all-purpose flour  
1 teaspoon baking powder  
1/2 teaspoon cinnamon 
1/4 teaspoon salt  
1/2 cup unsalted butter, softened  
3/4 cup granulated sugar  
2 large eggs  
1 teaspoon vanilla extract  
1/2 cup whole milk
Custard Filling:
1 cup heavy cream
1/4 cup granulated sugar
1 large egg
1 teaspoon vanilla extract
Topping
2 apples, peeled and thinly sliced
2 tablespoons sugar
1/2 teaspoon cinnamon
Directions:
Preheat oven to 350°F (175°C). Grease a 9-inch springform pan.  

In a bowl, whisk flour, baking powder, cinnamon, and salt.  

In another bowl, beat butter and sugar until fluffy. Add eggs and vanilla, mixing well.

Alternate adding dry ingredients and milk, mixing until smooth.

Pour batter into the pan and layer apple slices on top.

Bake for 25 minutes, then whisk custard ingredients and pour over the cake.

Sprinkle with sugar and cinnamon, then bake for another 20-25 minutes until custard is set.

Let cool before serving.
Prep Time: 15 minutes | Cooking Time: 45-50 minutes | Total Time: 1 hour 5 minutes
Pre-heat oven to 355 F.

Grease a 10 inch spring form very well with butter and dust with flour.

Place batter into a greased cake spring form .

Layer all apples on top.

Bake in preheated oven on 355 F for about 60 minutes.

Monday, August 18, 2025

Petticoat Tail Cookies

  
Petticoat Tails
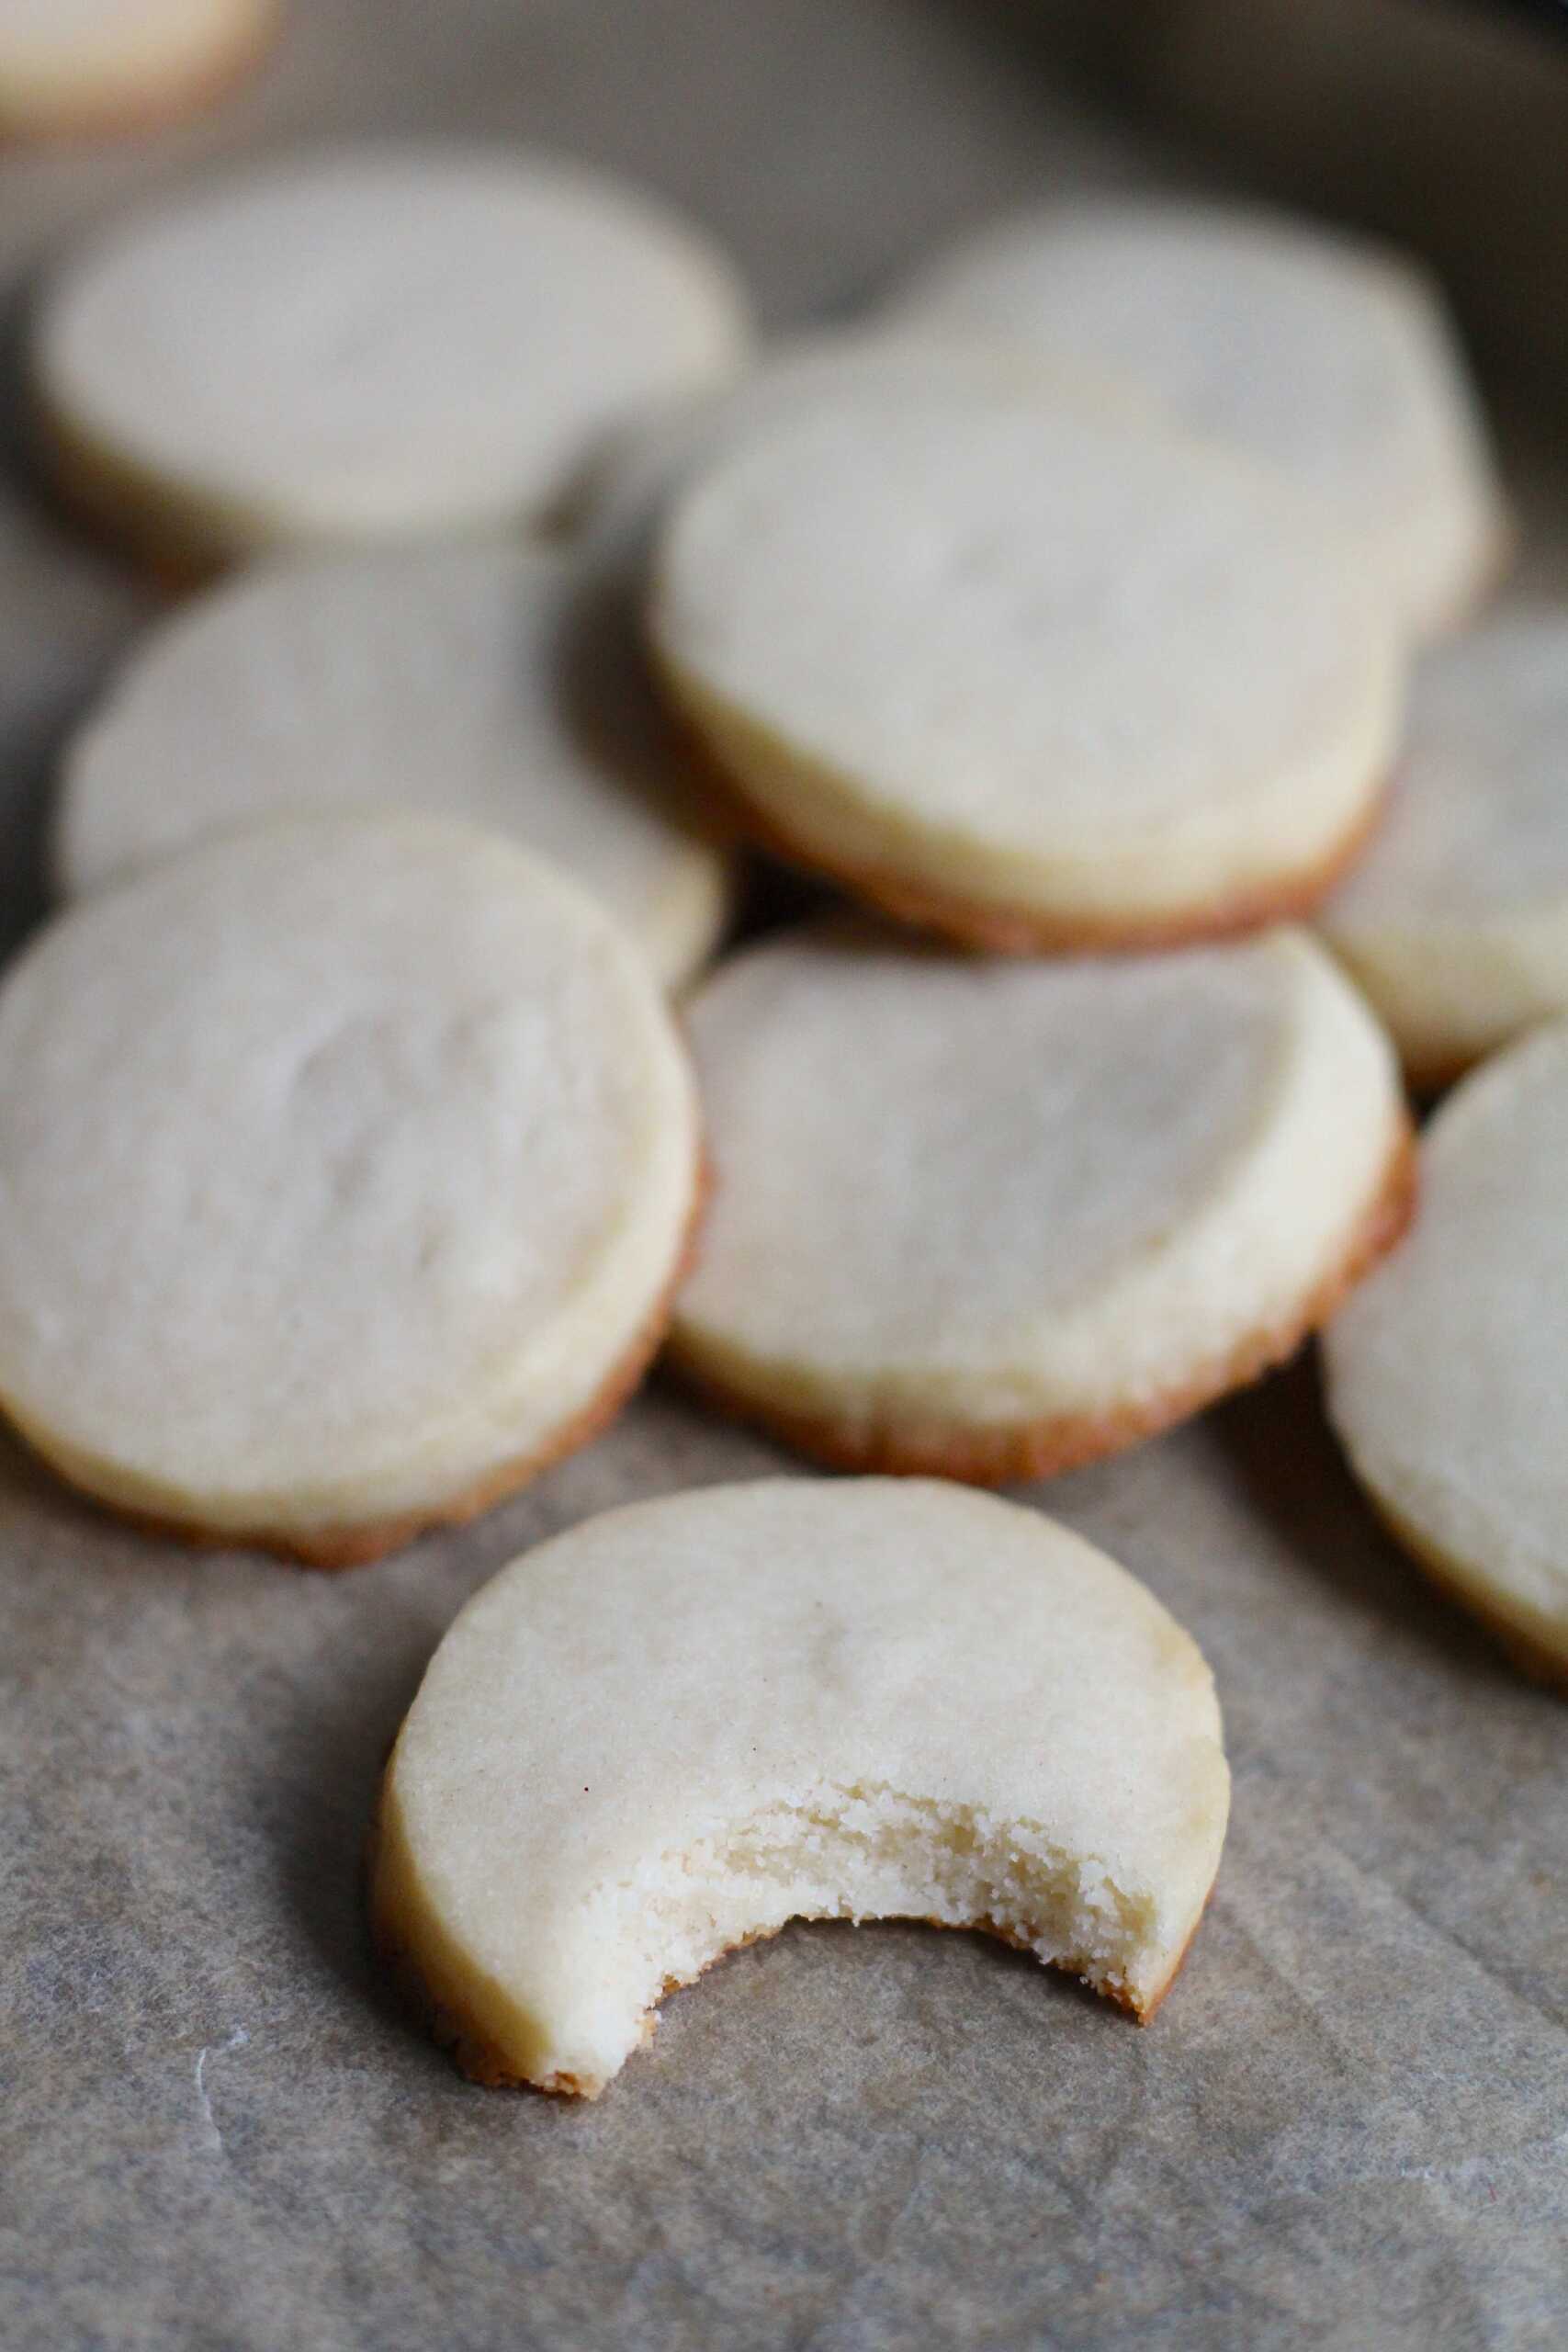
There’s something about an old-fashioned cookie recipe that you just can’t beat. Those classics that have stood up to time for good reason: because they are simply delicious! And these cookies are exactly that. The name Petticoat Tails is said to have come from the French “petits cotés” (meaning little sides) or the resemblance to the underskirts worn in the 1700s. No matter the origin, these cookies are perfection and every baker should have the recipe in their collection.
Ingredients:
1 cup butter, room temperature
1 cup powdered sugar
1 ½ teaspoons vanilla extract
2 ½ cups all-purpose flour
½ teaspoon salt
Optional: red or green food coloring
Optional: ½ teaspoon mint or almond extract

Directions
In a large mixing bowl, add butter and powdered sugar. Mix until fully
combined and smooth. Mix in vanilla extract and other extract if using.

Add flour and salt, then mix until well combined.

Roll dough into two logs about 2.5 inches in diameter. Cover tightly with plastic wrap and place in freezer for at least 90 minutes.

When ready to bake, preheat oven to 375 degrees F and line a baking sheet with parchment paper.

Slice log into rounds about ¼-inch thick and evenly arrange on baking sheet.

Bake cookies for 7-9 minutes or until edges just begin to brown.
Allow cookies to cool before enjoying or storing.  Makes 24 cookies.


Thursday, May 22, 2025

Matcha Glazed Swirl Bread

Matcha Glazed Swirl Bread
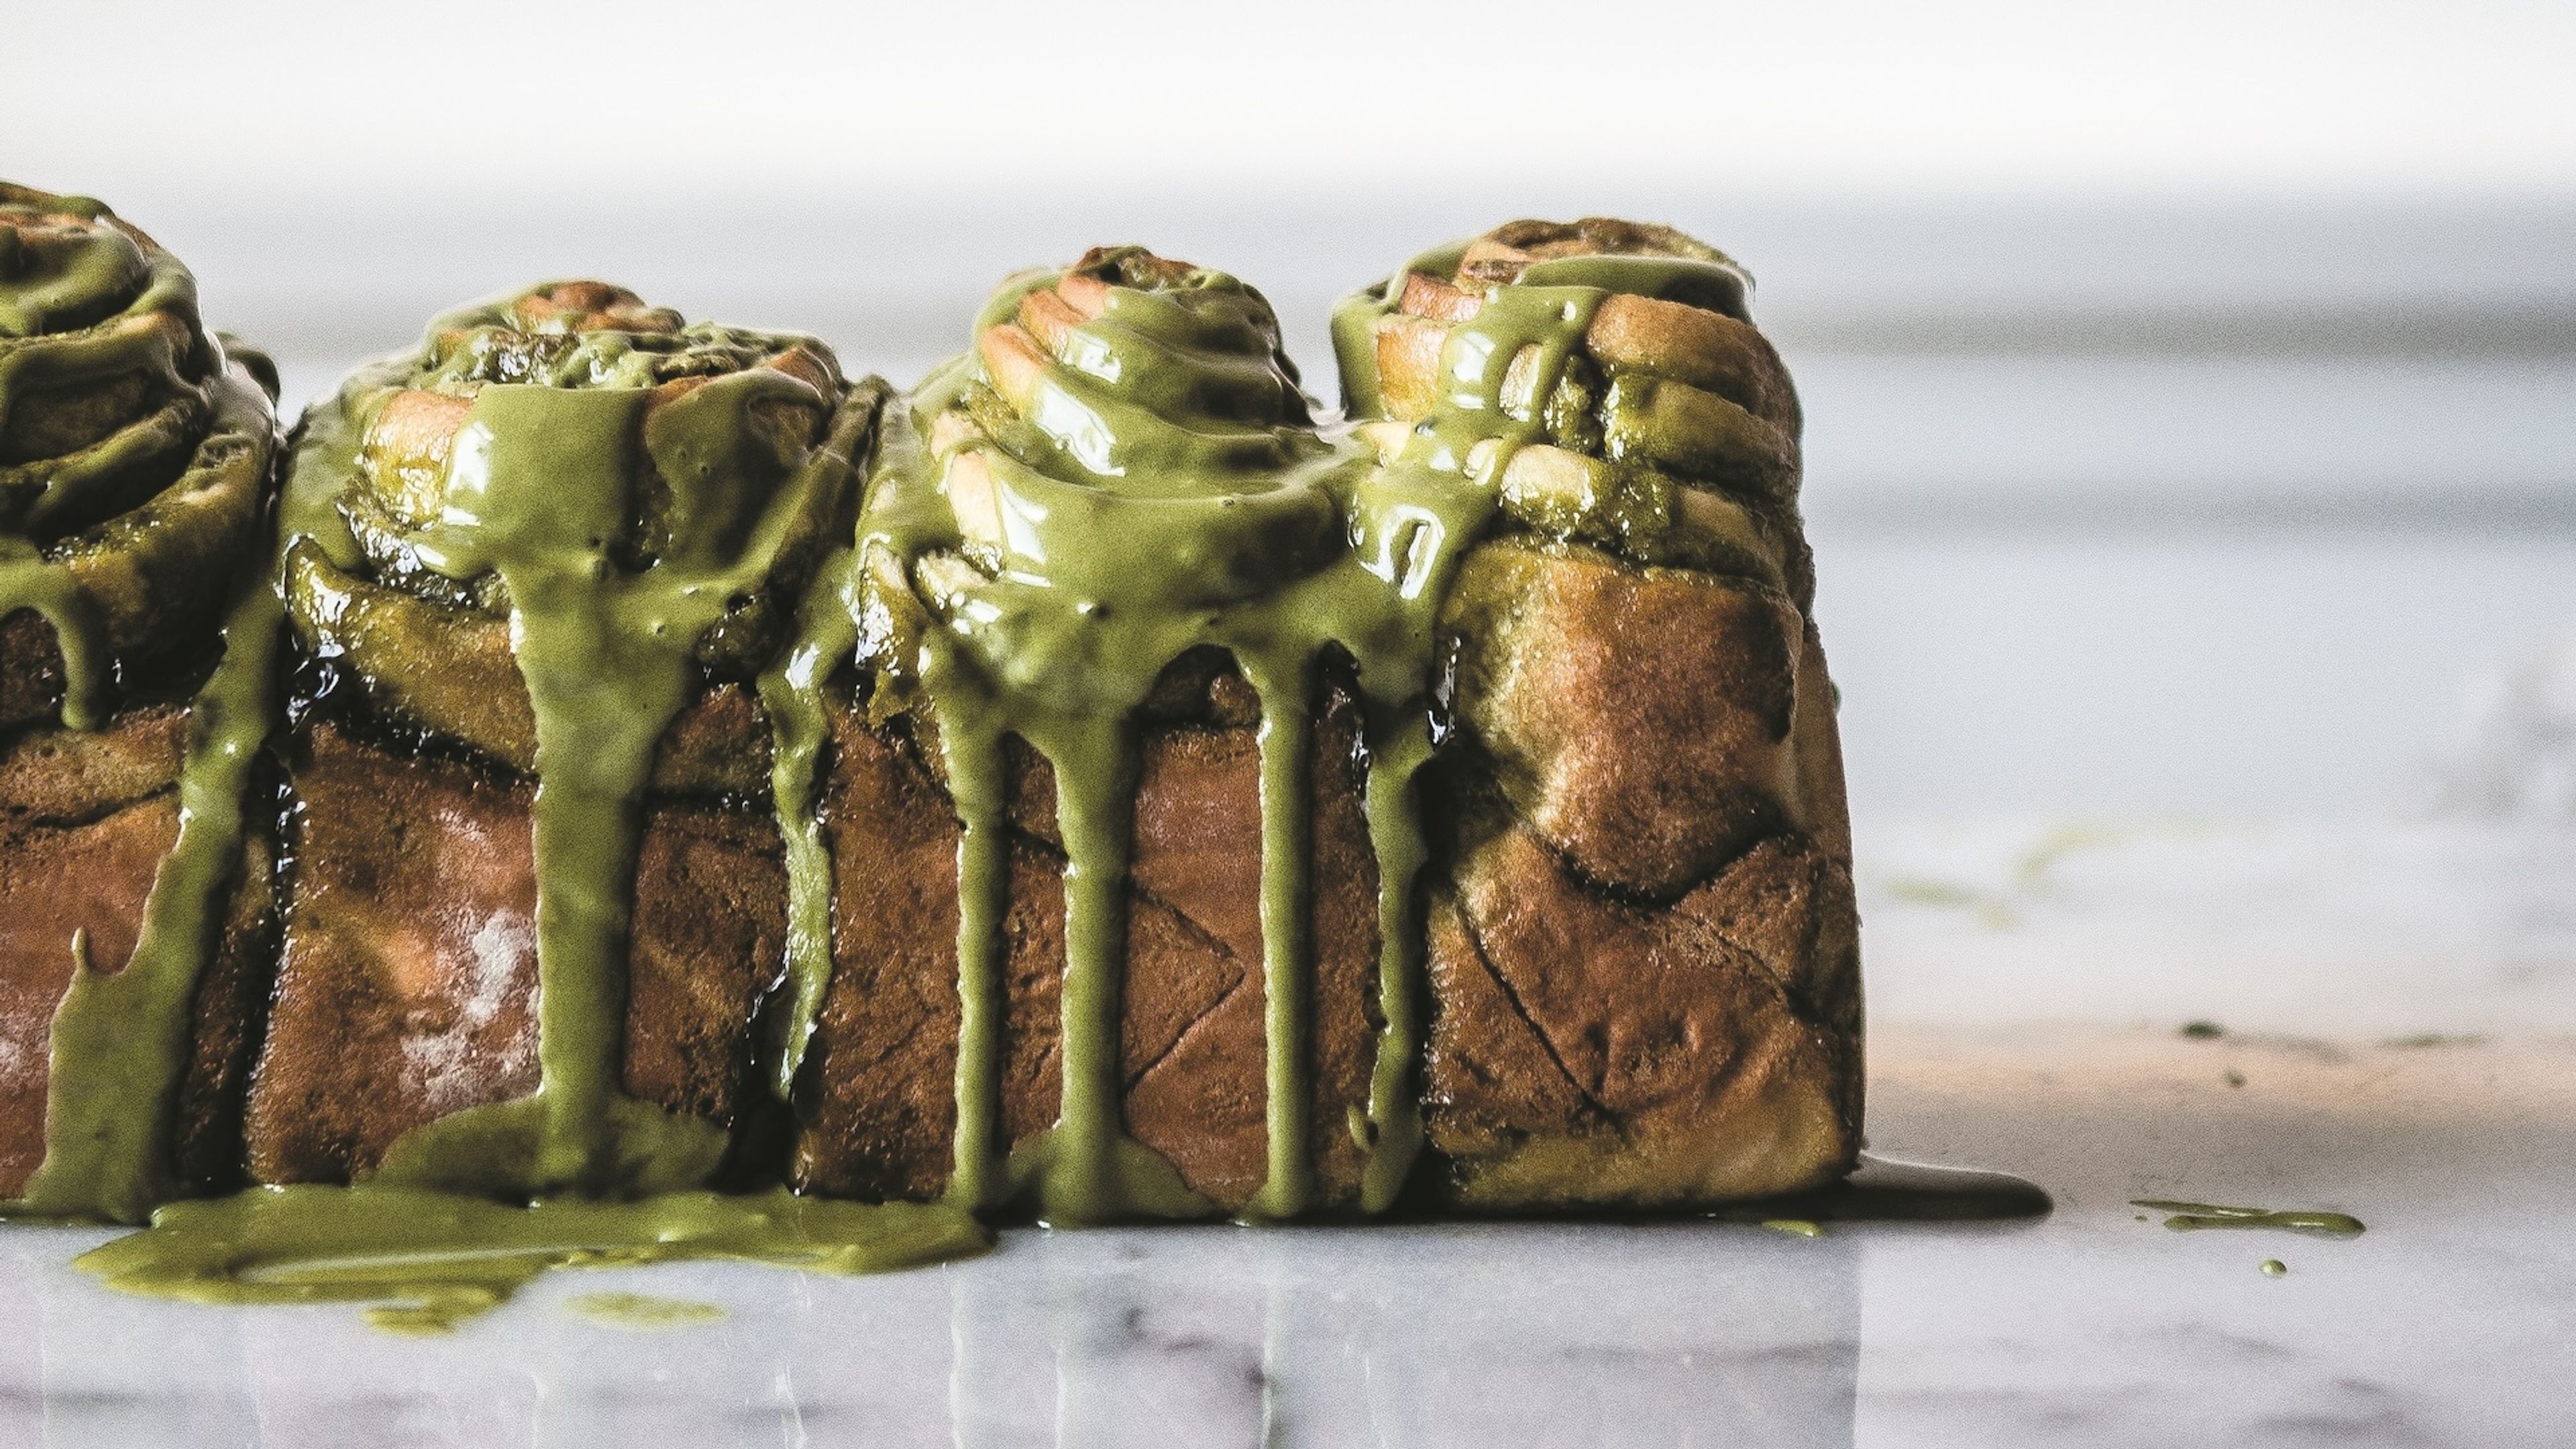
The bread is shaped like four giant cinnamon rolls cozied together
in a loaf pan, but with many, many more lay- ers, all beautifully
laced with matcha glaze. I bought a half-loaf, and loved it so much
that I convinced my husband to go back with me to buy a full one
the very next day. Being thousands of miles away from that fantastic
bakery, it was only a matter of time before I felt the need to try to
make this at home.”—James Beard Foundation Award nominee Cynthia Chen McTernan
Ingredients:
Sweet Dough
1/4 cup whole milk
1/4 cup (1/2 stick) unsalted butter plus more for pan
1 teaspoon active dry yeast or instant yeast
2 1/4 cups (282 grams) all-purpose flour plus more for rolling
3 tablespoons granulated sugar
1/4 teaspoon salt
1 large lightly beaten egg plus 1 large egg yolk
1/4 cup full-fat Greek yogurt
1/2 teaspoon vanilla extract
Matcha Glaze
1 tablespoon plus 1 teaspoon matcha powder (Green Tea Powder)
5 tablespoons heavy cream, plus 1 teaspoon more for thinning
1 1/4 cups confectioners’ sugar

Directions:
Make the dough: the night before, or at least 2 hours before baking,
in a small saucepan over medium heat, bring the milk just to a boil,
2 to 3 minutes, or heat the milk in a small microwave-safe bowl in the
microwave, about 1 minute. (This scalds the milk to kill any enzymes
that might prevent the yeast from doing their thing.) If you find a film
on the surface of the milk after heating it, just pour the milk through a
sieve.

Sprinkle the yeast on top and let sit until foamy, about 5 to 10 minutes.
If the milk-yeast mixture does not foam, you may want to start over to
make sure your yeast is active. (See Note if using instant yeast.)

Meanwhile, in a large bowl, whisk together the flour, granulated sugar, and salt. If you are not using a scale, take care to use the spoon-and-sweep method for measuring your flour, since too much flour canmake the dough dense.

When the yeast is foamy, add the egg and egg yolk, yogurt, and
vanilla to the yeast-milk mixture and whisk to combine. Mix the wet
ingredients into the dry, until all of the flour is incorporated and a wet,
sticky dough forms. Knead [the dough] in the bowl until it is smooth
and elastic, 8 to 10 minutes. Alternatively, use a silicone spatula to
scoop underneath the dough and fold it in onitself repeatedly. The
dough will start out maddeningly sticky; sprinkle up to 2 more
tablespoons of flour, just as much as needed to knead.

Cover with plastic wrap or a damp dish towel and place it in the refrigerator to rise overnight. Alternatively, you can let it rise at room temperature for 2 hours or so, until well doubled. I prefer a longer rise, to give the flavor time to develop and to split up the labor. The dough should be fine for up to 24 hours.

The next day, or at least 1 hour before baking, line a 9 × 5-inch
Pullman loaf pan with parchment paper or grease it with butter.

Make the matcha glaze: sift the matcha powder into a medium bowl.
Vigorously whisk 2 tablespoons of cream into the matcha until no
lumps remain. Whisk in the remaining cream, then sift in the
confectioners’ sugar 1/4 cup at a time, whisking after each addition,
until the mixture forms a very thick, barely pourable glaze.

Turn the dough out onto a well-floured surface. Roll the dough out
thin, thin, thin, to about an 18 × 24-inch rectangle, making sure to lift
the dough and add more flour to the work surface as you go. When the
dough is evenly rolled out, reserve 1/4 cup of the glaze and spread the
rest in a very thin layer across the dough. Using a pizza cutter, sharp
knife, or scissors, slice the dough in half lengthwise to form 2 long
9 × 24-inch strips. Carefully lift one strip and place it on top of the
other. If desired, trim the edges into a neater rectangle, then, starting
at a 9-inch end, roll the stack into a short, thick log.

Using a sharp, serrated knife, slice the log widthwise into 4 equal
pieces. Place the rolls, cut-side down, into the loaf pan. (Things will
get messy, but do not fear. The rolls are apt to bake up a little lopsided
no matter what; regardless of how they look, they all taste the same.)

Let [the dough] rise in a warm place until it is boisterously puffy and
fills the pan, 1 to 1 1/2 hours. When the dough is pressed with a finger,
it should bounce back very slightly, but the indent should remain.

During the last half-hour of the second rise, preheat the oven to 350°F.
Bake, uncovered, for 35 to 40 minutes, until golden-brown on top. Let
cool, then drizzle with the remaining glaze.

Note: If using instant yeast, use the same amount as active dry
yeast, but mix it in with the dry ingredients instead of adding it to
the scalded milk. If you can find SAF Instant Yeast, I have found
it to be wonderful and reliable, with yeast goods that are fluffier,
softer, and more flavorful than most.

Friday, May 9, 2025

Banana Bread Blondies

Banana Bread Brownies
Brownies Streaked With Chocolate and the Delightful Flavor of Banana.

Ingredients:
3/4 cup (170g) mashed banana (about 1 1/2 large, very ripe bananas)
2/3 cup (134g) granulated sugar
1/4 cup (54g) light brown sugar or dark brown sugar, packed
6 tablespoons (85g) unsalted butter or refined coconut oil
1 large egg yolk
2 teaspoons Pure Vanilla Extract
3/4 teaspoon table salt
1/2 teaspoon baking powder
1 1/4 cups (150g) All-Purpose Flour
1/4 cup (28g) chopped walnuts or pecans, toasted; optional
1/4 cup (43g) semisweet chocolate or mini chocolate chips
flaky sea salt, for sprinkling; optional

Directions:
Preheat the oven to 350°F with a rack in the center. Lightly grease an 8" square pan, then line it with a parchment sling.

In a large saucepan, mash the banana with the sugars until well combined. Bring the mixture to a boil over medium heat, then cook, stirring frequently with a flexible spatula, until shiny, syrupy, and caramelized. The mixture should be thick enough so that when it’s removed from the heat and the spatula is dragged across the bottom of the pan, the line fills in after about 1 second. This will take about 4 to 8 minutes of cooking, depending on the ripeness of the bananas.

Remove the pot from the heat, let cool for about 5 minutes, then add the butter, yolk, and vanilla. Stir until the mixture is creamy and emulsified. Whisk in the salt and baking powder, then stir in the flour with a flexible spatula until only a few dry streaks remain. Let the batter cool for about 5 minutes, then work quickly to stir in the nuts and chocolate (the chocolate will melt slightly). 

Transfer the thick, soft batter to the prepared pan and spread into an even layer (if the batter feels too thick to spread, use damp hands or a lightly greased offset spatula). Sprinkle with flaky salt if desired.

Bake for 20 to 22 minutes, until the bars are set in the center and a toothpick comes out with no raw batter. Let cool completely in the pan (at least 2 hours) before transferring to a cutting board to slice and serve.

Store the banana bread bars in an airtight container at room temperature for up to 4 days. Freeze, well wrapped, for longer storage.

Tips from our Bakers, Bananas that have been frozen and defrosted work well in this recipe. Drain any excess liquid before adding them to the saucepan.

Friday, March 28, 2025

Pistachio Bread

Two slices of pistachio cake with rich icing sit enticingly on a plate, reminiscent of freshly baked pistachio bread, accompanied by a steaming cup of coffee and scattered pistachios.
Pistachio Bread Recipe
This tender crumb Pistachio Bread Recipe is sweet and moist.  It only takes a few minutes to mix up.  You'll love how easy it is to make..
Ingredients:
1 cup granulated sugar
 cup vegetable oil
¾ cup milk, I use 2%
¼ cup full fat sour cream
2 large eggs
1 teaspoon pure vanilla extract
1 teaspoon almond extract
2 cups all-purpose flour
1 box (3.4 ounce) Instant Pistachio pudding mix
1 ½ teaspoons baking powder
½ teaspoon baking soda
½ teaspoon kosher salt
¼ cup chopped pistachios, divided
For the Icing:
1 cup powdered sugar
½ teaspoon almond extract
2 Tablespoons milk, I use 2%                                        
Directions:                                                                                                                                                               
Preheat oven to 350 degrees F. Spray a 9x5-inch loaf pan with baking spray. I like to line the bottom with a strip of parchment paper (bringing it up the sides (the short sides) so it creates a sling to lift out of the pan once baked. Set pan aside.

In a large mixing bowl combine the sugar, oil, milk, sour cream, eggs, vanilla, and almond extract. Mix until blended.

Add the flour, pistachio pudding mix, baking powder, baking soda, and salt to the wet ingredients. Mix until fully incorporated.

Pour batter into prepared loaf pan. Sprinkle the top with half of the chopped pistachios. Bake in preheated oven for one hour.

Remove from oven and allow to cool in pan for 15 minutes. Remove using the parchment paper and cool completely on a wire rack.

For the icing, in a small bowl whisk the powdered sugar, almond extract, and milk until smooth. Spread over the cooled loaf of bread and sprinkle with the remaining chopped pistachios. Allow to set, about 15 minutes.

Monday, March 24, 2025

Chocoflan

            Chocoflan
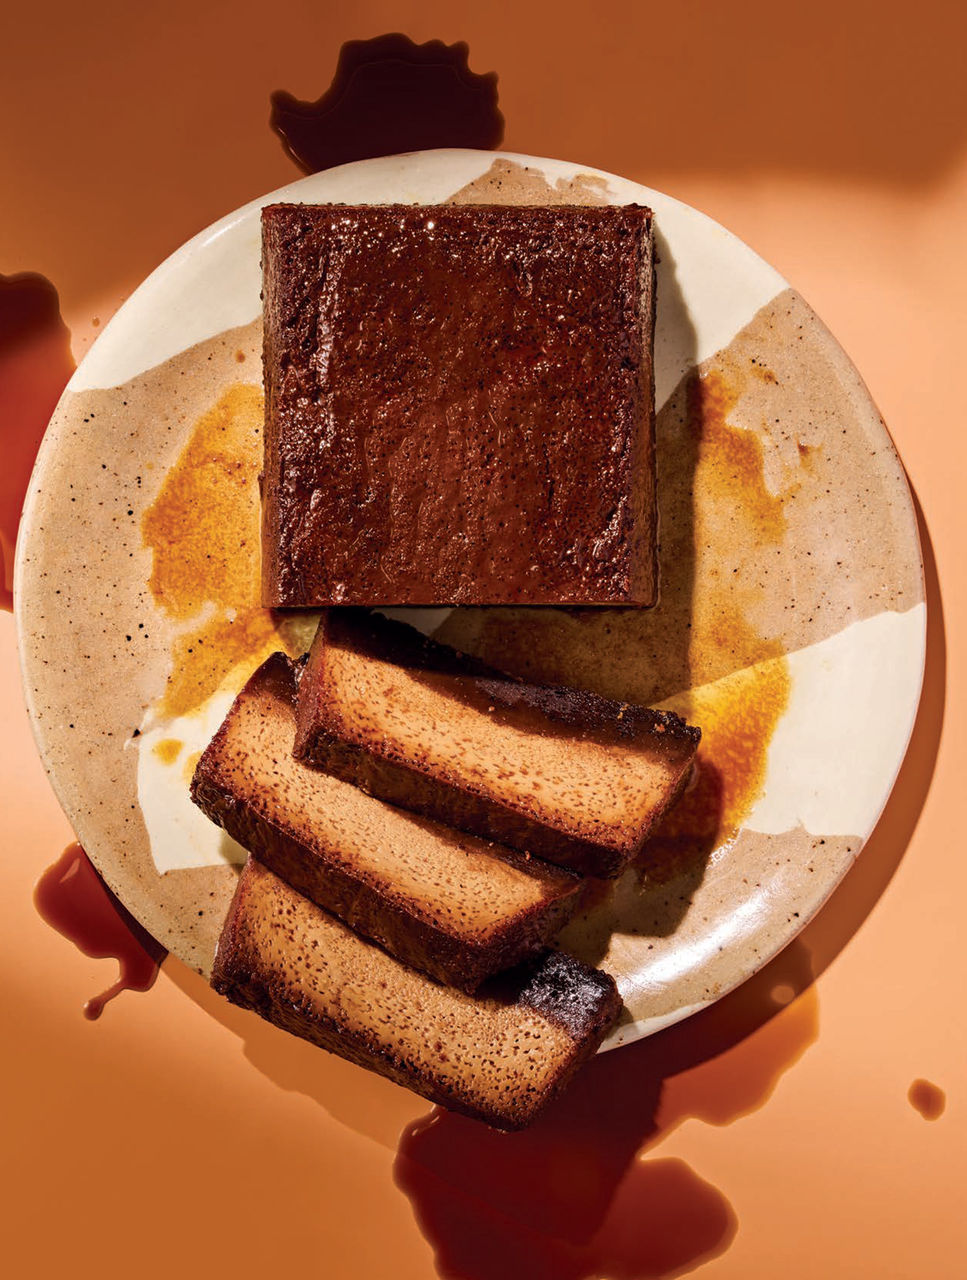
This rich Mexican dessert features layers of a dense chocolate cake and a creamy vanilla flan. It’s known as the “impossible cake” because the cake and flan batters are poured into the pan in one order, and then switch positions while baking in the oven. It’s typically baked in a bundt pan, but I prefer the look when baked in a loaf pan. You can find Mexican vanilla at many online food shops including Well.ca and Gourmet Trading Co. (gourmettrading.com) Serves 8 to 10
Ingredients:

Caramel
2/3 cup (150 mL) granulated sugar
1/4 cup (60 mL) water

Cake
2/3 cup (150 mL) hot brewed coffee
2/3 cup (150 mL) cocoa powder
1/4 cup (60 mL) semi-sweet chocolate chips
1/3 cup (80 mL) avocado or canola oil
1/2 cup (125 mL) full-fat sour cream
2 eggs
1 tbsp (15 mL) pure vanilla extract, preferably Mexican
1 cup (250 mL) granulated sugar
2/3 cup (150 mL) all-purpose flour
1 tsp (5 mL) baking powder
1/2 tsp (2 mL) baking soda
1 tsp (5 mL) Diamond Crystal kosher salt or 1/2 tsp (2 mL) table salt

Flan
1/2 cup (125 mL) Philly-style cream cheese, at room temperature
1 can (300 mL) sweetened condensed milk
3/4 cup (175 mL) evaporated milk
2 eggs
1 egg yolk
1 tbsp (15 mL) pure vanilla extract, preferably Mexican
1 tsp (5 mL) Diamond Crystal kosher salt or 1/2 tsp (2 mL) table salt.


Directions:
Preheat oven to 350°F (177°C). Grease sides of a 5 × 9-inch (12 × 23 cm, 1.9-L) loaf pan. Cut a piece of parchment paper to fit over top of pan. Grease one side of parchment and set aside.

For the caramel, heat sugar and water in a small saucepan over high. Stir until the sugar is dissolved. Continue to boil, watching closely, until mixture turns deep amber, about 5 minutes. Carefully pour into bottom of prepared pan. Set aside to cool and harden, at least 10
minutes.

For the cake, whisk hot coffee, cocoa powder and chocolate chips in a mixing bowl until smooth. Vigorously whisk in oil, sour cream, eggs, vanilla and sugar.

In a separate bowl, sift flour, baking powder and soda. Stir in salt. 
Stir dry mix into wet mix until batter is clump-free. Pour batter over caramel in an even layer.

For the flan, blend cream cheese and sweetened condensed milk in a blender until smooth. Add evaporated milk, eggs, yolk, vanilla and salt. Blend until evenly combined. Pass through a fine sieve into a bowl, then pour over chocolate batter, working from one side to other to form an even layer. (The flan batter will sink into cake batter.) Leave a 1-inch (2.5-cm) space below the top edge of the loaf pan to allow for rising. Depending on the capacity of your loaf pan, you may have a few tablespoons of flan batter left over. Discard.

Boil about 4 cups (1 L) water. Place loaf pan in baking pan large enough to hold it. Pour enough boiling water into baking pan to come about 1-inch (2.5-cm) up sides of loaf pan. Drape reserved piece of greased parchment over loaf pan, greased side down. Cover whole baking pan tightly with foil.

Bake on middle rack until a skewer inserted in center of chocolate cake comes out clean, about 85 minutes.

Remove from oven. Carefully remove foil and parchment then transfer loaf pan to a cooling rack. Cool then cover and refrigerate at least 3 hours, preferably overnight.

To serve, run a paring knife along the edges of the pan to loosen cake. Swiftly flip the loaf onto a rimmed plate. Slice and serve.