Showing posts with label Nuts. Show all posts

Friday, August 14, 2026

Buda Bowl

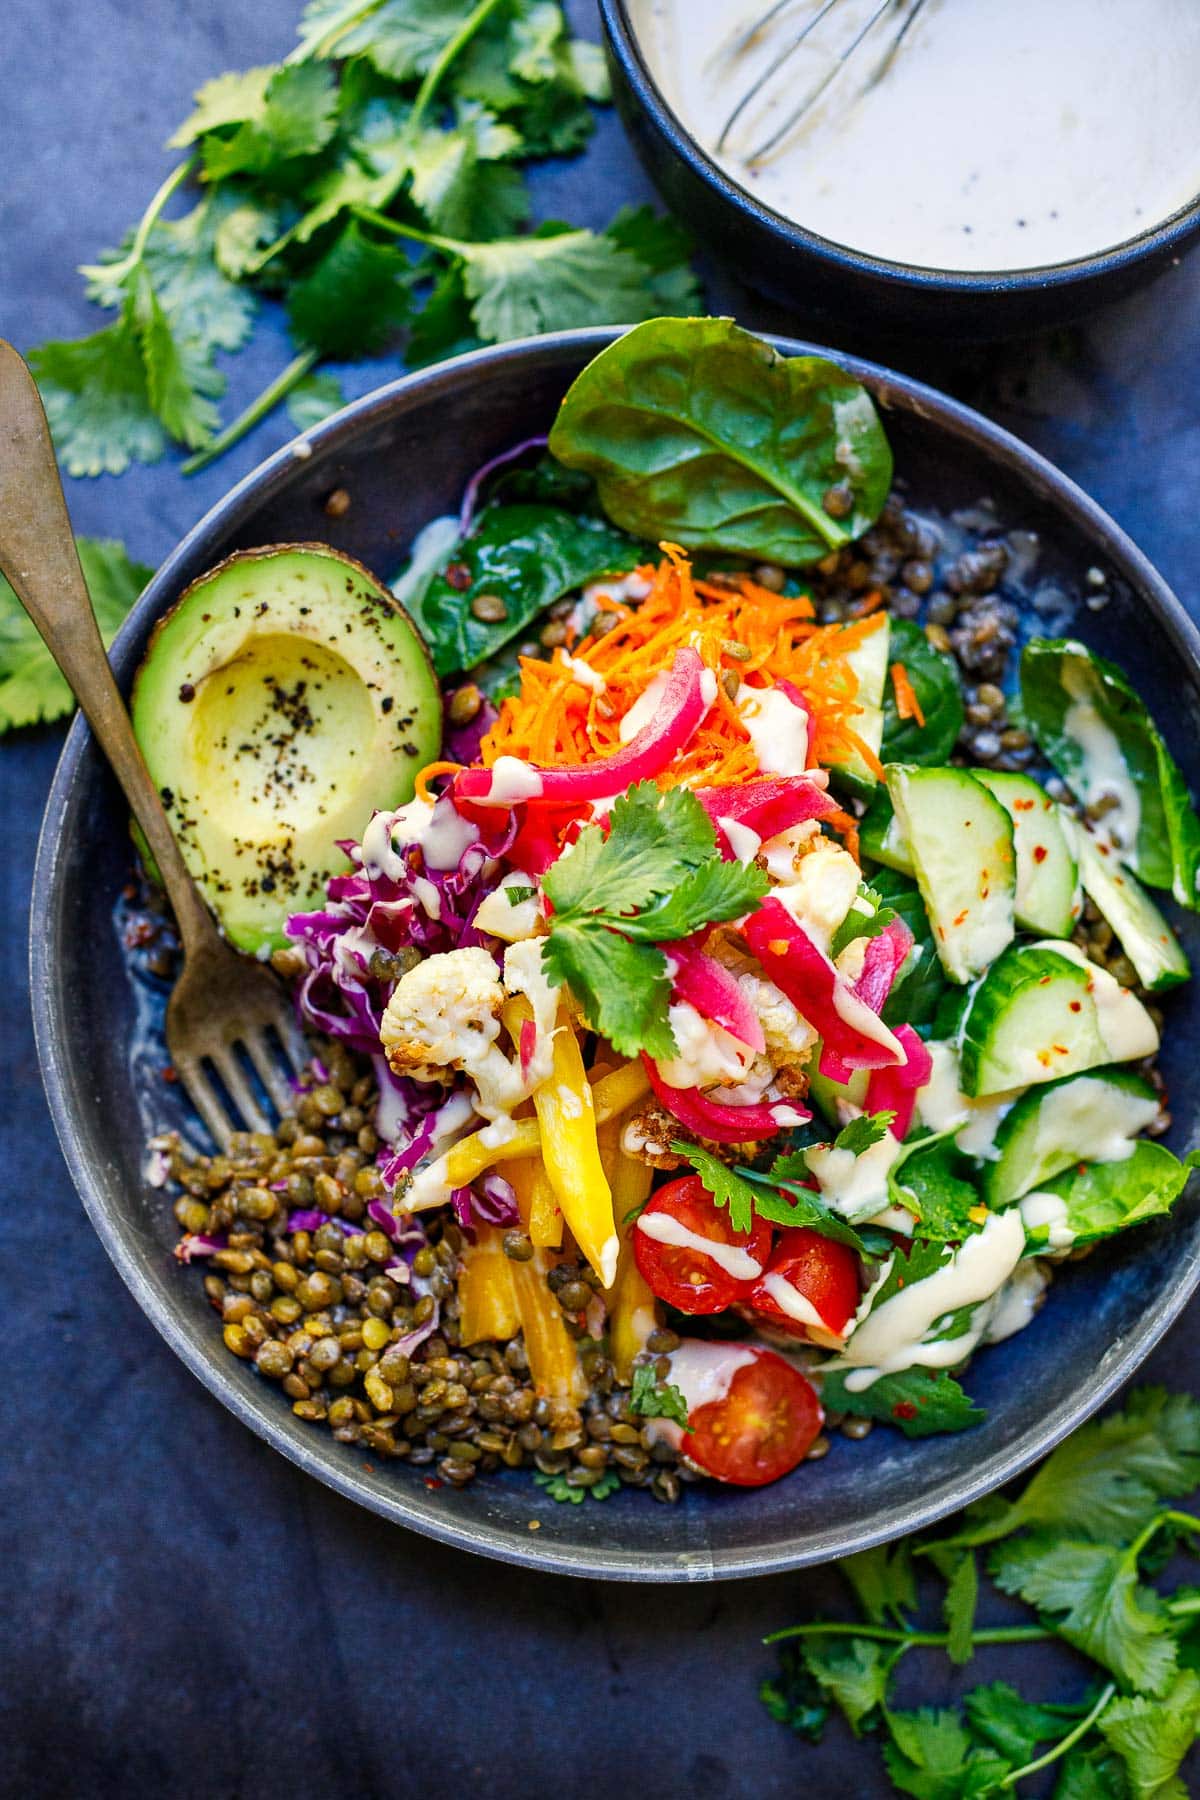
Buda Bowl With Lentils
These grain-free Lentil Bowls are so easy, nourishing and delicious! Made with seasoned lentils, fresh seasonal veggies, dark leafy greens, fresh herbs or micro-greens, nuts or seeds, avocado, and our favorite tahini sauce! Vegan, gluten-free and grain-free!

What I enjoy about this Lentil bowl is how flavorful it is, how full of color, nutrients, and polyphenols it is, and how it feels satiating from all the fiber and protein. It is also very adaptable and can be altered depending on what you have in the fridge or what is in season.

Lentil Bowl Ingredients:
Cooked Lentils- French green lentils, black lentils, brown lentils, or any whole, cooked lentils. We will season these simply with olive oil, salt, cumin, Aleppo chili flakes, and a squeeze of lemon juice.
Greens: Spinach, arugula, Lacinato kale, or Swiss chard, etc.
A rainbow of Vegetables: shredded carrots or beets, roasted cauliflower (I used this leftover roasted cauliflower from last night’s dinner), broccoli, bell pepper, cucumber, tomatoes, cabbage, etc.
Herbs or microgreens: cilantro, mint, dill, basil, Italian parsley, etc.
Nuts or seeds: toasted slivered almonds, sunflower seeds, hemp hearts, pumpkin seeds, walnuts, etc.
Tahini Sauce:  Make a whole batch and use it for other things! You’ll need tahini paste, olive oil, lemon juice, fresh garlic, salt and pepper)
Optional additions: Avocado, Pickled Red Onion, fermented sauerkraut or this beet kraut,
Recipe from Feasting At Home!


Thursday, December 18, 2025

Carrot Cake Scones

Carrot Cake Scones
These carrot cake scones are loaded with all of the good stuff – plenty of shredded carrots, coconut, pecans, raisins and some candied ginger for a fiery kick. Finished with a tangy cream cheese glaze, these scones are not too sweet and they're perfect for breakfast.
Ingredients:
2 ¼ cups all-purpose flour
¼ cup light brown sugar
½ tsp salt
1 tbsp baking powder
1 tsp cinnamon
¼ tsp nutmeg
⅛ tsp cloves
1 cup grated carrots
½ cup raisins
½ cup shredded sweetened coconut
½ cup chopped nuts (we used pecans)
3 tbsp crystallized ginger, finely chopped (optional)
½ cup heavy cream + more for brushing the scones
1 large egg
1 ½ teaspoons vanilla extract
½ cup unsalted butter, frozen
Optional: 2 tablespoons coarse (turbinado) sugar for
topping
Cream cheese glaze recipe follows:

Directions: 
Preheat the oven to 350˚F. In a large bowl. whisk
together the flour, brown sugar, salt, baking powder,
cinnamon, nutmeg and cloves.

Add in the grated carrots, raisins, coconut, nuts, and
ginger, tossing to coat in the flour mixture.

In a separate medium bowl, whisk together the heavy
cream, egg, and vanilla.

Using a box grater, grate the frozen butter into the
bowl with the flour mixture. Gently work the
ingredients together with a spatula or your hands so
butter is evenly distributed, but don’t over-mix.

Add in the heavy cream mixture and gently mix just
until a shaggy dough forms. Avoid over-mixing – you
should still be able to see the butter pieces throughout
the dough.

Transfer the dough to a clean, lightly floured surface.
Using floured hands, shape the dough into a roughly
10-inch disk. Using a sharp knife or bench scraper, cut
the dough into 8 triangle wedges.

Transfer the scones to a parchment paper-lined baking
sheet. Place the scones in the freezer for 15 minutes,
or in the refrigerator for 30 minutes to chill.

Before baking, brush the tops with more heavy cream,
then sprinkle with coarse sugar. Bake for 20-25
minutes, until light golden brown on top.


Cream Cheese Glaze (optional):
1 tablespoon cream cheese, softened to room temp
1 tablespoon unsalted butter, softened to room temp
1/2 cup powdered sugar
2 tablespoons heavy cream

Mix ingredients until you have a lump free glaze.

Tuesday, November 11, 2025

Carrot Cake Scones

Carrot Cake Scones
These carrot cake scones are loaded with all of the good stuff – plenty of shredded carrots, coconut, pecans, raisins and some candied ginger for a fiery kick. Finished with a tangy cream cheese glaze, these scones are not too sweet and they're perfect for breakfast.
Ingredients:
2 ¼ cups all-purpose flour
¼ cup light brown sugar
½ tsp salt
1 tbsp baking powder
1 tsp cinnamon
¼ tsp nutmeg
⅛ tsp cloves
1 cup grated carrots
½ cup raisins
½ cup shredded sweetened coconut
½ cup chopped nuts (we used pecans)
3 tbsp crystallized ginger, finely chopped (optional)
½ cup heavy cream + more for brushing the scones
1 large egg
1 ½ teaspoons vanilla extract
½ cup unsalted butter, frozen
Optional: 2 tablespoons coarse (turbinado) sugar for
topping
Cream cheese glaze recipe follows:

Directions: 
Preheat the oven to 350˚F. In a large bowl. whisk
together the flour, brown sugar, salt, baking powder,
cinnamon, nutmeg and cloves.

Add in the grated carrots, raisins, coconut, nuts, and
ginger, tossing to coat in the flour mixture.

In a separate medium bowl, whisk together the heavy
cream, egg, and vanilla.

Using a box grater, grate the frozen butter into the
bowl with the flour mixture. Gently work the
ingredients together with a spatula or your hands so
butter is evenly distributed, but don’t over-mix.

Add in the heavy cream mixture and gently mix just
until a shaggy dough forms. Avoid over-mixing – you
should still be able to see the butter pieces throughout
the dough.

Transfer the dough to a clean, lightly floured surface.
Using floured hands, shape the dough into a roughly
10-inch disk. Using a sharp knife or bench scraper, cut
the dough into 8 triangle wedges.

Transfer the scones to a parchment paper-lined baking
sheet. Place the scones in the freezer for 15 minutes,
or in the refrigerator for 30 minutes to chill.

Before baking, brush the tops with more heavy cream,
then sprinkle with coarse sugar. Bake for 20-25
minutes, until light golden brown on top.


Cream Cheese Glaze (optional):
1 tablespoon cream cheese, softened to room temp
1 tablespoon unsalted butter, softened to room temp
1/2 cup powdered sugar
2 tablespoons heavy cream

Mix ingredients until you have a lump free glaze.

Monday, September 15, 2025

Kale Citrus Salad


Kale Citrus Salad
Kale has not been the buzz-word in salads lately but the nutritional value is still front and center. This salad was a demonstration by the chefs from the magazine EdibleSanDiego at the Oceanside Harbor, Sunday July 20, show casing the local bounty of fresh fish.
Ingredients:
1/4 cup whole raw nuts (hazelnuts, walnuts, almonds, etc)
1 bunch Kale, about 4 cups washed, ribs removed, and cut into thin
ribbons
2 oranges, supremed (remove pith, and membrane and have slivers or
slices only)
1/2 cup EVOO
1/4 cup orange juice, (save leftover to make dressing).
1/4 cup vinegar. (red wine vinegar or champagne vinegar are good
options).
1/2 to 3/4 teaspoon salt
1/4 teaspoon fresh cracked pepper
1/2 teaspoon Dijon mustard
Parmigiano, freshly grated to serve
Note: Lacinto kale preferred but any kale works great.

Directions:
Toast nuts a dry sauté pan over low-medium heat until fragrant and golden. Watch closely and keep the nuts moving around in the pan to avoid burning. OR toast nuts in oven at 325* for 7 to 10 minutes. Set aside to cool.

Place kale ribbons in a large bowl and massage with dry hands until the kales softens, and the color turns darker green. Depending own the type of kale used, more or less massaging will be needed.

Make the dressing: add the olive oil and the fresh squeezed orange juice (from the leftover orange core), vinegar, salt and pepper, Dijon mustard to a mason jar or large bowl. Shake or whisk vigorously to emulsify. Tastes the dressing and adjust the flavor to your liking by adding vinegar, pepper, mustard, or salt.

Add 1 tablespoon of the dressing to the kale bowl and continue massaging the kale until it is a softer texture and a pleasant chew. Add more dressing, 1 to 4 tablespoons depending on your preference. Crush the toasted nuts with the flat side of a chef's knife on a cutting board or with a mortar and pestle.

Transfer dressed kale to a serving bowl or platter and top with crushed nuts, orange segments, and freshly grated parmesan cheese.

Note: Dressing will keep up to one week in the refrigerator.

Wednesday, March 1, 2023

Classic Raisin Oatmeal Cookies

Classic Raisin Oatmeal Cookies
Is there anything better than a soft, thick, and chewy cookie? I’ve always been a huge fan of oatmeal cookies because there’s so many different things you can mix into them and they’re always delicious.
Ingredients:

3/4 cup softened butter
1 cup packed brown sugar
1/2 cup sugar
1/4 cup milk
1 large egg
1 teaspoon vanilla extract
1 cup all-purpose flour
1 teaspoon ground cinnamon
1/2 teaspoon baking soda
1/4 teaspoon salt
3 cups quick or old-fashioned oats
1 cup Sun-Maid Sun-Dried Raisins
1 cup coarsely chopped nuts (optional)
Directions:
Heat oven to 350° F.
Beat butter, brown sugar, granulated sugar, milk, egg and vanilla until light and fluffy.
Combine flour, cinnamon, baking soda and salt.
Add to butter mixture and mix well.
Stir in oats, raisins and nuts, if using. 
Drop by tablespoonfuls onto greased cookie sheets.
Bake 12 to 15 minutes. (Don't over-bake.)  Remove from cookie sheets.   Cool on wire racks.

Tuesday, April 5, 2022

Nieman Marcus Cake

Nieman Marcus Cake
So  F-A-S-T and E-A-S-Y
Ingredients:
Cake
1 box cake mix, any flavor
1 stick butter
2 eggs
1 cup chopped nuts
Icing
1 (8-ounce) package cream cheese, softened
1 (16-ounce) box powdered sugar
1 egg

Directions:
Blend cake mix, butter and eggs. Mix in nuts.
Spread batter into a greased and floured 13 x 9 pan. 

Mix all ingredients for icing together. Pour icing on top of the cake batter.

Bake at 350°F for 45 minutes.

Monday, January 3, 2022

Toasting Nuts ~ 5 Ways

Toasting Nuts
Many baking recipes call for nuts. But the really smart ones call for toasted nuts. To say browning brings out the flavor in nuts is a decided understatement: A bit of heat applied for a small amount of time “blooms” raw nuts, releasing their aromatic volatile oils and “caramelizing” their surface. The result? Nuts that start out “Yeah, OK” and end up “Whoa, these taste great!”

So when you see a recipe that calls for “1 cup diced walnuts, toasted,” what do you think? Heat the oven? Get out the frying pan?Golden-brown, evenly toasted nuts are the goal. Is there a best way to get there?

Your chosen method for toasting nuts may well depend on balancing how much time you have, how much attention you want to spend, and the tools available to you.

Whichever method you choose, you'll want to transfer the hot nuts to a room-temperature receptacle once they’re toasted to prevent further browning. Oh, and even if your recipe doesn’t call for toasting the nuts before using them — if they’re an interior ingredient (rather than an external topping), go ahead and toast them. You’ll be glad you did.

Check out the following five options for toasting nuts to decide what works best for you. I've chosen walnuts for all of my testing here, but keep in mind that the higher the nuts' oil content, the faster they'll toast; pine nuts and macadamia nuts are especially prone to quick browning.

Using the stovetop? A cast iron or other heavy skillet is an excellent choice for toasting nuts. Thinner pans can heat unevenly, making it more difficult to control how quickly the nuts brown.

1) Fast and furious: Frying pan
Attention level: High.
Approximate time: 2 to 7 minutes, depending on heat.

Pros: You can see the nuts toast in real time and pull them from the heat when they’re the exact shade of brown you like; no having to open the oven or microwave to check progress.

Cons: It’s very difficult to get the nuts to brown evenly, despite constant stirring. And if your attention wanders for even a few seconds at the end, nuts can go from perfect to burned.

How to do it: Heat a heavy skillet over medium heat; don’t grease the pan. When hot, pour in nuts and spread into a single layer. Cook, stirring constantly, until nuts are as brown as you like and smell “toasty.”

Tip: The hotter your pan, the quicker the nuts will cook and the more likely they are to brown unevenly and exhibit burned spots. Cooking over lower rather than higher heat and stirring constantly is your best bet for even toasting.Toasting nuts in the oven is convenient when you're preheating it for your recipe anyway.

2) Tried and true: Oven
Attention level: Moderate.
Approximate time (depending on degree of browning): 10 to 15 minutes at 325°F.

Pros: You can toast three half-sheet pans of nuts at once if you like; your oven is perfect for large quantities. It's also a slower, gentler method of toasting (read: easier to control) than pan-frying.

Cons: Even if you’re only toasting a small amount of nuts, be ready to stand by and stir to redistribute them across the pan — perhaps more than once. Nuts on the outer edges will brown more quickly than those in the center, so even toasting requires attention. Also, since the nuts are inside the oven and not in plain view, it’s harder to keep a close eye on them.

How to do it: Spread nuts in a single layer on a parchment-lined baking sheet (or in a smaller baking pan). Bake in the center of a preheated 325°F oven, stirring to redistribute nuts every 5 minutes or so. Keep your eyes peeled and your nose on alert: Nuts in the oven can quickly go from just right to burned. When you start smelling the nuts, they’re probably done.

Tip: Using parchment not only keeps your pan clean, it’s a handy way to move nuts once they’re done. Simply grab the parchment and nuts, gently bend one end into a spout, and pour the nuts into your mixing bowl or a storage container.Note the overdone nuts around the edges; I didn't stir to redistribute them around the plate midway through their time in the microwave.

3) Tricky the first time, easy thereafter: Microwave
Attention level: High the first time; low once you have the process nailed.
Approximate time (depending on degree of browning and power setting): 5 to 12 minutes

Pros: You don’t need to heat your whole oven just to toast a handful of nuts. And once you nail your own microwave’s best process for toasting nuts (power setting and time), you can easily replicate it again and again.

Cons: Nuts can toast quite unevenly if you don’t watch them carefully and stir to redistribute across the plate or pan when necessary.

How to do it: Spread nuts in an even layer on a flat microwave-safe plate. Using the power setting of your choice (I use full power), heat in 1-minute increments, stirring in between. When nuts start to brown, heat in 30-second increments. When done, write down and save exactly how long it took to toast nuts to perfection on your chosen power setting.

Tip: The first time you toast nuts in your microwave, you should stand by and check them every minute — which is a pain. But once you determine your microwave takes 10 minutes to toast nuts on high power, you’re all set. Going forward, there’s no need to check the nuts every minute; simply break that 10-minute toasting time into two 5-minute bursts with a quick stir in between.An 8" parchment round is the perfect liner for my Gourmia air fryer basket, preventing diced nuts from falling through the basket's vent holes.

4) Quick, reliable, and hands off: Air fryer
Attention level: Low.
Approximate time (depending on degree of browning): 3 to 7 minutes.

Pros: Speed and ease! Without paying any attention at all, you can toast a cupful of nuts in 5 minutes or so.

Cons: Capacity is limited by the size of your machine.

How to do it: If nuts are small enough to fall through the holes in your air fryer tray or basket, line the receptacle with parchment. Spread nuts in a single layer, not heaped up in a mound or unevenly distributed across the basket or tray’s surface.

If your air fryer doesn’t include a recipe for toasting nuts, experiment with a small amount first — about 1/4 cup should do it. Choose a low temperature (e.g. 325°F), and a short time — say, 3 minutes. Add or omit the preheat cycle, your choice. Press the start button, and after 3 minutes assess whether you need to add more time. Remember, write down your total time at the end (and whether or not you used the preheat cycle) in order to avoid needless experimentation in the future.

Tip: Despite what you might have heard or read online, nuts don’t need to be sprayed with oil before toasting; they naturally contain enough oil to brown nicely on their own.Set it and forget it: I program my Zojirushi bread machine to the jam cycle, add nuts, and come back to thoroughly roasted nuts when the cycle is finished.

5) Slow roasted, not toasted: Bread machine
Attention level: Low.
Approximate time (depending on degree of browning): 2 1/2 to 5 hours (in a Zojirushi bread machine).

Pros: Cooking nuts in your bread machine roasts them through and through, as opposed to just toasting their surface; this full-nut roasting can produce superior flavor.

Cons: The process is slow, taking upward of 5 hours for deeply roasted nuts.

How to do it: Place nuts in your machine’s bucket; they don’t need to be in a single layer, though the deeper you pile them, the longer they’ll take to roast through. Select the jam cycle and press Start. One complete jam cycle should roast 1 cup of nuts lightly; two cycles will roast nuts to a deep golden brown. Time-consuming? Yes. But what’s the difference, when you don’t have to stick around to watch the process?

Tip: When you complete one cycle, check the nuts by tasting them; are they as flavorful as you'd like? If not, let the machine cool for a couple of minutes with the lid open, then close the lid and restart, making sure it’s still programmed for the jam cycle.
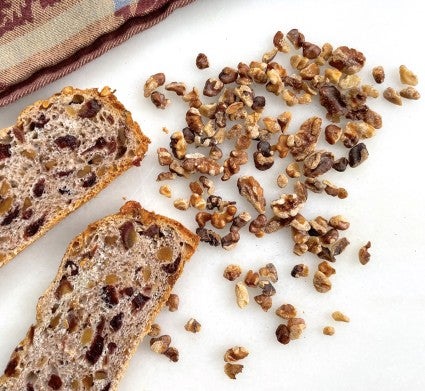
My favorite Tuscan Coffeecake gets its superior flavor from dried fruit and toasted walnuts. 
Toasting nuts: there’s no best way

As with most things baking, there are many paths to the same destination: in this case, well-toasted nuts. It’s tempting to think, “Yeah, but which is best?” Ultimately, the best way to toast nuts is the way you like the most.

Try as many of these methods as you like; you’ll soon see that one or two meet your needs better than the others. Personally, I prefer to toast nuts in my air fryer: It’s fast, reliable, and doesn’t heat up the kitchen. For larger quantities, I go with my oven or bread machine. But again: entirely up to you.

How about that other baking staple that frequently calls for toasting, shredded coconut? For me, one method stands head and shoulders above the others:
Sunday, November 14, 2021

Chewy Chocolate Ginger Molasses Cookies

Chewy Chocolate Ginger Molasses Cookies

Ingredients:
3/4 cup butter
1/3 cup dark brown sugar
1/3 cup granulated sugar, plus extra for rolling
1/3 cup molasses
1 1/2 tablespoon fresh ginger
1 large egg
1 tsp vanilla extract
1 1/2 cups all purpose flour
1/2 cup cocoa powder
1 teaspoon baking soda
1 teaspoon cinnamon
1 teaspoon ground ginger
1/2 teaspoon fine sea salt
1 cup chocolate chips and/or chopped nuts

Directions:
Whisk melted butter, sugars, and molasses in a large bowl.  Whisk in fresh ginger, egg, and vanilla.  Sift the dry ingredients into the bowl and stir until combined. (dough will be soft).  Stir in the chocolate and or chopped nuts.  Chill dough for at least 2 hours or overnight.

Preheat oven to 350*F.  Grease 2 baking sheets or line with parchment paper.

Portion 1 tablespoon of dough into a bill.  Roll each cookie into granilated sugar to coat and place on the baking sheet 2" apart.  Bake 10 to 12 minutes, until the crinkle and feel set edges when gently pressed,  Cool cookies on the trays for 10 minutes before removing.  Makes about 30 cookies.

Monday, August 16, 2021

Veggie Burgers

Veggie Burger


Veggie burger essentials

Al dente beans: Choose beans that have a firm texture and cook them from scratch until they’re just al dente to solve the problem of a mushy texture. Try Negro, Bayo, or Ayocote Morado.

Sauteed veggies: Sauté the veggies beforehand to remove moisture and add depth of flavor.

Smoky flavor: Chipotle chiles or smoked paprika kicks the flavor up a notch.

Coarsely ground nuts: Make for a hearty bite.

Panko bread crumbs: Perfectly binds the ingredients together.

Crumbled salty cheese: Adds moisture and seasoning right into each patty.

Serves: 6   Time: 30 minutes (plus bean cooking and chilling)
Cookware: medium skillet, food processor, grill or large cast-iron skillet

Ingredients:
Patties
⅓ lb dried beans (makes ~2-⅓ cups cooked), flavored to your liking (see our cooking guide)
1-½ tbsp vegetable oil, plus more for cooking the patties
½ cup finely chopped onion (any color) or scallions
Up to 1 cup veggies (grated or very finely chopped): fresh peppers, roasted red peppers, mushrooms, beets, carrots, sweet potato, zucchini, etc.
3 cloves garlic, minced
1 chipotle chile in adobo sauce, finely chopped, or 1-½ tsp smoked paprika
¾ cup toasted nuts, pulsed in a food processor into small pieces: cashews, walnuts, almonds, etc.
½ cup finely crumbled feta or cotija cheese (optional)
2 tbsp mayonnaise (or substitute with vegan mayonnaise)
1 egg (or substitute with 1 tbsp ground flax mixed with 2-½ tbsp water)
¾ cup panko breadcrumbs
¾ teaspoon coarse salt
½ tsp freshly ground black pepper

Burger fixings
6 hearty hamburger buns
Sliced cheese: muenster, Swiss, sharp cheddar, pepper jack
Condiments: mayonnaise, ketchup, mustard, hot sauce, BBQ sauce, etc.
Toppings: crisp lettuce, juicy sliced tomato, thinly sliced onions, pickled onions, smashed avocado, dill pickles, pickled jalapeños, fried egg, etc.

Directions:
Prepare the beans: Cook beans according to our guide in the cooking vessel of your choice. Reduce the cooking time by 5 minutes (pressure cooker), 20 minutes (stove top) or 1 hour (slow cooker) so that the beans are nearly tender, but not quite cooked through. Once cooked, strain very well and allow to cool.

Sauté the veggies: Meanwhile, heat 2 tbsp of the oil in a medium skillet over medium heat. Add vegetables (minus garlic) and sauté about 5 minutes. Add garlic and cook, stirring frequently, until fragrant, about 2 minutes. Add chipotle or smoked paprika and stir until fragrant, about 30 seconds. Transfer mixture to a large bowl and allow to cool.

Pulse the ingredients: Place nuts in a food processor and pulse until chopped into small pieces (stop before nuts become a smooth meal). Add to the bowl with vegetables. Transfer strained beans to the food processor and add cheese. Pulse just until beans are roughly chopped. Transfer mixture to the bowl with the other ingredients.

Mix everything together and chill: Add mayonnaise, egg, bread crumbs, salt, and pepper to the ingredients in the bowl. Mix thoroughly with a wooden spoon or your hands. Divide mixture into 6 equal portions and form each portion into a patty about ¾ inch thick and roughly as wide as the buns you are using. Cover in plastic wrap and refrigerate for at least 2 hours (and for up to 3 days) to let everything firm up before cooking.

Cook the patties: For the grill: Heat the grill and brush the patties with oil. Grill over a low to moderate flame for 4-6 minutes per side, until well browned and cooked through, topping with cheese at the end if desired. If they start to burn before they’re fully cooked, move them to the sides of the grill to finish cooking over indirect heat. For the stovetop: Heat 2 tsp oil in a cast-iron skillet over medium-low heat. Cook 2-4 patties at a time (depending on how many will fit comfortably) until well browned and cooked through, about 6 minutes per side, adding more oil as necessary in between batches.

Dress up and serve: Toast the buns if desired. Spread top and/or bottom buns with condiments, place patties on bottom bun, and top as desired. Enjoy immediately.


Wednesday, January 15, 2020

Warm Mixed Nuts With Rosemary And Shallots

Warm Mixed Nuts With 
Rosemary And Shallots
Makes 5 cups.  This recipe is best if eaten the day they are made.
Ingredients:
5 cups mixed nuts i.e. walnuts, cashews, almonds, 
   pecans, and hazelnuts
1 tablespoon extra-virgin olive oil
2 small shallots, thinly sliced crosswise to yield 
   approx. 1/4 cup
3 garlic cloves, thinly sliced lengthwise
2 tablespoons unsalted butter
1/4 cup coarsely chopped fresh rosemary 
1/4 teaspoon cayenne pepper
1 tablespoon firmly packed dark brown sugar
1 tablespoon Kosher salt

Directions:
Heat the oven to 350*F.  Place the nuts in a single layer on 2 rimmed baking sheets.

Toast until the nuts are golden and fragrant, 8 to 12 minutes, rotating the pans halfway through the toasting.  Transfer the nuts to a bowl and set aside.

Heat the olive oil in a small skillet over medium heat.  Add the shallots and garlic, fry until golden, 3 to 5 minutes.  Transfer the shallots and garlic to paper towels.  Set aside.

Melt the butter and pour it over the nuts.  Add the rosemary, cayenne, brown sugar, and salt.  Stir well to combine.  Toss in the crispy garlic and shallots.  Serve warm  The nuts may be reheated in a 300*F oven for 10 minutes.

Recipe from Carrie Jackson

Makes 2 1/2 cups  Half recipe.
2 1/2 cups mixed nuts
1 1/2 teaspoons extra virgin olive oil
1 small shallot to yield 2 tablespoons
1 1/2 garlic cloves
1 tablespoon unsalted butter
2 tablespoons chopped fresh rosemary
1/8 teaspoon cayenne pepper
1 1/2 teaspoon packed dark brown sugar
1 1/2 teaspoon Kosher salt

Thursday, March 31, 2016

Easy Nutty Toffee

Easy Nutty Toffee
My cousin Ann Baker shared this "Tried and True" recipe. 
Ingredients:
Melt 6 T butter in large skillet.
Add 2 C sugar
2/3 C water  
5 cups nuts, any kind or mixture
*
Directions:
Cook over medium heat about 5 mins stirring often. 
Add 5 cups nuts - unsalted but any kind. Can be all cashews. I added peanuts, pine nuts, walnuts and pecans. In second batch I added 1/2 cup dried cranberries. 
Continue to stir until mixture darkens and liquid is mostly absorbed, about 15 or more minutes.
Remove from heat and quickly stir in 
2 teaspoon nutmeg, 
2 teaspoon cinnamon  
1 or more tablespoon sea salt.
Quickly pour into greased cookie sheet, thinning out layer with wooden spoon. 
Allow to dry several hours. Makes about 8 cups.

Sunday, January 12, 2014

Stanford Hospital Prune Cake

Stanford Hospital Prune Cake
Although details are lost of the origin of this recipe which first appeared in the Sunset Magazine in the 1940's. The hospital is located  in Palo Alto, California.  The cake continues as a favorite. It makes a good coffee cake as well as a dessert.

Ingredients:
1/2 cup butter
2 cups sugar
6 eggs, separated
3 cups all-purpose flour
2 teaspoons baking powder
2 teaspoons baking soda
1 teaspoon cinnamon
1 teaspoon ground cloves
1 teaspoon salt
1/2 teaspoon nutmeg
2 1/4 cup finely chopped moist-pack pitted prunes
1/2 cup chopped nuts
1/2 cup buttermilk (or regular milk mixed with 
    1 1/2 teaspoons vinegar)
1 tablespoon lemon juice
Sweetened whipped cream

Directions:
Cream the butter and sugar well.  Add the egg yolks, and beat smooth.  Sift the flour, measure, then sift with the baking powder, soda, salt and spices.  Coat the prunes and nuts with some of the flour mixture, reserve.

Add remaining flour mixture a little at a time, alternately with the milk, to the butter mixture, beating smooth.  Then mix in the lemon juice, prunes, and nuts.  Beat egg whites stiff and fold into batter.

Pour into three greased and floured 9" round cake pans.  Bake in a 375^F oven about 30 minutes, or until a toothpick inserted comes out clean.  Serve warm in wedges, with sweetened whipped cream on top; or put layers together with whipped cream.
Serves 12 to 16

Saturday, November 2, 2013

Light Roasting Nuts and Seeds


Light Roasting Nuts and Seeds 

Raw nuts or those that have been lightly roasted at home are healthier than most that have been commercially available roasted nuts and seeds.  That's because, even if they are dry roasted, most commercially available nuts and seeds are heated to a high temperature (over 350' F), which damages their delicate oils, resulting in the formation of free radicals.   The problem with free radicals is that cause lipid peroxidation - the oxidizing of fats in artery walls - the first step in the build up of plaque and atherosclerosis.  If you want to enjoy nuts and seeds with a lightly roasted flavor, I suggest low temperature roasting.  Here is how you can create delicious and healthy roasted nuts and seeds in a manner of minutes.  


Directions:
Preheat oven to 160 - 170 F.  Place a thin layer of nuts or seeds (about 2 cups) on a cookie sheet.  Bake for 15 - 20 minutes.  To enhance the "roasted" flavor, try putting a little liquid aminos or tamari (soy sauce) in a spray bottle and misting the nuts or seeds before cooking.


This article was copied from Facebook.