Showing posts with label Snack. Show all posts

Saturday, November 15, 2025

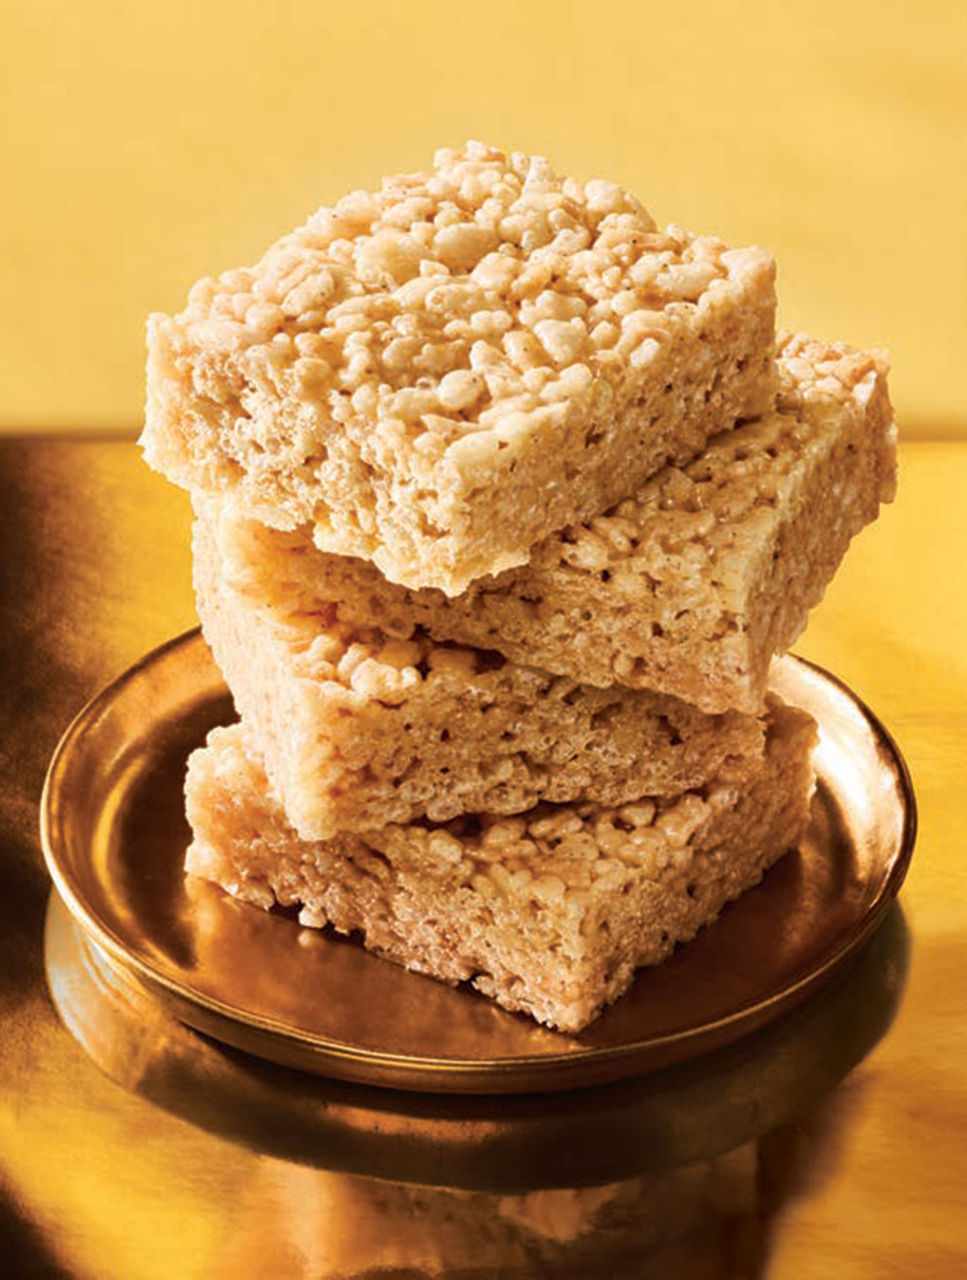
Bourbon, Vanilla Bean, and Brown Butter Crispy Rice Squares

Bourbon, Vanilla Bean, and 
Brown Butter Crispy Rice Squares
Dress up a childhood classic for the grown-up palate without turning on the oven! Vanilla bean and bourbon-infused brown butter transform the sweet marshmallow treat into a warm, 
mellow, adults-only delight that stores well and makes a 
wonderful addition to a holiday treat box.
Ingredients:
1/2 cup (125 mL) unsalted butter
2 tbsp + 1 1/2 tsp (30 + 7 mL) bourbon, divided
1 bag (455 g) regular marshmallows
2 tsp (10 mL) vanilla paste
3/4 tsp (4 mL) fine sea salt
8 cups (2 L) crispy rice cereal


Directions:
Line a 9 × 13-inch (23 × 32-cm) baking dish with parchment paper and set aside.

In a large pot, melt butter over medium heat, stirring often, until beginning to foam. Once foaming, stir continuously until butter smells sweet and nutty and turns golden brown, about 3 to 5 minutes.

Pour 2 tbsp (30 mL) bourbon into browned butter and continue stirring for 1 minute to cook off some of the alcohol.

Add marshmallows, stirring constantly, until almost melted and smooth. Working quickly, stir in vanilla paste, salt and remaining bourbon, and stir until mixture is smooth and creamy.

Reduce heat to low and immediately stir in cereal, stirring until fully combined.

With lightly buttered or damp hands, press mixture evenly into the prepared dish. Cool to room temperature, about 1 hour, before cutting into squares. Store at room temperature in a tightly sealed container for up to 1 week.     
Makes 12 large or 24 small squares

Thursday, July 10, 2025

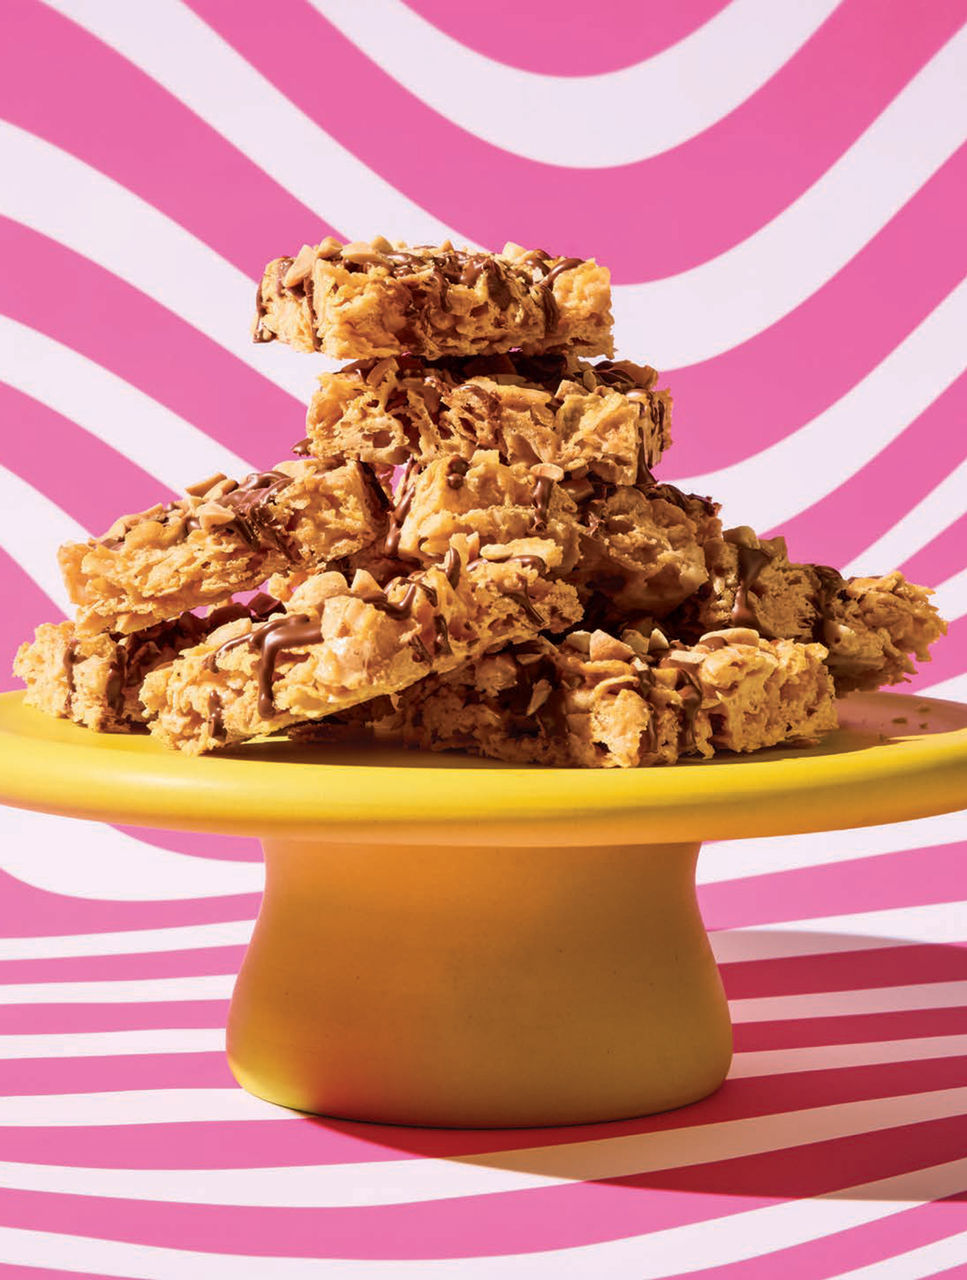
Miso Brown Butter Cornflake Treats With Chocolate & Peanuts

Miso Brown Butter Cornflake Treats 
with Chocolate & Peanuts
This chewy, crispy, nutty dessert takes inspiration from both the popularity of Rice Krispie treats and the viral cornflake brittle recipe. Using cornflakes instead of puffed rice ups the crunch factor, while 
browning the butter and adding a dollop of miso create a depth of flavor. You could use white or semi-sweet chocolate, but we found milk chocolate tastes best.  Makes 24 squares
Ingredients:
1/4 cup (60 mL) unsalted butter, plus more for greasing pan
5 cups (1.25 L) mini marshmallows
1 tbsp (15 mL) white or yellow miso, at room temperature
6 cups (1.5 L) cornflakes (see TIP)
4 oz (115 g) milk chocolate, chopped
1/3 cup (80 mL) chopped dry-roasted peanuts
Directions:
Butter a 9 × 13-inch (23 × 33-cm) metal baking pan. Line bottom and long sides with a single piece of parchment paper, leaving a little overhang on both sides—this will make it easy to remove for cutting.

Heat butter in a medium-size pot over medium heat. Cook, swirling pan occasionally, until there are deep brown flecks on bottom and butter smells nutty—watch carefully. Reduce heat to medium-low. 

Add marshmallows and miso. Using a silicone spatula, stir constantly, until melted and smooth, about 1 1/2 minutes. Remove from heat. Quicky fold in cornflakes until evenly coated with marshmallow goo.

Transfer to prepared pan and lightly pat into an even layer with spatula. Cool completely, about 45 minutes.

Lift cooled mixture out of pan onto a cutting board. With a sharp serrated knife, cut into 4 by 6 rows to make 24 squares. Place squares on a parchment-lined baking sheet.

In a small heatproof bowl set over a pan of barely simmering water—bottom of bowl should not touch  water—melt chocolate, stirring occasionally, until smooth, about 3 minutes. Cool 5 to 10 minutes then
transfer to a disposable piping bag opened up inside a coffee mug. 
Cut a tiny hole at tip and drizzle chocolate over squares. Sprinkle peanuts over squares. Refrigerate until chocolate has firmed up, 15 to 20 minutes.

Transfer to airtight containers lined with parchment paper. (If layering, place parchment between layers.) Store at room temperature for up to 3 days. Makes 24 squares

Tuesday, December 10, 2024

Broiled Clementines.

                                             
Broiled Clementines
Eat these as a treat, toss them into salads, use them on ice cream.
The wonder of broiled clementines goes on and on. Chop them up and they become a delightful addition to morning yogurt or scattered on pancakes or waffles. Stir them into muffin batter.  Serve them to compliment the richness of roast pork. And know that this method also works beautifully with lemons or Meyer lemons.
Ingredients:
4 Clementines
Directions:Preheat a broiler. Ideally setting a cooking rack about 3 inches below the heating element. Prepare a large baking sheet by either lightly oiling it or lining it with a sheet of parchment.
Working with 1 clementine at a time, cut off and discard the stem end. Then slice the rest of the clementine, discarding the other end piece (or broiling it—your choice!). Remove and discard and seeds. 
Lay the slices in a single layer on the prepared baking sheet. Repeat with the remaining 3 clementines.

Broil the sliced clementines until the edges are browned and the juices are bubbling, 3 to 5 minutes. The timing with vary greatly between broilers, so keep a close eye on them. Remove the pan and gently turn each clementine slice over. Broil on the second side until those edges are also browned, 3 to 5 minutes. As always with broiling, keep a careful watch so they don’t go from beautifully browned and caramelized to burnt and ruined.

Notes
Let the broiled clementines cool before using. They will keep, covered, for up to 1 day, or covered and chilled up to 3 days.

Wednesday, November 27, 2024

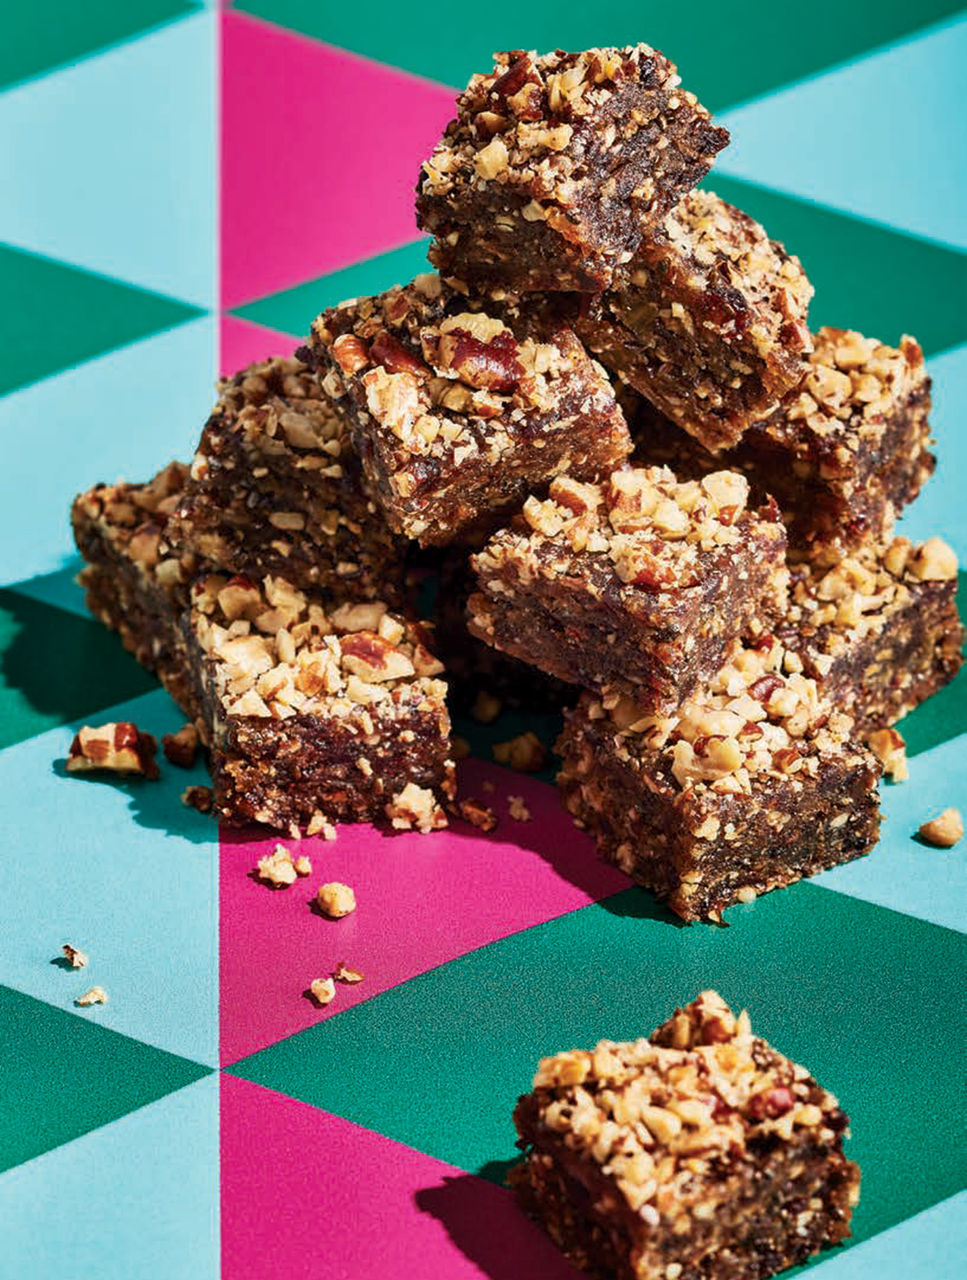
Pecan, Date and Dried Cherry Bites

Pecan, Date and Dried Cherry Bites
Medjool dates and pecans form the base of these fudgy cubes, which are no-bake, healthy and delicious—a rare combination during the holidays. For the best possible texture, try to serve them fridge-cold.
Ingredients:
14 oz (400 g) Medjool dates, about 20, pitted
1/2 cup (125 mL) dried cherries
1 1/4 cups (310 mL) chopped pecans, toasted, divided
1/2 tsp (2 mL) cinnamon
1/4 tsp (1 mL) fine sea salt
2 tbsp (30 mL) chia seeds
Directions:
Line a 5 x 8-inch (12 x 20-cm) loaf pan with parchment paper, leaving overhang on two opposite sides. Set aside.

Combine dates, cherries, 1 cup (250 mL) pecans, cinnamon and salt in a food processor and pulse until mixture is well combined and clumps together. Add chia and pulse until just combined. Scrape mixture into prepared pan, lay a piece of plastic wrap on top and press mixture into an even layer.

Finely chop remaining 1/4 cup (60 mL) pecans and sprinkle evenly overtop of date mixture, pressing down lightly to embed. 

Wrap pan in plastic wrap and place in the fridge for 4 hours or overnight—block should feel very solid. Use parchment to pull mixture out of pan and place on a cutting board. Cut block into 32 bite-size pieces. Transfer to an airtight container, using parchment between layers to keep pieces from sticking together. Refrigerate up to 2 weeks.


Makes 32 pieces

Sunday, October 27, 2024

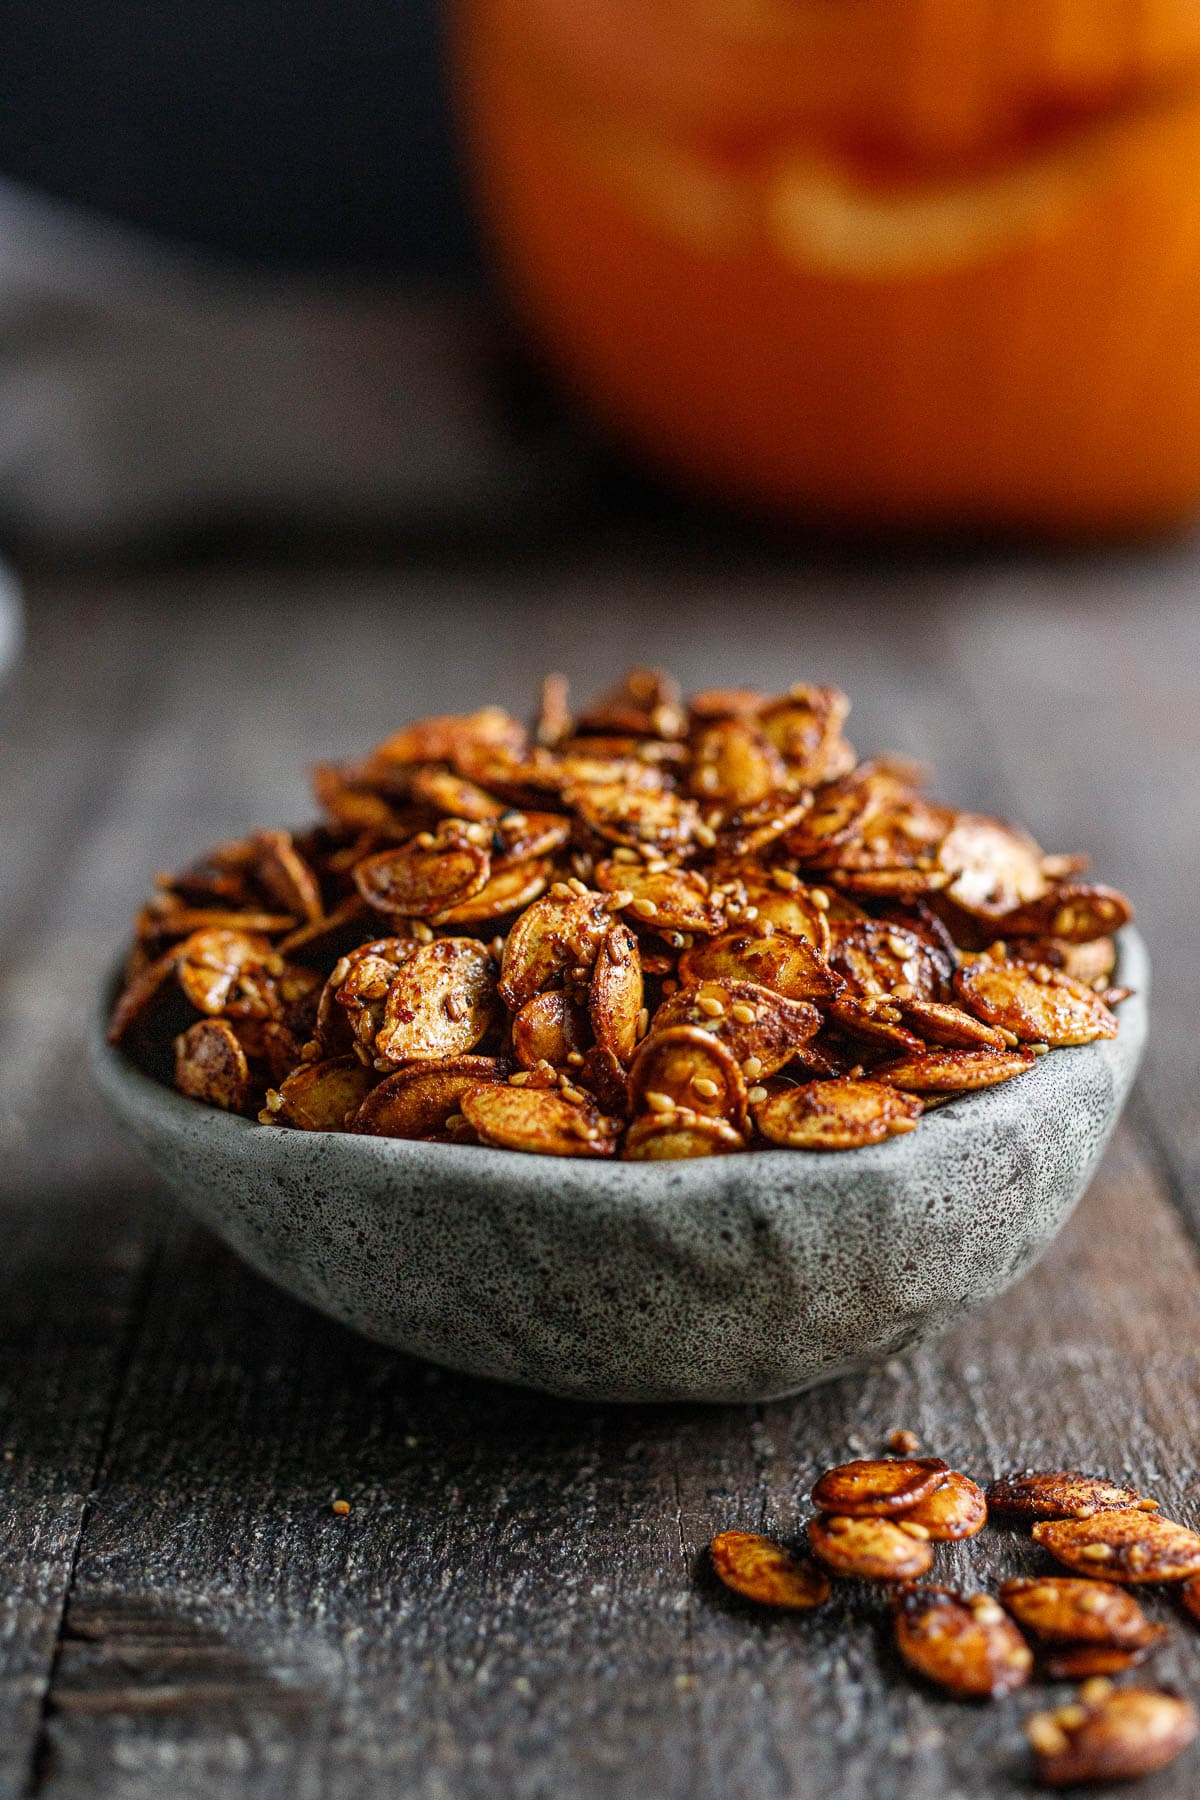
Maple Roasted Pumpkin Seeds

                                                           
                              Maple Roasted Pumpkin Seeds
Ingredients:
3 tablespoons Maple Syrup
1 teaspoon olive oil
2 teaspoons of seasonings or seeds

Variations (Based On 1 Cup of Pumpkin Seeds)

3 tablespoons maple Syrup + 1 teaspoon olive oil + 2 teaspoons Garam Masala, optional fennel seeds or black mustard seeds, and salt to taste.

2 tablespoons maple syrup, 1 teaspoon olive oil + 2 teaspoons Everything Bagel Spice

2 tablespoons maple syrup, 1 teaspoon olive oil + 1 -2 teaspoons cajun seasoning, ( or taco seasoning, or Tajin, salt to taste

2 tablespoons maple syrup + 1 teaspoon olive oil + 2-3 teaspoons Za’atar, salt to taste.

Directions:
Scoop out the seeds using a metal spoon. One 10-inch wide pumpkin generally yields roughly one cup of pumpkin seeds, once all is said and done. 

Place seeds in a bowl of water and massage them, to help remove pulp. The seeds will float to the top and the pulp will sink down.

Scoop them out, and strain.

At this point, you can boil them in salted boiling water for 10 minutes or skip this step. See recipe notes.

Pat them dry- or dry them on a sheet pan in the preheating oven, stirring every so often. You can also leave them overnight on the counter on a paper towel-lined sheet pan.

The drier you can get them, the crispier they will be. Once dry, Spread them out on a parchment-lined sheet pan.

Season! Time to have fun! Pick one of the variations or just start creating. Toss with maple syrup, a little oil and spices. 

Other seeds are a nice touch here too! Spread them out again, and bake, on the middle rack in a 375F oven, stirring every 5 minutes.

Keep in mind, you can make different flavors, all in one go.

Watch them carefully while baking, especially after the 10 minute mark- you want them to get golden but not burn!

Pull them out, stir or “fluff” them a bit and let them cool down completely for about 20-30 minutes.

They will crisp up as they cool.

Wednesday, September 18, 2024

Blooming Onion With Dipping Sauce

Blooming Onion With Dipping Sauce
Breaded and deep-fried onions are a staple in many restaurants. They're also delicious at home, but they can be difficult to make. If you're looking for an easier way to enjoy this appetizer, consider using your air fryer! Read on for step-by-step instructions on how to make the perfect air fryer blooming onion.
Ingredients:
1 large sweet onion
2 large eggs
1/2 cup buttermilk
1 cup all-purpose flour
1 teaspoon onion powder
1 teaspoon garlic powder
1 teaspoon sweet paprika
1/2 teaspoon kosher salt
1 pinch cayenne pepper, or black pepper
Directions:
Preheat your air fryer to 350 degrees F, air fryer setting.
Slice the top 1/2 inch of the stem end of the onion and peel the whole onion.
Place the onion cut side down so the root end is facing up on a cutting board.
Taking a knife, about 1/2 inch from the root, cut down four slices, so the onion is now cut into fourths but still intact. Between those cuts, make three more even cuts, making sure not to cut through the root or accidentally cut off a chunk. Turn the onion right side up and generally separate the petals, set aside.                                                                              

In a medium-sized bowl, big enough to fit the onion, whisk the eggs and buttermilk together, set aside.  

In another medium-sized bowl large enough to fit the onion, whisk together the flour, onion powder, garlic powder, paprika, salt, and cayenne.

The best you can dip the onion in the buttermilk mixture, coating everything. You may need to use your hands for this. Place the onion into the flour and coat with the flour. 

Separate the petals in each step to make sure to coat. Shake off any excess flour. Dip the onion once again in the buttermilk mixture the once again in the flour mixture. You can also open the petals up and sprinkle the flour inside to make sure everything is coated.

Spray the air fryer basket with cooking spray.

Place the onion cut side up into the basket.

Spray very generously with cooking spray.

Air Fry for 20-25 minutes, or until golden brown, and the onion is tender.  

About every 8 minutes, open up the air fryer and respray cooking spray on top.

Serve with the dipping sauce.

Dipping Sauce
Ingredients:
½ cup mayonnaise
2 tablespoons cream-style horseradish sauce
1 tablespoon ketchup
⅓ teaspoon paprika
⅓ teaspoon cayenne pepper
¼ teaspoon salt
⅛ teaspoon dried oregano
1 pinch ground black pepper

Directions:
Combine the ingredients and refrigerate until ready to serve. Best to make ahead allowing flavors to develop and meld.

Saturday, February 10, 2024

Broiled Onion Slices

Broiled Onion Slices
Ingredients:
2 lage onions, sliced 1/4" discs
1 cup almond flour
1 teaspoon paprika
1/2 teaspoon garlic powder
1/4 teaspoon cayenne pepper (optionally available, for a spicy kick)
Salt and pepper to style
2 large eggs, overwhelmed
2 cups shredded mozzarella or cheddar

Directions:
Preheat oven to 400°F (200°C) and line a baking sheet with parchment paper.

Separate onion slices into discs.

Combine almond flour, paprika, garlic powder, cayenne, salt, and pepper in a shallow dish.

Whisk eggs in one other dish.

Dip onion discs in egg, then coat with almond flour combination.

Bake 15 minutes till cheese is bubbly and golden.

Let cool, then remove from the baking sheet.


Thursday, January 25, 2024

Date Dadus ~ Vegan

 
Date Dadus
Dadus make decadent, high-fiber treats that taste absolutely amazing. Plus, they are easier on blood sugar than most sweets. These raw refrigerator cookies rank high in protein, fiber and healthy fats—making them an ideal homemade, energy boosting treat. You can use any variety of dates in this recipe. The larger the date, the fewer you need. Fan favorites are medjool, Dayri, honey and barhi dates.
Ingredients:
1 16-ounce jar raw tahini, refrigerated for 2 hours or more
8−10 dates any variety, pitted and roughly chopped
¼ cup maple syrup or alternative liquid sweetener
¼ cup raw cacao powder cocoa powder or carob powder
½ cup dried currants or raisins
½ cup raw sunflower seeds or pumpkin seeds
¼ cup dried figs roughly chopped
1/8 cup raw cacao nibs optional
3 tablespoons crystallized ginger finely chopped
1 tablespoon fresh ginger peeled and minced
1 teaspoon ground cinnamon
1 teaspoon ground cardamom
½ teaspoon ground clove
1/8 teaspoon vanilla or cardamom extract
1/8 teaspoon high-quality mineral-rich salt
½ cup dark chocolate chips optionalDark Chocolate
For The Coating
½ cup vanilla granola or ½ cup raw almonds
¼ cup raw cacao powder cocoa powder or carob powder
½ teaspoon ground cardamom or cinnamon
½ teaspoon ground dried rose petals optional
Directions:
Pinch of high-quality, mineral-rich salt First prepare the coating. Finely grind the granola or almonds in a blender or food processor. 

Pour the ground granola into a small bowl and combine with the cacao powder, cardamom, optional rose petals and salt. Set aside.

Place all the remaining ingredients, minus the optional chocolate chips, into a food processor and combine until the mixture forms a sticky mass. Mix in the (optional and recommended) chocolate chips.

Alternatively, combine everything together in a large bowl with a wooden spoon. Just make sure you’ve finely chopped the dried fruit and that your batter gets well mixed.

Roll the sticky batter into 1-inch or 1-ounce balls. Roll each ball in the ground granola mixture so that it’s well coated and place on a plate.

Refrigerate after making. Dadus will keep in a well-sealed container in the refrigerator for up to 1 month. They also freeze beautifully.  Makes about 30 balls.


Friday, January 19, 2024

Bacon Wrapped Brussels Sprouts

Bacon-Wrapped Brussels Sprouts
Seafood has become so expensive that beloved bacon-wrapped scallops have been eliminated from many people’s budgets. However, if you swap the bivalves for Brussels sprouts—a natural with bacon—you’ve got a tasty hors d’oeuvre destined to become a new holiday tradition. For an easy dip, you could serve them with bottled blue cheese dressing. Makes 24
Ingredients:
12 slices bacon (not thick-cut), halved lengthwise
24 Brussels sprouts, trimmed
24 toothpicks
2 tbsp (30 mL) olive oil
Salt and freshly ground black pepper to taste
2 tsp (10 mL) coarsely chopped rosemary
2 tbsp (30 mL) honey
1 tbsp (15 mL) white or red wine vinegar
2 tbsp (30 mL) water

Directions:
Preheat oven to 400°F (204°C).

Working one at a time, wrap a piece of bacon around a Brussels sprout, secure with toothpick and place in a casserole dish just large enough to hold all wrapped sprouts snugly. Repeat with remaining bacon and Brussels sprouts. Drizzle with olive oil. Season lightly with salt and generously with pepper.

Bake for 20 minutes. Remove from oven and gently loosen with a spatula. Sprinkle with rosemary and drizzle in honey, vinegar and 2 tbsp (30 mL) water. Bake until sprouts are tender and bacon is crisp, about 20 minutes more.

Remove from oven. Using a pastry brush, brush sprouts with liquid in pan. Let sit for 10 minutes—they will be very hot—before serving. Remove toothpicks, if desired.


Monday, October 16, 2023

Amazing Spanikopita

Amazing Spanakopita
Experience the richness of Greek cuisine with this ultimate Spanakopita recipe. A perfect blend of crispy phyllo dough, earthy spinach, and tangy feta cheese, this dish promises a burst of flavor in every bite.
Prep Time: 45 mins. Total time 1 hr. 30 mins.
Utensils required:
Large sauté pan, Mixing bowls, Pastry brush, 9x13-inch baking dish
Sharp knife,  
Measuring cups and spoons
Ingredients
1 lb fresh spinach leaves
1 cup crumbled feta cheese
1/2 cup olive oil
1/4 cup chopped fresh dill
1/4 teaspoon nutmeg
Salt and pepper to taste
16 sheets phyllo dough thawed
Additional olive oil for brushing

Directions:
Prepare the Spinach:
Preheat a large sauté pan over medium heat. Add spinach and cook until wilted. Drain excess water and set aside.

Make the Filling:
In a mixing bowl, combine wilted spinach, feta cheese, dill, nutmeg, salt, and pepper. Mix well.

Preheat the Oven:
Preheat your oven to 350°F (175°C).

Assemble:
Brush a 9x13-inch baking dish with olive oil.
Place a sheet of phyllo at the bottom of the dish, brush with olive oil. Repeat this step, layering and brushing each sheet, until you have 8 sheets layered.  Spread the spinach-feta mixture evenly over the phyllo.

Continue the layering process with the remaining 8 sheets of phyllo, brushing each with olive oil.

Bake:Place the baking dish in the preheated oven and bake for 40-45 minutes, or until the phyllo is golden brown and crispy.

Notes
Serving Suggestions:Cut into squares and serve hot.A side of Greek salad or tzatziki sauce complements the dish wonderfully.


Friday, October 6, 2023

Harvest Nachos With Squash, Brussei

Harvest Nachos with Squash,
Brussels Sprouts & Smoked Cheddar
Breaking out of its Tex-Mex shackles, Harvest Nachos finds crunchy tortilla chips baked under a bed of two cheeses, roasted fall veggies, dried cranberries and fresh thyme. If you cut the vegetables and grate the cheeses ahead of time, the whole dish comes together in under an hour. It is important to layer nachos so the last bite is as good as the  
first.  Serves 8
Ingredients:
3 cups (750 mL) diced butternut squash, cut into ¾-inch (2-cm) 
   cubes
1 lb (455 g) Brussels sprouts, trimmed, quartered through core
2 tbsp (30 mL) canola oil
Salt and freshly ground pepper to taste
2 tbsp (30 mL) red wine vinegar
2 tbsp (30 mL) water
2 tsp (10 mL) sugar
1 large shallot, thinly sliced into rings
1 lb (455 g) sturdy tortilla chips
½ lb (225 g) smoked cheddar, grated
½ lb (225 g) Swiss melting cheese (Emmenthal, Appenzeller, 
    Gruyère), grated
½ cup (125 mL) dried cranberries
3 tbsp (45 mL) fresh thyme leaves
Lemon wedges for serving

Directions:
Preheat oven to 450°F (230°F).

In a large mixing bowl, combine squash, Brussels sprouts, oil, salt and pepper. Mix thoroughly and transfer to a heavy-duty baking

sheet lined with parchment paper. Bake on lower rack, stirring twice, until browned and soft, about 25 minutes. Remove from oven.

Lower temperature to 350°F (180°F).

While the vegetables are roasting, whisk vinegar, water, sugar and a pinch of salt in small bowl until sugar is dissolved. Stir in shallot. Set aside, stirring occasionally.

Line a heavy-duty rimmed baking sheet with foil. Spread out half the chips and sprinkle with half the cheese, half of the roasted vegetables, cranberries and thyme. Repeat with a second layer using up remaining half of chips, cheese and toppings. Bake until cheeses are melted and nachos are hot, 15 to 20 minutes.

Remove from oven. Drain shallots and sprinkle over nachos. Serve immediately with lemon wedges.

Serves 8

Saturday, August 26, 2023

Cheesy Taco Casserole

Taco Casserole   
The one change made that most distinguishes these from typical tacos is our use of biscuit mix instead of tacos or tortillas. Had we used tortilla chips or actual taco shells, they would have grown soggy once all of our yummy bonus ingredients were piled on top. We found that biscuit dough was a delicious compromise, since it settles into the beef a bit, plus its sturdiness means you can pile whatever other toppings on top that you like! No need to rein it in here, go crazy and make this the taco casserole of your dreamings.
Ingredients;
2 pounds ground beef
1 packet Taco Seasoning
4 eggs
3/4 cup whole milk
1 3/4 cup Biscuit mix OR Bisquick
1/2 cup sour cream
2 cups chopped lettuce
2 cups sharp cheddar cheese, grated
Black Olives, optional
Kosher salt and pepper to taste
Directions:
Preheat oven to 400º F and lightly grease a 9x13-inch baking dish with non-stick spray.

In a large bowl, beat eggs and milk together until combined, then stir in biscuit mix, and salt and pepper, if using. Set aside.

Season beef with salt and pepper, then cook until browned. Drain fat, then stir in taco seasoning.

Place beef in an even layer in greased baking dish, then spread biscuit mix in an even layer on top of beef.

Transfer baking dish to oven and bake until biscuit layer is golden brown, 22-25 minutes.

Remove from oven and let cool 10 minutes, then spread sour cream on top of biscuits.

Top with chopped lettuce, tomatoes and olives, if using, then sprinkle cheddar cheese on top.       
Serve hot and enjoy!   Serves 8

Friday, May 6, 2022

Grilled Kiwi Parfait ~ Coconut-Cashew Granola

Grilled Kiwi Parfait
When it comes to grilling fruit, kiwi is often not considered. This recipe should change that. When grilled, kiwi’s bright green flesh caramelizes and becomes dense with flavour. Paired with thick yogurt and a tropical take on granola, this parfait is parfait for any time. Serving the kiwi warm is optional. You could grill the fruit and assemble the parfaits up to an hour before they are served. Keep them in the fridge until you are ready to serve them.    Serves 6

Ingredients:
3 kiwis, peeled and halved lengthwise
2 tsp (10 mL) vegetable oil
1 tsp (5 mL) lime zest
3 cups (750 mL) thick greek yogurt or skyr
2 cups (500 mL) Coconut-Cashew Granola (recipe below)
2 tbsp (30 mL) honey

Directions:
Preheat grill to medium-high heat.

In a bowl, mix kiwis and oil until evenly coated. Place on grill, cut-side down, until charred and tender, about 2 minutes. Flip and repeat. Remove kiwis from grill and let cool slightly, about 5 minutes.

Cut each kiwi half into ½-inch (1-cm) slices widthwise so that the slices are shaped like half moons.

Mix lime zest with yogurt then divide into 6 jars or glasses. Divide granola on top of yogurt, then arrange kiwi slices on top of granola. Drizzle honey over each parfait and serve.
Serves 6

Coconut-Cashew Granola
There is something extremely satisfying about the crunch of granola. Coconut, cashews and black sesame seeds give a tropical flair to this recipe. Use it in the Grilled Kiwi Parfait or sprinkle it onto your yogurt or fruit salad in the morning. It will keep well on your shelf for a few weeks.

Ingredients:
1 cup (250 mL) large flaked oats
½ cup (125 mL) raw unsalted cashews, roughly chopped
½ cup (125 mL) sweetened desiccated coconut
2 tbsp (30 mL) black sesame seeds
¼ cup (60 mL) coconut oil (at room temperature)
½ tsp (2 mL) cinnamon
½ tsp (2 mL) kosher salt
1 tbsp (15 mL) honey

Directions:
Preheat oven to 375°F (190°C). Line a baking sheet with parchment paper.

In a bowl, mix all the ingredients until well combined. Pour mixture onto prepared baking sheet and bake until golden brown, about 15 minutes. Remove from oven and let cool completely.
Makes 2 cups (500 mL)


Saturday, February 19, 2022

Greek Yogurt And Kale Pesto Dip

Greek Yogurt and Kale Pesto Dip


Tuesday, January 25, 2022

Asparagus And Bacon Pizza

Asparagus and Bacon Pizza

Oma's Tarte Flambée ~ Flammkuchen

Tarte Flambee, aka Flammkuchen, is German pizza with a twist! So easy to make, quick and easy to get creative with. Enjoy this Alsatian treat that’s SO traditionally German! It's so delectably delicious and can be made with many variations.

This one is my favorite with asparagus, bacon, and caramelized onions.

Ingredients:

Dough:

2 cups all-purpose flour
¾ teaspoon salt
½ cup warm water
3 tablespoons olive oil
Topping:
½ cup crème fraîche or Greek yogurt
4 ounces lean bacon, diced
1 medium onion
8 stalks green asparagus (optional)
salt and pepper

Directions:

Mix together flour and salt in a medium-small bowl. Stir in water and olive oil. Mix together with a wooden spoon, until dough is crumbly. Add more water as needed, one tablespoon at a time, until the dough starts to hold together (it usually takes 2 to 3 tablespoons). Knead dough with hands until the dough is smooth and doesn't stick to the sides of the bowl.

Remove dough from bowl, and pour about ½ teaspoon olive oil in bowl to grease it and return ball of dough to the bowl. Roll it around until it has oil all over. Cover bowl with plastic wrap and set put in fridge for about 30 minutes while you prepare the toppings.

Preheat oven to 450°F.

Meanwhile, render the bacon in a frying pan, just until the fat starts to be released (do not let the bacon become crisp.) Remove the bacon to a paper-towel lined plate to drain the bacon fat.

Add the onions to the frying pan and sauté until soft and translucent over high-medium heat, stirring frequently.

Snap off the tough ends of the asparagus. Slice asparagus stalk thinly on the diagonal. Cut the heads, lengthwise, in half.

Line a baking sheet with parchment paper.

Remove dough from fridge. Place on parchment paper and roll out very thin. It should cover the whole baking sheet.

Spoon Greek yogurt over top. Sprinkle with bacon, onion, and asparagus. Sprinkle with salt and freshly ground pepper

Bake in the hot oven, on lowest rack, for about 20 to 30 minutes or until edges are nicely browned and topping is crisp.

Cool, cut, and serve.  Serves 2 to 4

NOTES/HINTS:

Traditionally, the bacon and the onion is added raw on top of the dough and NOT pre-cooked. Personally, though, I like the bacon already rendered and the onions more caramelized than just letting them cook in the oven. Use your preference.

You can divide your dough and top each piece of dough differently.
Sprinkle a little nutmeg over the Greek yogurt

Instead of the creme fraiche or Greek yogurt, you can use fromage blanc, quark, sour cream or equal parts buttermilk and cream cheese.

Friday, November 26, 2021

Cranberry Jalapeno Dip

Cranberry Jalapeno Dip
 This recipe makes a big dish of dip that’s great for a crowd.  The festive red cranberries, green scallions & jalapenos, and white cream cheese make it perfect for your holiday parties.  You can serve this with any type of cracker – whole grain or the traditional refined buttery ones (not as healthy, but oh-so-delicious).

Ingredients:
12 ounces fresh cranberries (one regular size bag)
2 jalapenos, finely chopped
4 scallions, chopped
2 tbsp cilantro, chopped
1/2 cup sugar
1 lime, juiced
1/8 tsp salt
14 ounces cream cheese

Directions:
Add cranberries to a food processor and pulse once. If after once pulse there are still a lot of whole cranberries, pulse once more. Your goal is for most of the cranberries to be cut but you don’t want to puree them.

Pour cranberries in a bowl and mix with jalepenos, scallions, cilantro, sugar, lime juice and salt. Let sit in the fridge for at least 30 minutes (that’s the minimum; longer is fine).

When you're ready to complete the dish, spread cream cheese into a pie plate.

Remove cranberry mixture from the fridge and place in a fine sieve. Let as much juice drain from it as possible.

Top cream cheese with cranberry mixture. Serve with crackers and enjoy!

Monday, October 18, 2021

Carmel Corn

Carmel Corn

Ingredients
15 cups popped corn (1/2 cup kernels, unpopped)
2 tablespoons (39g) molasses
1 cup (213g) brown sugar, packed
8 tablespoons (113g) salted butter, cold
1/4 cup (78g) light corn syrup
1/2 teaspoon baking soda

Directions
Preheat your oven to 200°F and line two large rimmed baking sheets (18" x 13") with parchment. Pour the popped corn into a large bowl (at least 6 quarts); remove any unpopped kernels. Set aside.

In a 3-quart saucepan over medium-high heat cook the molasses, brown sugar, butter, and corn syrup, stirring occasionally until the sugar dissolves. Boil the syrup, stirring occasionally, for 5 minutes until it reaches 250° to 255°F on a digital or candy thermometer. The syrup will darken slightly.

Remove the pan from the heat and add the baking soda; stir well (the mixture will foam).

Immediately (and carefully) pour the hot syrup over the popped corn and stir until the corn is well coated.
Perfect your technique

Spread the hot caramel corn on the sheet pans. Bake at 200°F for 1 hour, stirring every 15 minutes.

Remove from the oven and let cool before storing in an airtight container. This recipe doubles and triples well.

Notes:
Want to add a bit of saltiness to your sweet caramel corn? Add 1 cup of roasted, salted peanuts to the bowl of popped corn before pouring on the syrup. Homemade Cracker Jack®!

To make popcorn balls on a stick, omit the baking soda from the recipe. As soon as you can handle the corn without burning yourself, form it into 1-cup balls, inserting a lollipop stick or skewer at one end of each.

Be sure to assiduously remove any unpopped kernels; you'll get most of them by shaking the bowl of popped corn, and scooping out the hard kernels that sift to the bottom. If you don't remove them, the syrup will allow them to adhere to popped kernels, and the next thing you know — ouch! A dental bill.

Sunday, March 28, 2021

Crunchy Sesame Seed Candy


Ingredients:
Vegetable oil or nonstick cooking spray, for the pan 
2 cups sesame seeds
1/2 cup honey
1/2 cup brown sugar
1/2 teaspoon ground cinnamon
1/4 teaspoon ground ginger

Directions:

  • Coat a 9-inch-square baking pan or dish with oil or non-stick cooking spray; set aside.
  • Put the sesame seeds into an ungreased 10-inch skillet (preferably one with a non-stick surface) and stir them over medium-high heat for about 5 to 10 minutes, or until they are lightly browned and aromatic.
  • Temporarily transfer the seeds (they will be hot) to a bowl, making sure that none are left in the skillet; set aside.
  • Put the honey, brown sugar, cinnamon, and ginger into the skillet and mix them well.
  • Slowly bring the mixture to a boil over medium heat, stirring constantly.
  • As soon as the entire mixture comes to a full rolling boil, cook it vigorously for exactly 2 minutes.
  • Remove the skillet from the heat and immediately stir in the sesame seeds until well mixed.
  • Quickly turn out the hot mixture into the prepared pan and use a metal spatula that has been dipped into cold water to press the candy into a very smooth and even layer.
  • Cool the candy in the pan for l5 minutes, or until it is solid but still lukewarm.
  • Run the spatula around the edge of the candy to loosen it.
  • Then turn out the whole slab of candy onto a wooden board or other cutting surface.
  • Use a sharp knife to cut the large square of warm candy into very small squares, diamonds, or rectangles.
  • Cool the candies completely; then store them in an airtight container at room temperature.
  • If a professional look is desired, roll each cooked candy in a small piece of stiff cellophane and twist the ends.

Wednesday, March 24, 2021

Sausage, Caramelized Onion And Date Pizza

Sausage, Caramelized Onion & Date Pizza

This is a pizza that is loaded with big flavour, which allows it to stand up to all the delicious notes of the Dunkel. The steak sauce as a base is what really helps to unite the two aromatically, not that beer and pizza 
ever really need a helping hand! 


Ingredients:
1 pkg store-bought pizza dough (about 700 g), at room temperature
2 tbsp (30 mL) olive oil14 oz (400 g) spicy Italian sausage, casings removed
2 cups (500 mL) red onion, very finely sliced
½ cup (125 mL) water
⅓ cup (80 mL) steak sauce
½ cup (125 mL) dates, pitted and coarsely chopped
1½ cups (375 mL) mozzarella cheese, grated
1 cup (250 mL) fontina cheese, grated

Directions: 

Preheat oven to 400°F (200°C). 

On a floured surface, roll dough into a rectangle to fit a 12 x 17-inch (30 x 43-cm) lightly greased baking sheet. Spread dough evenly on baking sheet. 

In a large sauté pan, heat oil over medium-high heat, add sausage and break into bite-size pieces with a fork or wooden spoon. Sauté sausage until browned and cooked through, about 7 minutes.

Remove sausage from pan and set aside. Drain all but 1 tbsp (15 mL) oil from pan, add onions and water. Cover and cook onions over medium-low heat until translucent, about 5 minutes. Remove cover and cook on medium-high until all liquid has reduced and onions begin to brown, about 3minutes. 

Cover dough evenly with steak sauce, top with sausage, onions and chopped dates. Sprinkle evenly with cheeses. 

Bake in lower third of oven until the dough is golden on the bottom and the cheese is golden on top, about 22 minutes. 

Let cool for 10 minutes on a cooling rack, then slice into 24 small snack-size slices.

Serves 6

Saturday, January 16, 2021

Coconut Cauliflower Bites With Creamy Honey Mustard Yogurt Sauce, Vegan

Coconut Cauliflower Bites With
Creamy Honey Mustard Yogurt Sauce

Ingredients:
For the Coconut Cauliflower bites: 
1 medium (or half) cauliflower head, leafy parts 
   trimmed, and cut into bite size florets.
1 14 oz. can unsweetened coconut milk
1 cup unsweetened coconut flakes
1 cup Panko breadcrumbs
1/2 cup all-purpose flour
1 tsp salt
1/2 tsp freshly ground black pepper
2 eggs lightly beaten with 1 Tbsp water
Creamy Honey Mustard Dipping Sauce:
1/2 cup plain Greek yogurt
2 Tbsp yellow or Dijon mustard
2 Tbsp honey
1 Tbsp juice from a fresh lemon
salt and pepper to taste
Directions:
For the Coconut Cauliflower bites:
Add your cauliflower florets into a medium glass bowl or ziplock bag and pour in the coconut milk (reserving any cream that has formed in the can for another use). Toss and set aside to marinate for two hours, tossing every 30 minutes or so to get any pieces not submerged mixed in.

Preheat oven to 400 degrees and line a baking sheet with parchment paper.

In either a high speed blender or food processor, pulse the coconut flakes until ground into small crumbs. Transfer to a shallow bowl and add in the panko breadcrumbs. Toss to combine and set aside.

In another shallow bowl, toss together the flour, salt, and a dash of pepper. Set aside.

In a third shallow bowl, add the beaten egg.

Remove the cauliflower florets from the coconut milk and dip into the flour mixture to thoroughly coat. Next, dip into the egg mixture to thoroughly coat and then dip into the breadcrumb mixture to coat. Place coated cauliflower pieces onto your prepared baking sheet, making sure to leave a little space between each floret, and repeat the dipping steps with the remaining florets.

Bake for 30 minutes or until starting to brown all over, tossing halfway through. Serve warm with the Creamy Honey Mustard dipping sauce.

Creamy Honey Mustard Dipping Sauce:

Whisk together the yogurt, mustard, honey, and lemon juice. Taste and season with salt and pepper.