Showing posts with label Whole Wheat Flour. Show all posts

Wednesday, March 29, 2023

Pain de Campagne (Country Bread)

Pain de Campagne (Country Bread)
Using unfed sourdough starter, minimal kneading, long fermentation, and baking in a hot Dutch Oven are some of the techniques  Once you read through and bake this recipe yourself,  you'll no doubt discover exactly how to adapt it to your own schedule — which means you may very well find yourself baking this country bread weekly (or even daily!).   Prep 20 mins.  Bake 40 to 45 mins    Total 21 hrs 5 mins
Yield 2 large loaves

Ingredients
*900g Unbleached Bread Flour
100g Whole Wheat Flour
800g tepid water (75°F to 80°F )
20g salt
40g sourdough starter, unfed/discard
*Don't have a scale? See "tips," below, for approximate volume measurements.

Directions
Combine all the ingredients in a large bowl or extra large (6-quart) dough rising bucket. It's fine to use sourdough starter straight from the refrigerator if that's where you keep it, though it's best if you've fed it at least once in the past week.

Mix the ingredients by hand until the dough forms a shaggy mass and the flour is hydrated. Cover the bowl or bucket and let the dough rest at room temperature for 15 minutes.

Fold the dough by grabbing a section from one side with a wet hand, lifting it up, then pressing it down to the middle to seal. Repeat this with the remaining three sides of the dough. Cover and let it rest for 15 minutes.

Fold the dough two more times, giving it a 15-minute rest between the two, for a total of three sets of folds in 45 minutes. As you perform the folds you’ll notice that the dough smooths out, gaining strength and becoming elastic.

Cover the dough tightly after the final fold and leave it at room temperature (approximately 72°F) for about 12 hours. It's helpful to mark the height of the dough (use the markings on the bucket or a large rubber band around your bowl) to gauge how much it rises.

Turn the dough out onto a lightly floured or greased surface and divide it into two roughly equal pieces. Gently form the pieces into rounds, cover them, and let them rest seam-side down for 10 minutes.

Generously dust two lined bannetons or towel-lined large bowls with whole wheat flour.

Shape the loaves into tight rounds (boules), place them seam-side up into the prepared bannetons or bowls, and cover them with a plastic bag or shower cap.

If your dough doubled (or came close to doubling) during the 12-hour rise period, immediately place the boules into the refrigerator. But if your dough was a bit more sluggish, let the boules rest at room temperature for 30 to 60 minutes to give them a head start on the second rise.

Let the boules rest in the refrigerator for 8 to 12 hours, depending on your schedule (not theirs!).

When you're ready to bake, place two Dutch ovens or other lidded bread bakers onto a rack set in the lowest third of the oven. If you just have one Dutch oven or don't have room for two in your oven, you can certainly bake one loaf at a time, leaving the other in the refrigerator while the first one bakes. Preheat the oven (and Dutch ovens) to 500°F for 45 minutes (you'll want to ensure that they're tough enough to withstand preheating; not all are).

Turn each loaf out onto a piece of parchment paper and slash them with a lame or sharp knife.

Remove the preheated Dutch ovens from the oven. With the help of the parchment, carefully transfer the loaves to the Dutch ovens.

Cover the Dutch ovens with their lids and place them in the oven.

Immediately reduce the oven temperature to 450°F and bake the covered loaves for 20 minutes. Remove the lids from the Dutch ovens and bake the loaves for 20 to 25 minutes uncovered, until they're a deep golden brown.

Remove the loaves from the oven and carefully turn them out of the Dutch ovens onto racks to cool completely. If you're baking one loaf at a time repeat the process with the second loaf, preheating the Dutch oven if necessary.

Store leftover bread, loosely wrapped, for several days; freeze for longer storage.

Tips from our Bakers

The proportion of the ingredients in this recipe is partly why we like it so much; the weights of the ingredients are easy to remember if you work in baker's percentage. That said we recognize that some bakers prefer to work with volume measurements, so here are the volume approximations for the ingredients in this recipe:

– 7 1/2 cups Unbleached Bread Flour
– 3/4 cup + 3 tablespoons Whole Wheat Flour
– 3 1/2 cups tepid water (75°F to 80°F )
– 1 tablespoon salt
– 3 tablespoons sourdough starter, unfed/discard

Monday, August 30, 2021

Brown Butter Rye Scones

                                                                                  
Brown Butter Rye Scones
Although rye is often associated with bread, we think this classic grain has endless possibilities when introduced into other baking categories. In this scone, pumpernickel flour adds a subtle dimension to flavors from other grains. We enjoy the tasty wholesomeness of these scones served plain, but for over-the-top tastiness, we recommend adding the glaze. King Arthur Flours.

Prep: 15 mins  Bake: 15 to 18 mins  Yield: 8 scones

Ingredients
Scones
8 tablespoons (113g) unsalted butter, cold, divided
1/2 cup (64g) Six-Grain Blend or old fashioned oats
1/2 cup (57g) Whole Wheat Flour
1 cup (106g) pumpernickel flour medium rye flour
1 tablespoon baking powder
3 tablespoons (35g) sugar
1/2 teaspoon salt
2 large eggs
1/3 cup (74g) milk  (try reducing to 1/4 cup)
Glaze:
2 tablespoons (28g) unsalted butter, browned
3/4 cup (85g) confectioners' sugar
1/4 teaspoon vanilla-butternut flavor or 1/2 teaspoon vanilla extract
1 to 2 tablespoons (14 to 28g) milk

Directions:
To make the brown butter: Melt, then cook 5 tablespoons of the butter in a saucepan over medium heat, swirling occasionally, until golden brown. Pour into a heatproof container, cool slightly, then freeze until solid, about 2 hours.  Illustrated directions follows.

Scones:
Preheat the oven to 425°F. Line a baking sheet with parchment.

Combine the 6-grain blend, flours, baking powder, sugar, and salt until well blended.

Work both the chilled brown butter and the additional 3 tablespoons butter into the flour mixture until unevenly crumbly.

Combine the eggs and milk, then mix into the flour-butter mixture.

Turn the dough out onto a floured surface and pat it into an 8" disk. Cut into 8 wedges and place on the baking sheet.

Bake the scones for 15 to 18 minutes, until golden. Cool slightly before glazing.


To make the glaze: 
Brown the butter as you did for the scones, then combine all the ingredients, adding enough milk to make a spreadable glaze. Glaze scones while still warm, and serve.

Store any leftover scones well-wrapped, at room temperature, for several days. Freeze for longer storage.


How to make brown butter:

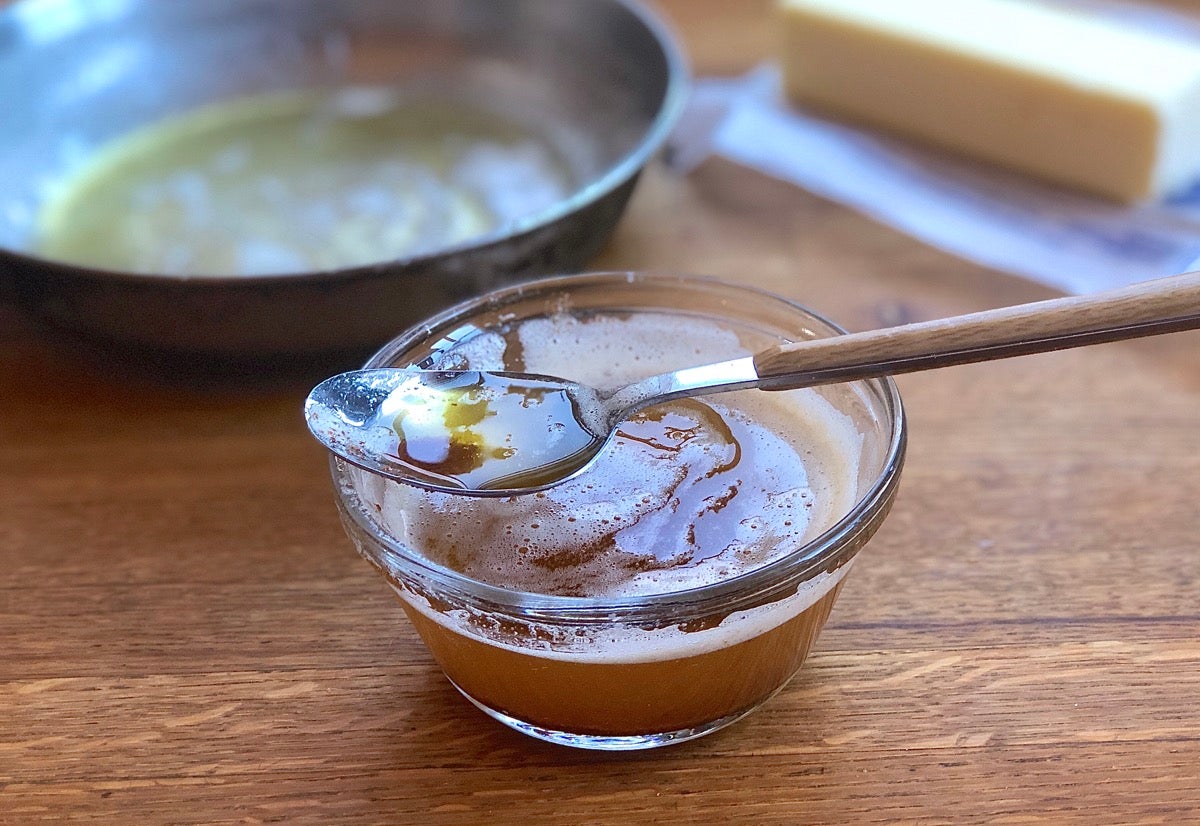
Bowl of hot brown butter, straight from the skillet.

How does regular butter become brown butter?

Brown butter is butter that’s heated until its water evaporates and its milk proteins and sugars (specifically, lactose) turn brown. This process is an example of the Maillard reaction, a chemical interaction between amino acids and sugar that results in darkened color and the production of a variety of flavor compounds. The Maillard reaction is responsible for the “toasty” flavor in a slice of breakfast toast, the delicious crispy edges of a chocolate chip cookie, and the rich flavor of a golden-brown croissant.

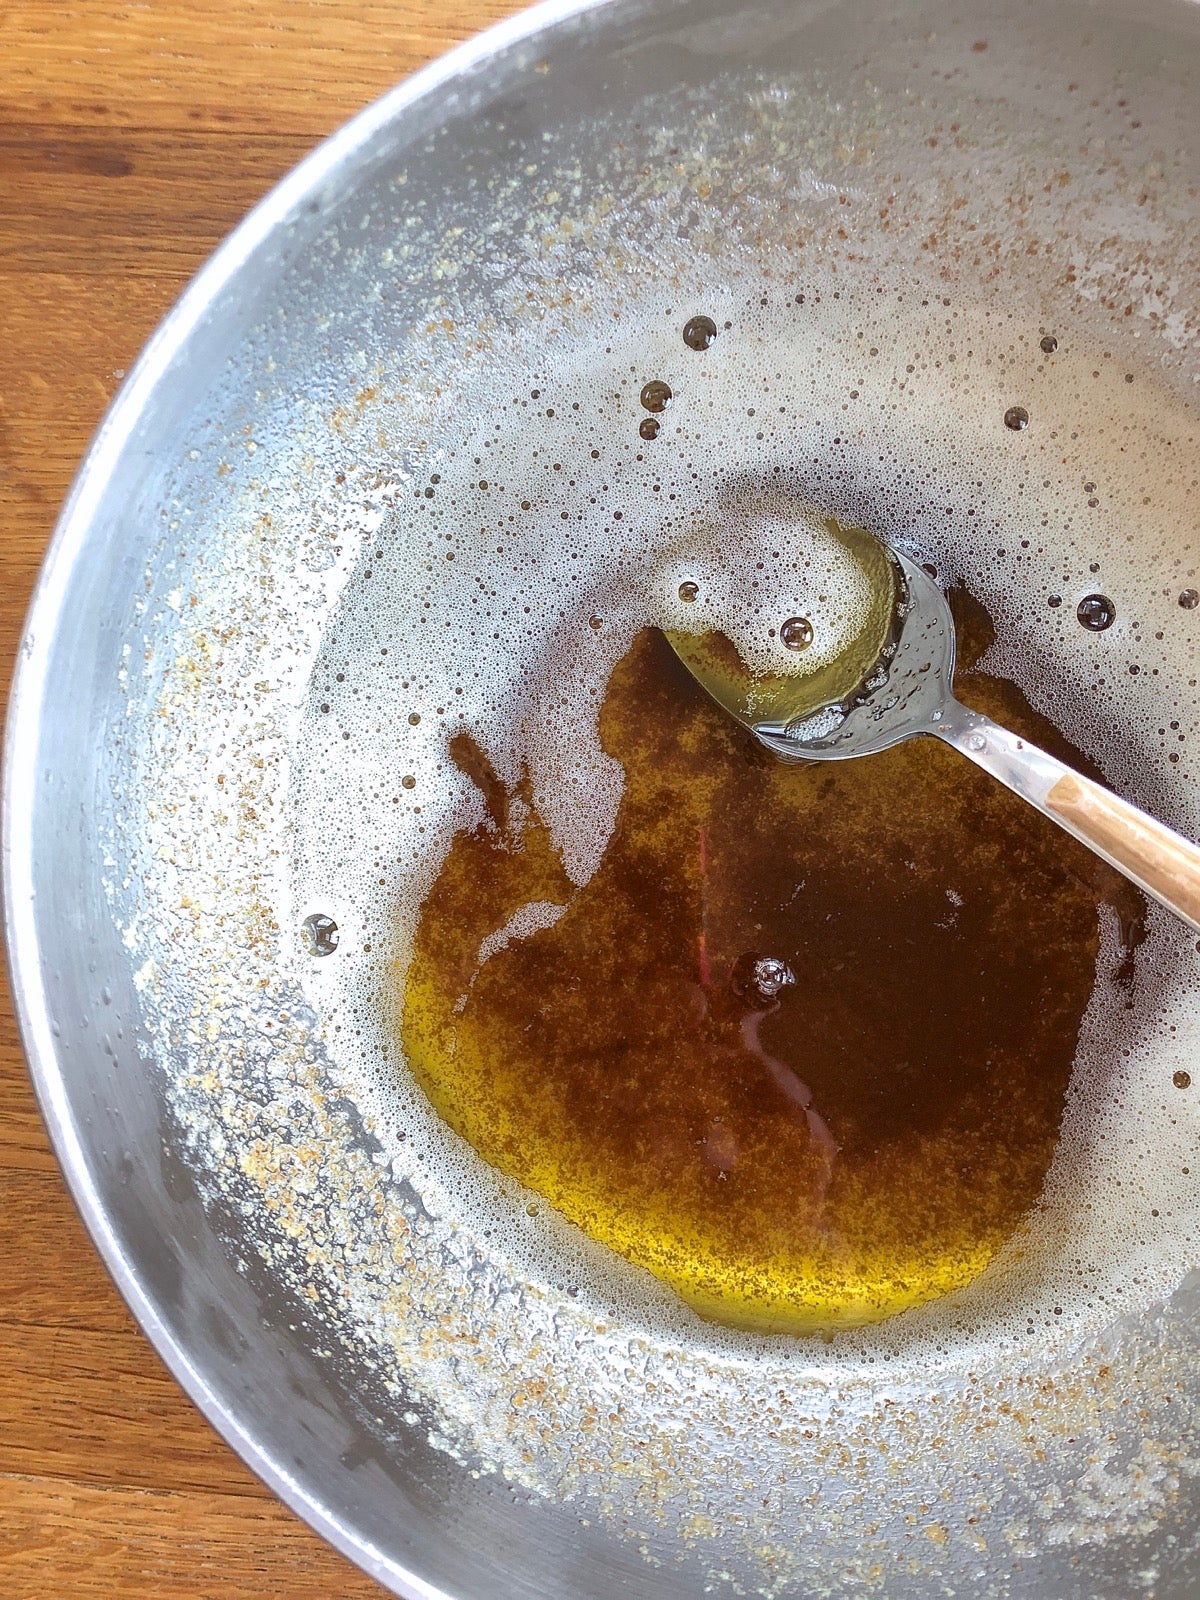
Brown butter in a skillet showing dark milk solids at the bottom of the pan.

When butter is melted and then simmered, it gradually separates into two parts: its inherent fat, and its milk solids, which drop to the bottom of the pan. The fat darkens somewhat, but the silty looking milk solids brown significantly, moving from light mahogany to almost black as the butter simmers.

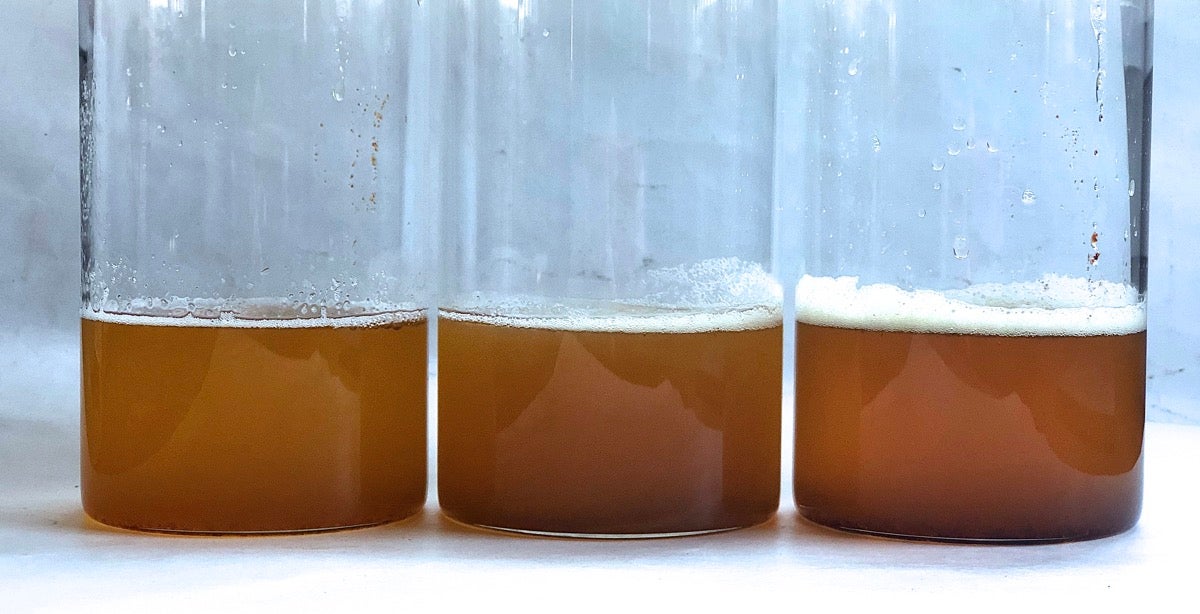
Three clear glass lab jars of liquid brown butter, showing slight differences in color.
Three "strengths" of brown butter. Note the base of each jar, where you can see the dark milk solids. The jar on the left is light brown butter, the one on the right darker, and the one in the center darker still.

Brown butter’s flavor reflects the color of its milk solids: very light solids give the butter mild flavor; dark solids, a much richer, “toastier” experience.

For comparison's sake think of maple syrup, whose grades range from light amber to dark/robust: the darker the syrup, the more maple-y it tastes. Thus with brown butter: the darker it is, the stronger its butter flavor. (Stop short of letting that sediment turn black, though: blackened butter is bitter.)

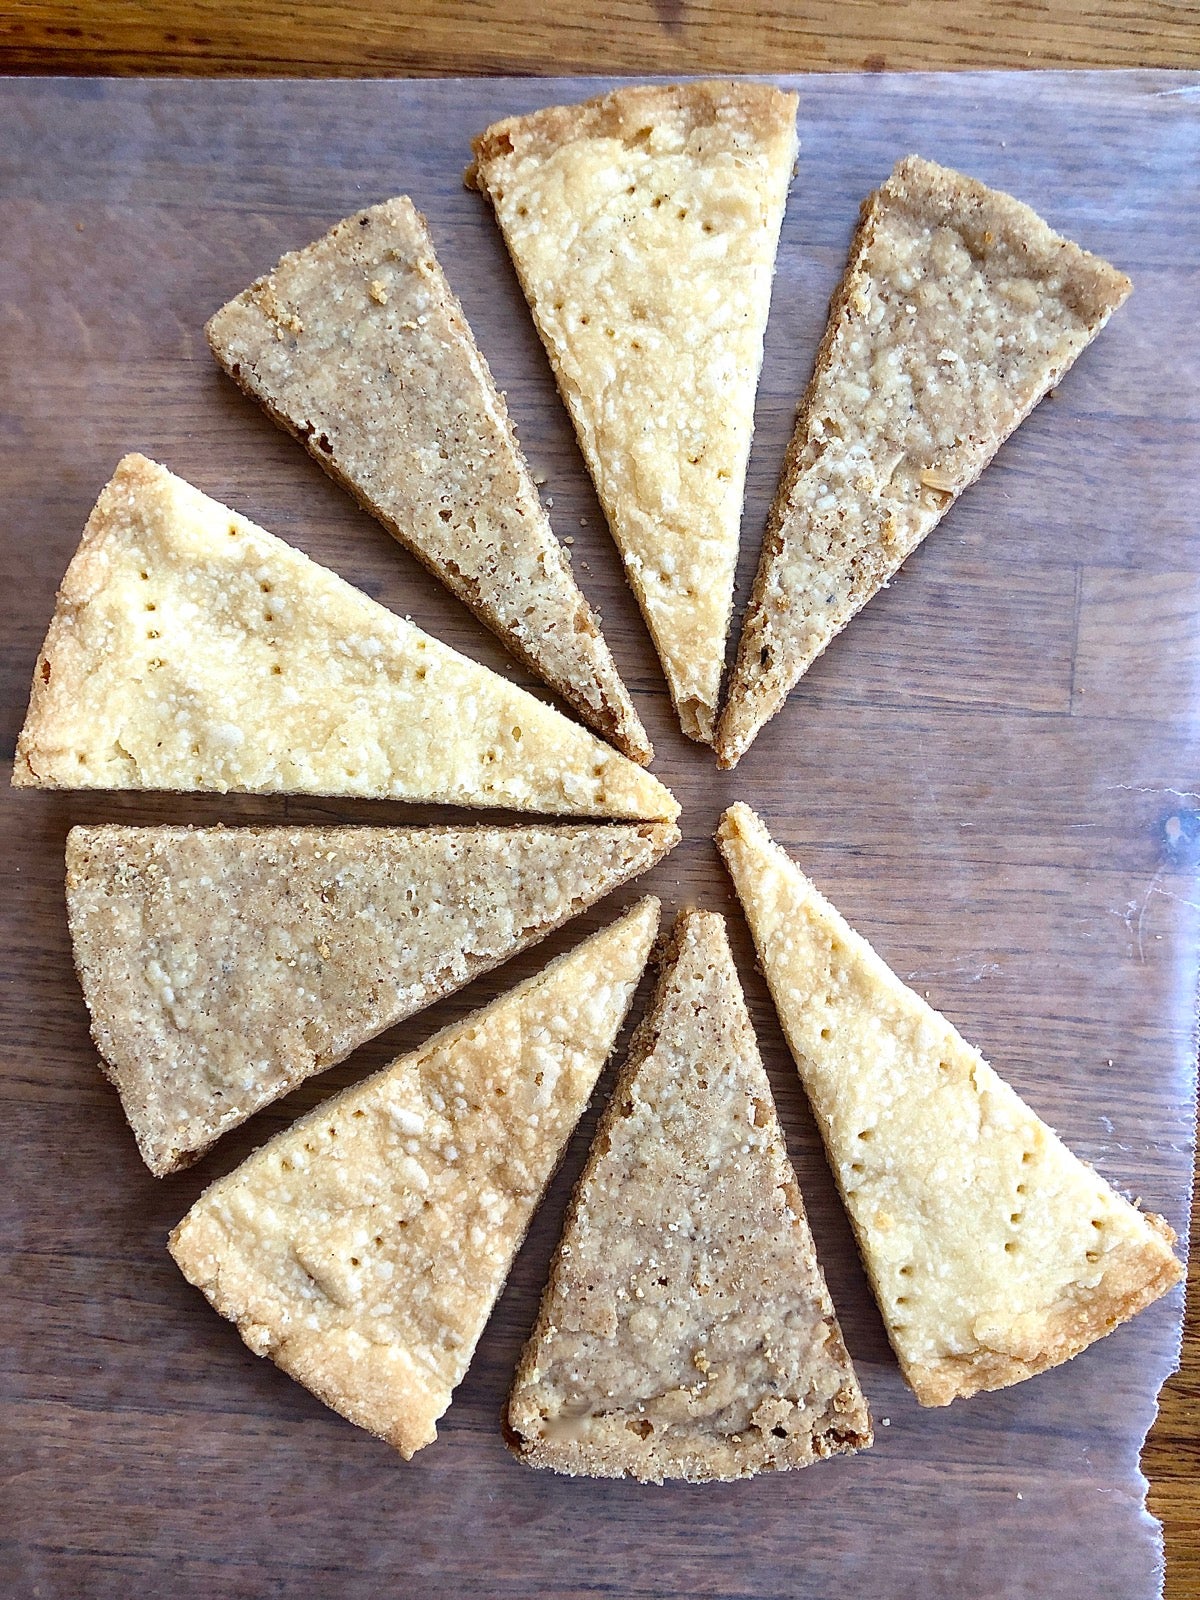
Shortbread wedges on a counter, some made with brown butter, some with standard butter.
Two batches of shortbread, one made with brown butter, one with standard butter. Notice the difference in color.

What can I bake with brown butter?

Use brown butter just about everywhere you’d use regular butter, including in cookies and cake, biscuits and pie crust, scones and muffins and pastry. It's also superb in icings and frostings: try it in our favorite Italian Buttercream, or Soft Cookie Frosting.

A couple of caveats: Brown butter may darken the color of lighter baked treats like sugar cookies and yellow cake. Also, brown butter's dark flecks may be visible. Just think of them as you would vanilla bean specks: indicative of wonderful flavor.

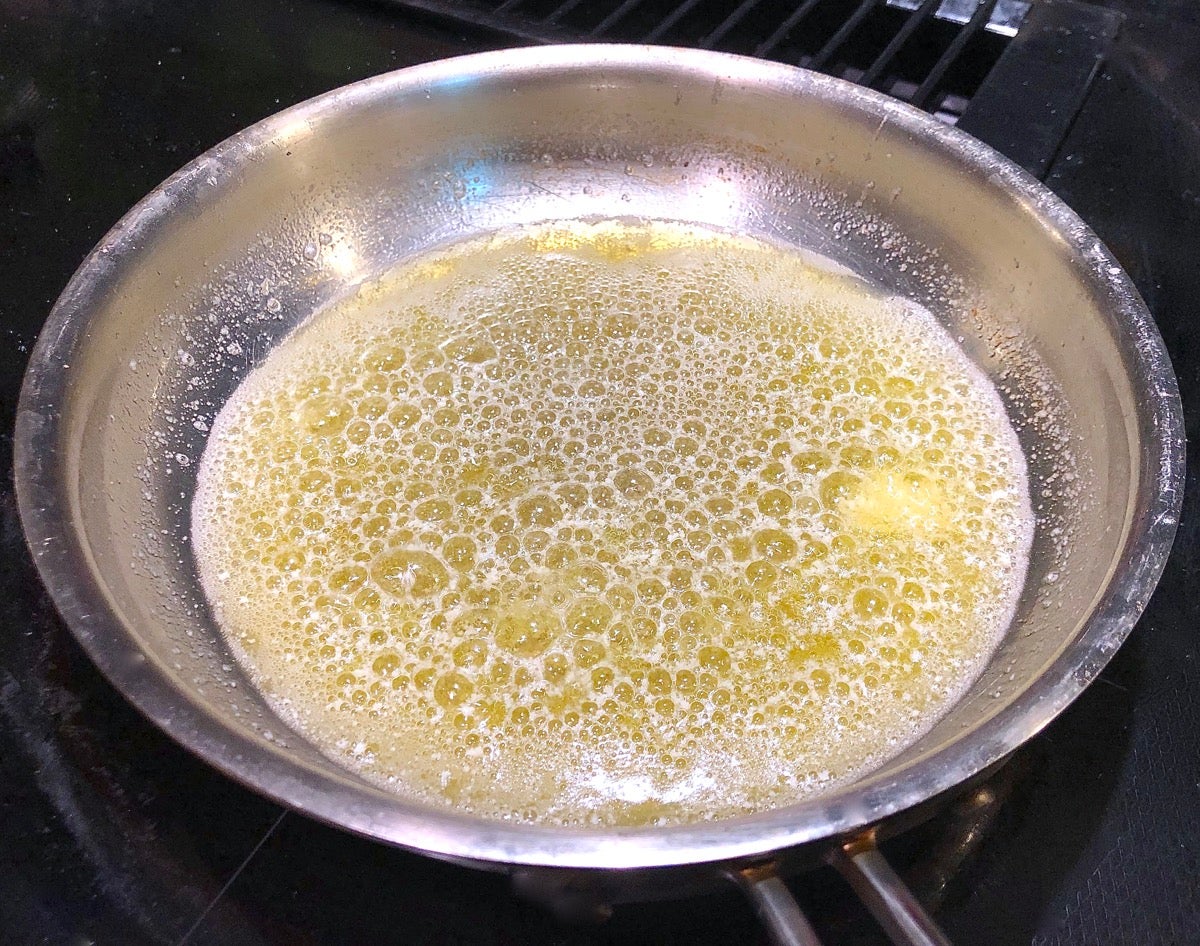
Butter sizzling in a shallow skillet.

How to make brown butter

This is a really easy process — but it’s not foolproof. You either pay attention, or pay the price: burned, bitter butter. Still, 10 to 12 minutes at the stove isn’t onerous, and brown butter is certainly worth the effort.

I typically use 8 ounces (227g, 16 tablespoons, two sticks) of unsalted butter. Why unsalted? Salted butter runs the risk of becoming too salty as the butter’s liquid evaporates. Salted butter also tends to foam more as it melts, making it difficult to see the butter underneath changing color.

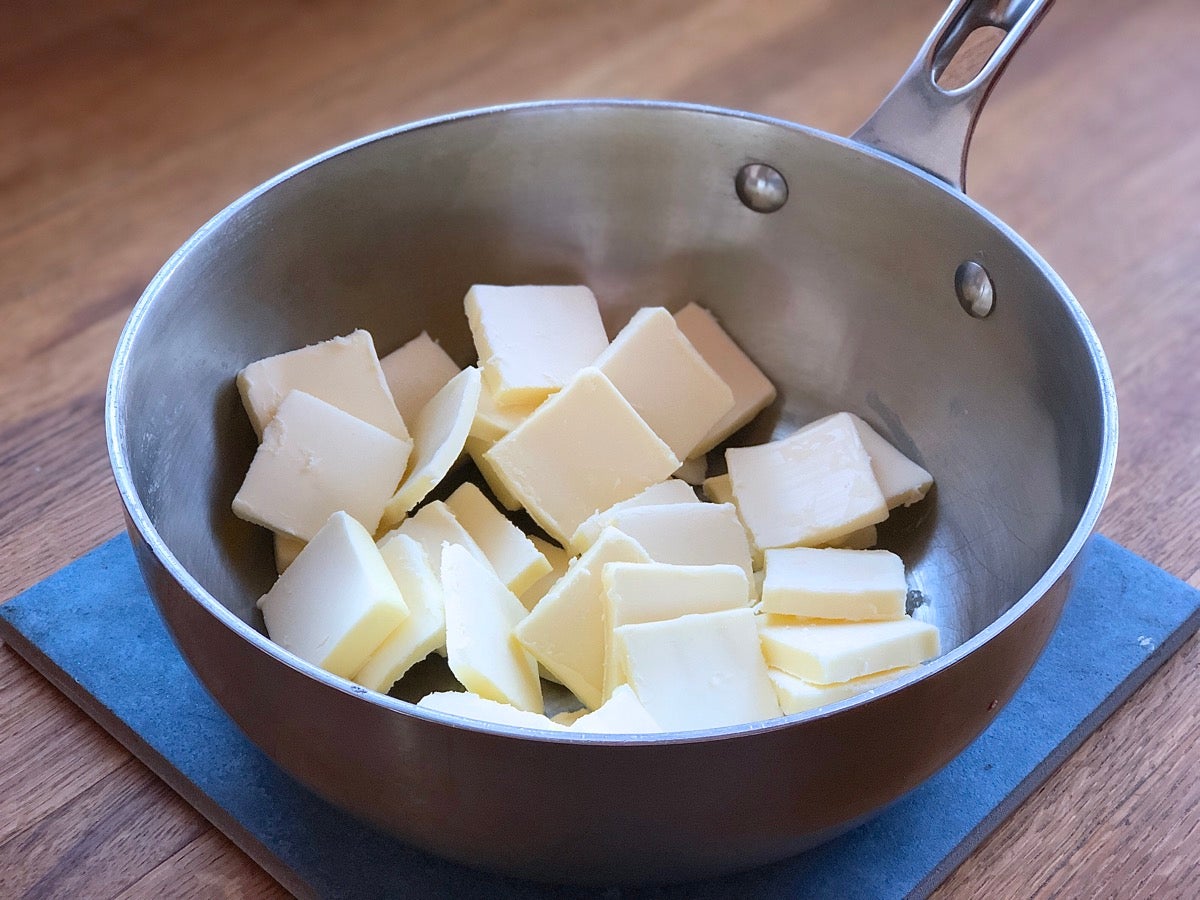
Pats of butter in a light-colored skillet, ready to melt and simmer into brown butter.

First, choose a light-colored pan. This will allow you to easily track the butter’s progress from amber to dark gold to chestnut brown.

Cut butter into uniform pieces so it heats evenly. While it’s tempting to just throw a couple of sticks of butter into the saucepan and forget about it, take the time to cut the butter into pats. This will ensure the butter melts evenly, a key to making brown butter that’s neither undercooked nor burned.

Place the pan on a burner set to medium heat. You’re looking for a very even heating experience. Using medium heat is a good compromise between high heat (too much risk of burning) and low (too slow)

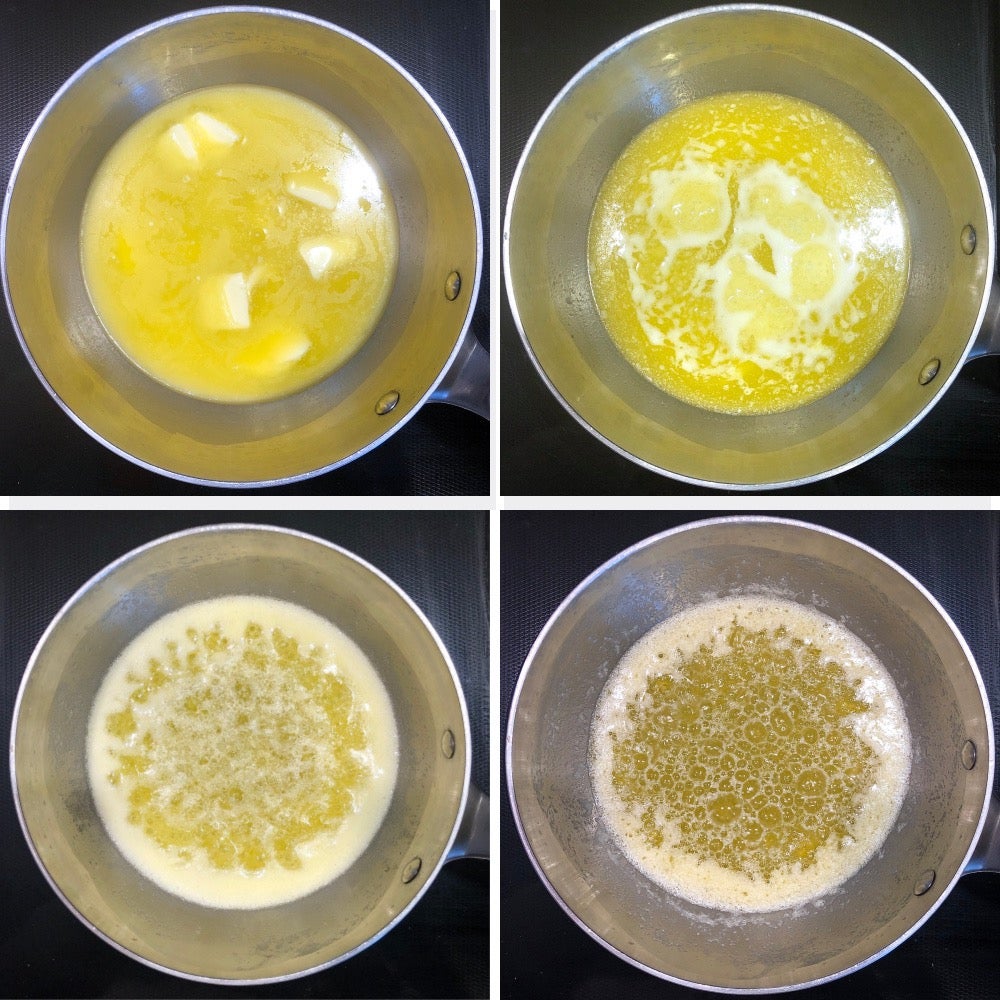
Four photos showing the four stages of butter browning in a saucepan

The butter gradually melts (photo at top left), then starts to sputter and pop as its water evaporates (top right). Foam collects on top as the butter continues to simmer (bottom left). The bubbles eventually become larger, pushing the foam to the sides of the pan and giving you a better view of the darkening milk solids underneath (bottom right).

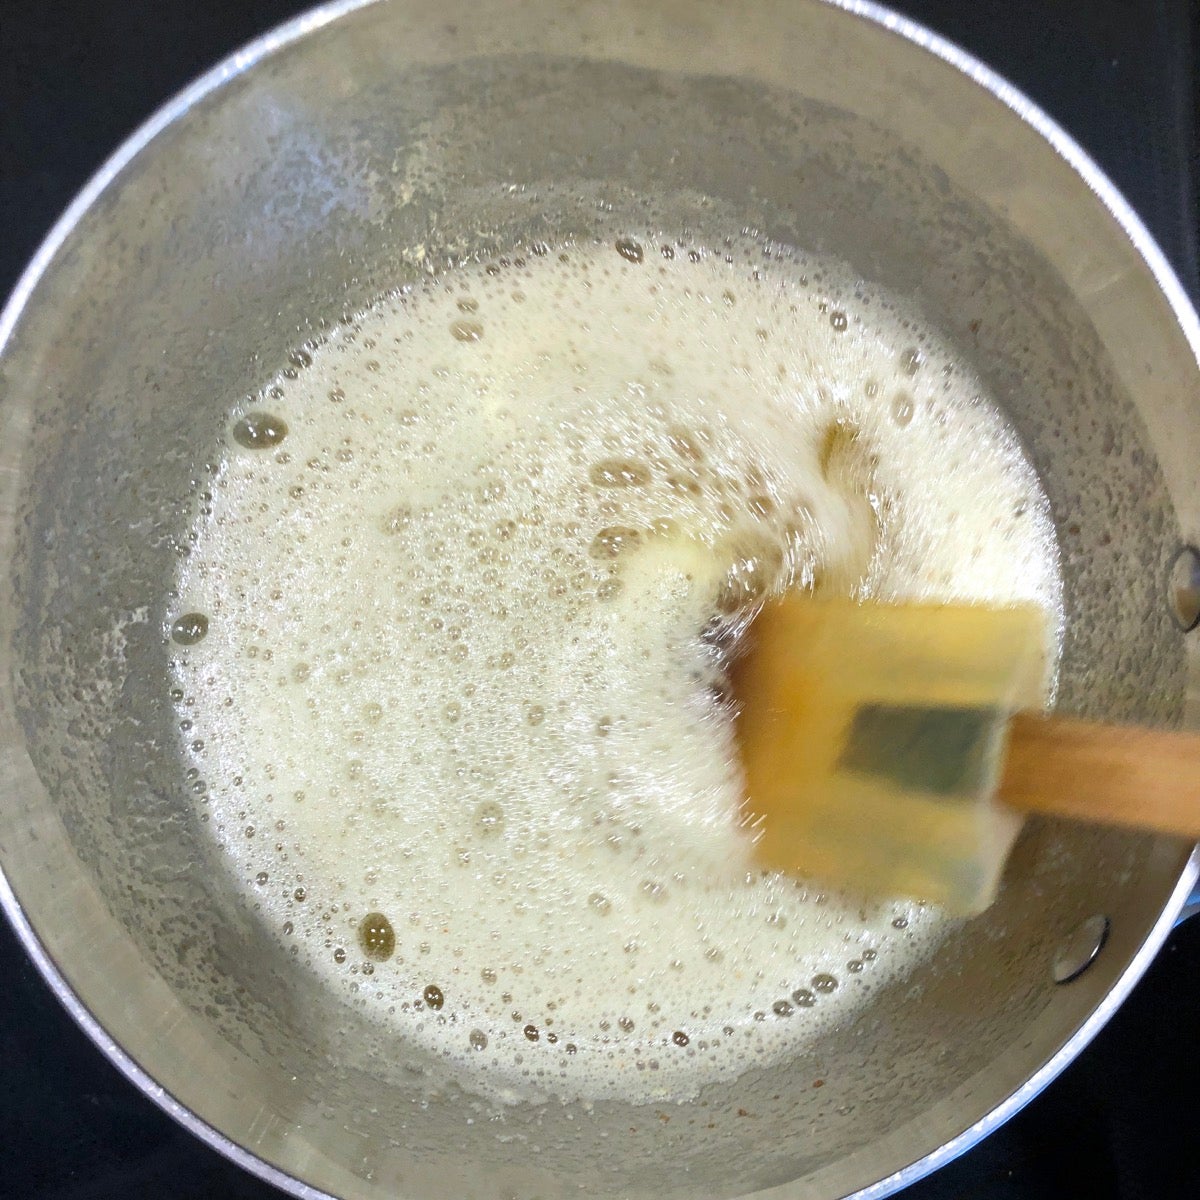
Using a spatula to stir simmering butter in a skillet.

Once the butter has stopped popping and sputtering and started foaming, swirl the pan to help clear the foam to the sides, and stir up the dark bits at the bottom with a heatproof spatula. Swirling and stirring keep the bits from burning.

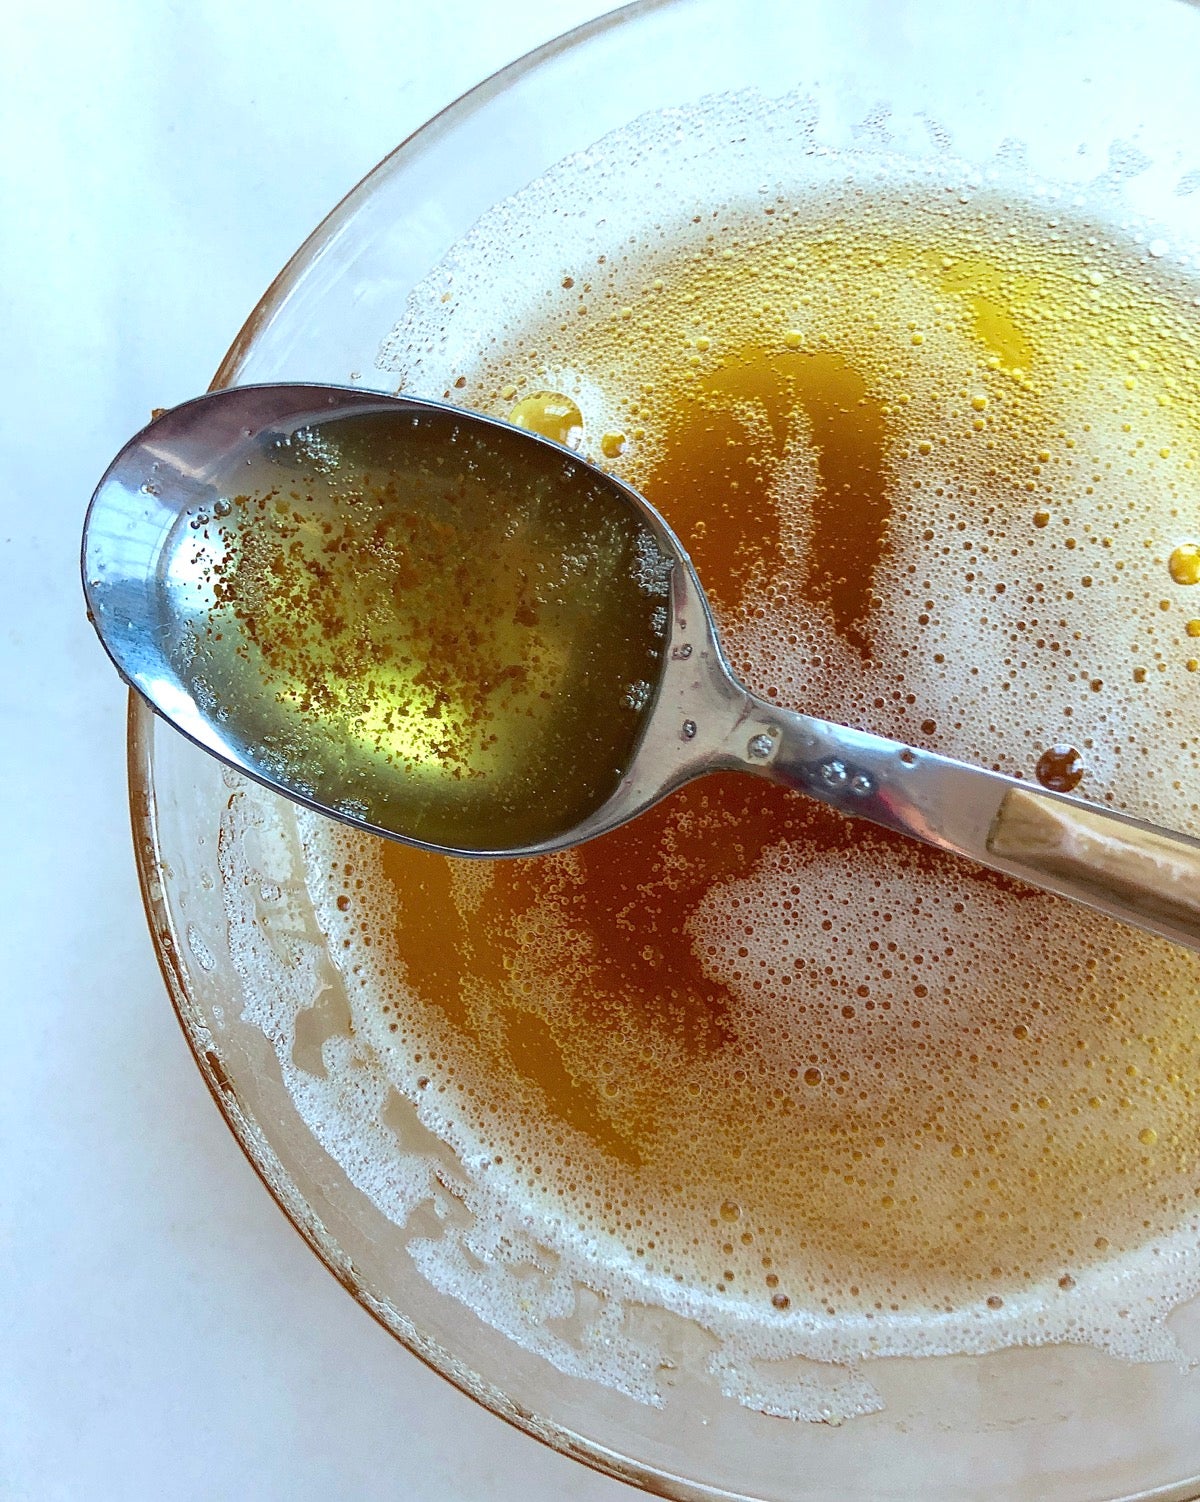
Brown butter in a bowl with some in a spoon showing the darker milk solids under the liquid fat.

When the butter has browned to your liking, remove the pan from the heat. You may prefer the mild flavor of barely browned butter, or the more intense taste of butter with a generous amount of deep brown milk solids; it's up to you.

In France, brown butter is called beurre noisette: hazelnut butter, referring to the preferred color of the browned solids. For added flavor leave the pan on the heat beyond this point, long enough to yield solids that are a really deep mahogany brown.

Once the butter is as brown as you like, speed is imperative: immediately remove the pan from the heat and pour the butter into a heatproof container, to stop it cooking any further.

If your recipe calls for melted butter, you can use brown butter immediately. But if your recipe calls for softened, room temperature, or cold butter, you’ll need to refrigerate it first.

Brown butter becomes rock hard in the refrigerator, making it appropriate for recipes that need cold butter to be “worked” into flour (think biscuits and pie crust).

For recipes calling for room-temperature butter, remove brown butter from the fridge an hour or so ahead of time, just as you would regular butter. For softened butter, give room-temperature butter a few quick stirs; it should loosen up nicely.

Brown butter keeps well for several weeks in the refrigerator; store it airtight. A glass jar is your best bet.

Brown butter in a bowl, chilled in the refrigerator to make it solid.

Brown butter tips  

Adjust the liquid in your recipe if necessary. Since butter is 15% water, you need to adjust your recipe to make up for the liquid that evaporated from the butter during the simmering process. Add 1 tablespoon (14g) water (or other liquid) for every 1/2 cup (8 tablespoons, 113g) of butter used. Failing to add this extra liquid may yield a somewhat greasy final result, especially in something like chocolate chip cookies. 

For the biggest bang, use brown butter in butter-forward baked goods. While brown butter will make everything taste better, the difference in flavor is more apparent in baked treats that use a lot of butter and don’t offer a lot of competing flavors. Plain cookies (shortbread, sugar cookies), pie crust, puff shells (choux paste), flaky pastry, and biscuits are good examples. 

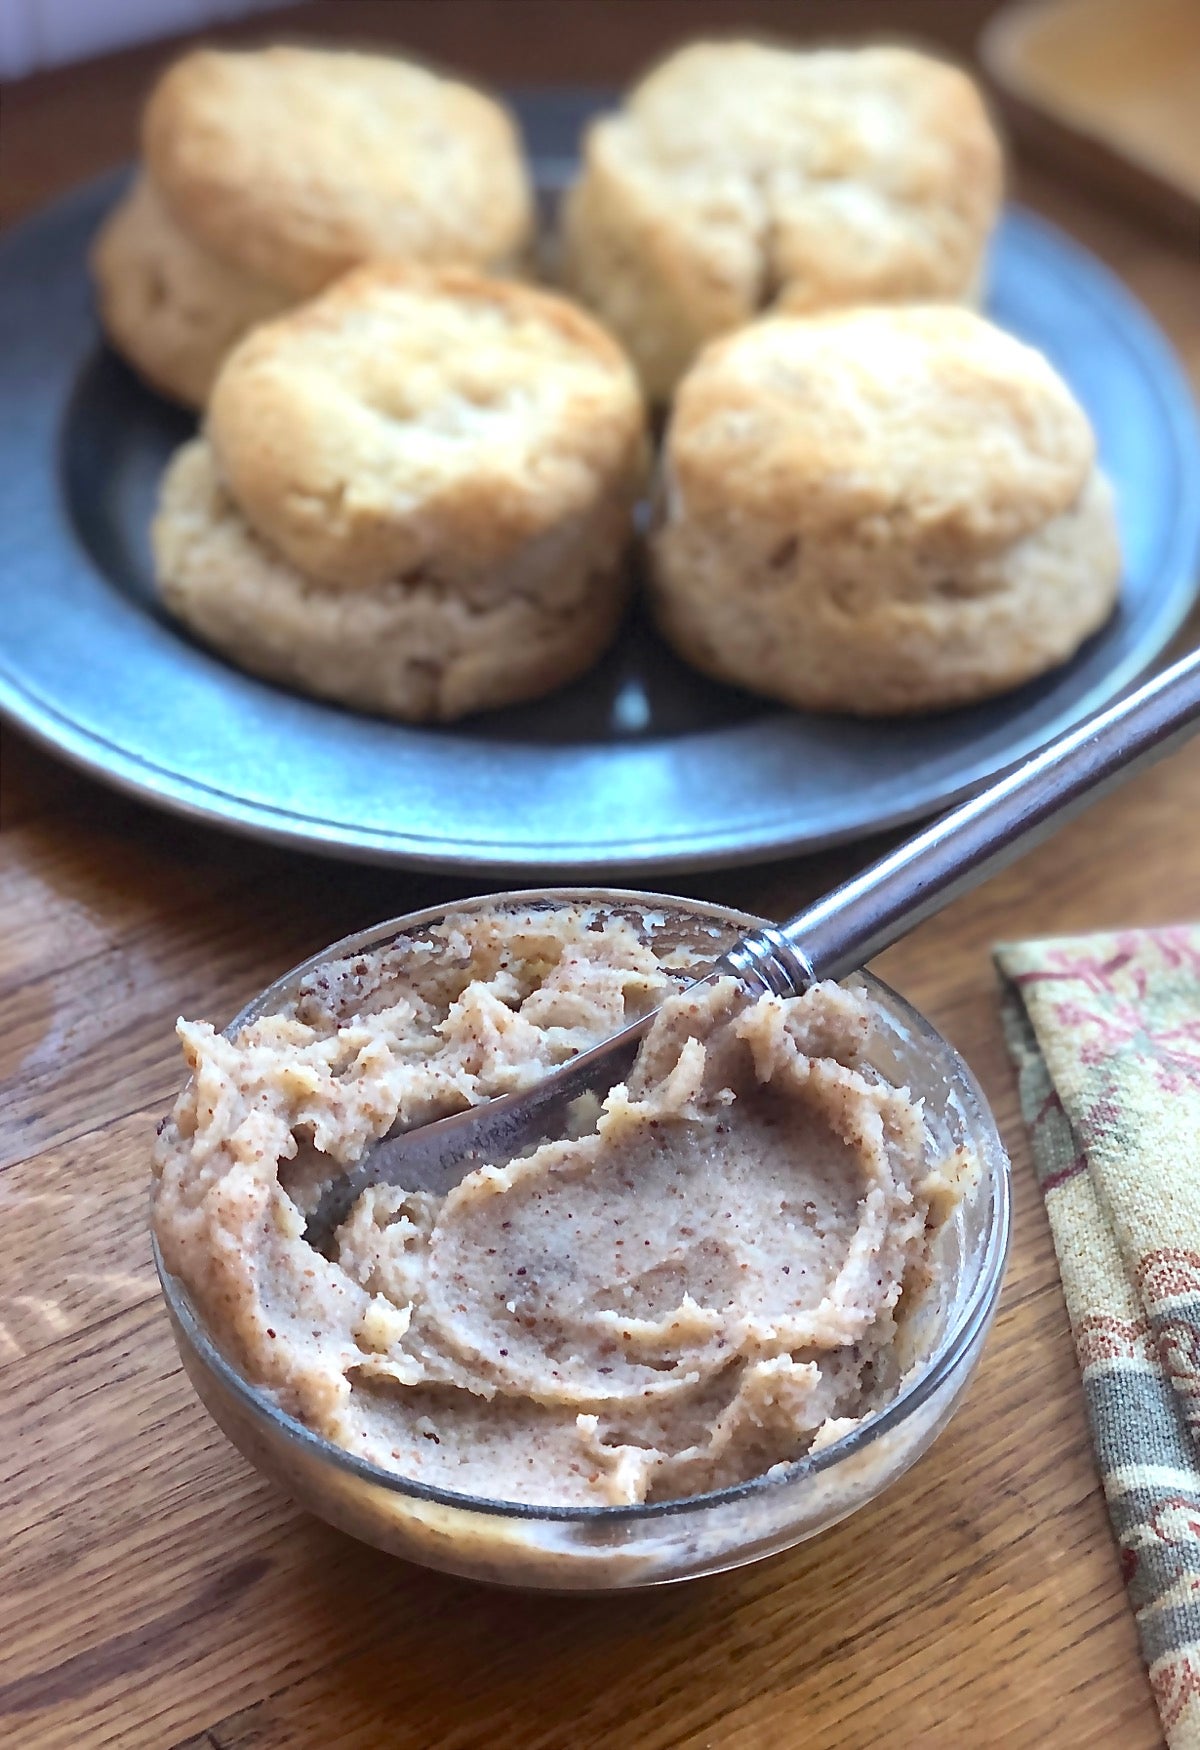
Brown butter's not just for baking. Drizzle melted brown butter onto cooked vegetables or fish, or use room-temperature brown butter as a spread on toast, pancakes, scones, muffins, or biscuits. It's also wonderful, as you'd expect, on popcorn.  

Store any leftover scones well-wrapped, at room temperature, for several days. Freeze for longer storage.


Saturday, May 8, 2021

Pumpkin Streusel Muffins


Pumpkin Streusel Muffins

Ingredients:
For the Streusel:
1 1/2 ounces old-fashioned rolled oats (1/3 cup; 40g), not quick-cooking or instant
1 ounce light brown sugar (2 tablespoons; 30g)
1/2 ounce all-purpose flour (2 tablespoons; 14g) 
1/4 ounce ground cinnamon (1 tablespoon; 7g)
1/8 teaspoon Diamond Crystal kosher salt; for table salt, use half as much
1 ounce unsalted butter (2 tablespoons; 30g)
1 1/2 ounces green pumpkin seeds, raw (heaping 1/4 cup; 40g)
For the Muffins:
6 1/2 ounces whole wheat flour (1 1/3 cups; 185g)
5 1/2 ounces all-purpose flour (1 cup; 155g)
5 1/4 ounces sugar (3/4 cup; 150g)
1 tablespoon ground cinnamon (1/4 ounce; 7g)
2 teaspoons ground ginger
1 teaspoon baking powder
1 teaspoon baking soda
3/4 teaspoon kosher salt; for table salt, use half as
much
1/2 teaspoon ground cloves
1/4 teaspoon ground or grated nutmeg
6 ounces unsalted butter (1 1/2 sticks; 170g), soft but cool, about 68°F
8 ounces pumpkin purée, fresh or canned (1 cup; 225g)
4 ounces plain, nonfat Greek yogurt (1/2 cup; 110g)
2 large eggs, cold
1 tablespoon vanilla extract (1/2 ounce; 14g)

Directions:
For the Streusel: Combine rolled oats, brown sugar, flour, cinnamon, salt, and butter in the bowl of a stand mixer fitted with a paddle attachment. Mix on low to form a crumbly meal, then fold in pumpkin seeds by hand. Transfer to a small bowl, cover with plastic, and freeze until needed, up to 1 month.

For the Muffins: Adjust oven rack to middle position and preheat to 350°F (175°C). Combine whole wheat flour, all-purpose flour, sugar, cinnamon, ginger, baking powder, baking soda, salt, cloves, nutmeg, and butter in the bowl of a stand mixer fitted with a paddle 
attachment (no need to wash after making streusel). 

Mix on low to form a mealy powder, about 2 minutes. Add pumpkin purée, Greek yogurt, eggs, and vanilla, mixing only until dry ingredients disappear. With a flexible spatula, fold batter once or twice to make sure it's well mixed from the bottom up.

Lightly grease a standard muffin pan. (You can line with muffin papers if desired, but you'll still need to grease the flat part of the pan.) Divide batter evenly between cups, filling each to the brim. Sprinkle generously with streusel, then bake until puffed and firm, about 25 minutes. Cool at least 5 minutes before serving. Store leftovers in an airtight container for about 2 days.

Important Note:  
Avoid Greek Yogurt thickened with gum, gelatin, or pectin.  Look for brands that contain only milk and active cultures;  this recipe was tested with both that contain only milk and active cultures; both Fage and Chobani.

Tuesday, October 6, 2020

Persimmon Rum Bread


                                                  Persimmon Rum Bread
Ingredients:
1 cup all-purpose flour
3/4 cup whole wheat flour
3/4 tsp kosher salt
1 tsp baking soda
1/2 tsp ground nutmeg
1 cup white granulated sugar
1/2 cup melted unsalted butter, cooled
2 extra large or large eggs, lightly beaten
1/3 cup spiced dark rum 
1 cup persimmon puree (i used 2 very ripe large fuyu 
   persimmons) 
1 cup pecans
1 cup or so dried fruit (i used a mix of chopped whole 
   dates, golden raisins, or regular raisins)

Directions:
Preheat oven to 350 degrees.  I will try 325*F next time.

Grease and flour or line loaf pan with a piece of parchment paper.

Mix flour, baking soda, salt, nutmeg and sugar into a large mixing bowl. Reserve 1/4 cup of the flour mixture in a separate small bowl. Toss in the dried fruit in the reserved mixture, making sure to coat each piece well.

Make a well in the center of the dry ingredients and then stir in the butter, eggs, liquor, persimmon puree, pecans and floured dried fruit (note: you want to add any leftover flour that the fruit was tossed in as well...waste not, want not!).

Mix the batter just until combined (having little streaks of flour is okay...don't over mix). Pour the batter into the loaf pan and then place the pan in the oven. Bake 1 hour or until toothpick inserted into the center comes out clean. Allow to cool completely in the pan before serving.


To make Persimmon Pulp:

Alway start with Fresh fruit washed under cold water after stem is removed to prevent collectying dirt.

Remove the stems and slice the persimmons in half. Using a spoon, scoop the seeds out of the persimmons. Place the seeded fruit into a blender and puree.

Thomas Hooke/Demand Media

Pour the persimmon puree into a sieve over a bowl and press the puree against the sieve with a spoon. The smooth puree will be pushed through the sieve.


Saturday, September 22, 2018

Double Date Cake With Whiskey Butterscotch Sauce

Date cake tastes like holidays, will 

make you forget fruitcake jokes

Despite the jokes, we enjoy fruitcake in our house. Likewise, the dark fruit flavors of mincemeat, plum puddings, stollen and lebkuchen. They prove a bold contrast to all the sugar cookies, peppermint bark and homemade fudge — which we also love.
Cakes made with dates are relatively new to our repertoire. We’ve had a few good ones this year — most recently at The Vanguard in Indianapolis. They served a warm wedge of a robust, super moist date cake with a generous ladle of warm toffee sauce. Tasted like the holidays to us!
At home, I pureed pitted dates with hot water and a bit of espresso powder for an even darker, pleasantly bitter flavor in this simple one-layer cake. A topping of diced dried dates (look for packages of diced dates with oat flour; the pieces stay separate), mixed with walnuts and cacao nibs, adds a great texture and an attractive appearance. The cake keeps well for several days. I like to it warm; slices can be heated very briefly in the microwave.

The whiskey-spiked toffee sauce gilds the lily. The sauce makes a nice packaged in small jars. Microwave the sauce until it’s warm, so it flows over the cake nicely.

   Double Date Cake With Whiskey Butterscotch Sauce
Makes: 10 to 12 servings
3/4 cup diced dates with oat flour
1/2 cup chopped walnuts
2 tablespoons cacao nibs or small bits of dark chocolate, optional
1 1/2 cups all-purpose flour
1/4 cup whole wheat flour
1 1/2 teaspoons baking soda
1 teaspoon pumpkin pie spice blend
3/4 teaspoon ground ginger
1/2 teaspoon salt
1 package (8 ounces) whole pitted dates, about 1 3/4 cups
2 tablespoons rye whiskey or 1 teaspoon pure vanilla extract
2 teaspoons instant espresso powder
1 1/2 sticks (3/4 cup) unsalted butter, softened
1 cup packed dark brown sugar
4 large eggs
Powdered sugar, optional.
*Whiskey Butterscotch Sauce, see recipe below 
Diretions:
Heat oven to 325 degrees. Butter a 9-inch springform pan. For the topping, mix diced dates, walnuts and cacao nibs in a small bowl. Set aside.
2. Mix flours, baking soda, spice blend, ginger and salt in a separate bowl. Put pitted dates, whiskey and espresso powder in a heat-proof bowl. Add 1 cup boiling water and let stand until dates are super soft, about 10 minutes. Pour date-whiskey mixture into a food processor; process to a smooth puree. Let stand to thicken, about 20 minutes.
3. Meanwhile, put butter into a large bowl of an electric mixer. Beat on high speed until light and fluffy. Beat in sugar until fluffy. Beat in eggs, one at a time, until the mixture is light and fluffy, about 5 minutes total. Add half of the flour mixture and all of the date-whiskey puree. Beat to combine. Add the remaining flour mixture and beat just enough to combine. Do not over-mix.
4. Scrap the batter into the prepared pan. Smooth the top. Sprinkle the reserved diced-dates-and-walnuts mixture evenly over the batter. Bake until cake is pulling away from the sides of the pan and a wooden pick inserted in several places comes out clean, 50 to 60 minutes.
5. Let the cake cool on a wire rack at least 1 hour. Remove the sides of the springform. Cut cake into wedges to serve. Sprinkle generously with powdered sugar, if desired. Drizzle with the whiskey butterscotch sauce.
  
Whiskey Butterscotch Sauce
Makes: 1 1/2 cups
You can sub bourbon or brandy for the rye whiskey, if you prefer.
1 1/2 cups packed dark brown sugar
1/3 cup dark agave syrup
2 tablespoons unsalted butter
1/4 teaspoon coarse salt
1/2 cup heavy (whipping) cream
1/4 cup rye whiskey 
Directions:
1. Put sugar, syrup, butter, salt and 1/4 cup water into a medium-size deep saucepan. Heat to a boil over medium heat. Reduce heat to low, cover the pan and let simmer, 2 minutes. 

Uncover the pan. Add cream and continue to simmer on low, stirring often, until sauce is thick and syrupy, about 10 minutes. 

Stir in whiskey, and cook 1 minute. Remove from heat. Allow sauce to cool at room temperature. Transfer to jars or microwave-safe container. Sauce will keep for up to one month in the refrigerator.

Microwave on medium (50 percent power) to warm the sauce. Serve warm.

Monday, December 12, 2016

Low-fat Gingerbread Cookies


                        Low-fat Gingerbread Cookies 
In these cookies, applesauce adds moisture and flavor. Adding minced candied ginger is a nice surprise. Chopped dried cranberries add a festive garnish. These can be made in advance and kept refrigerated until ready to serve. Sprinkle with the cranberries right before serving. 


Ingredients:
1 egg
1⁄2 cup unsweetened applesauce
1⁄4 cup brown sugar
1 tablespoon molasses
11⁄2 cups whole wheat flour
1⁄2 teaspoon baking soda
1 teaspoon ground ginger
2 teaspoons pumpkin pie spice
2 tablespoons minced candied ginger (optional)
1 lemon, zested and juiced
1⁄2 cup powdered sugar

2 tablespoons dried cranberries, chopped

Directions:
Preheat the oven to 350 degrees.

Beat the egg in a large bowl, then add the applesauce, brown sugar and molasses. 

Mix the whole wheat flour, baking soda, ginger and pumpkin pie spice together in a bowl and add tothe applesauce mixture. 

Fold in the candied ginger, if using and lemon zest. 

Bake on parchment-lined baking sheets for 10 to12 minutes until cookies are still soft but baked through.  Allow to cool completely. 

Make a lemon glaze by mixing the lemon juice with the powdered sugar. Drizzle cooled cookies with the glaze and sprinkle with dried cranberries.   Makes 24 cookies.

Tuesday, June 3, 2014

Hummus With Whole Wheat Flatbreads

Hummus With Whole Wheat Flatbreads
The recipe I share today is from Alice Waters.  Alice is the lady who coined the term Nouvelle Cuisine.  She operates a small and very intimate restaurant in Berkley CA.  Reservations are a must and also if you are lucky.  Her menu changes daily due to what is fresh from the garden or at the market.
*
Ingredients:
Hummus
3/4 cup dried chickpeas, soaked and 
    drained overnight
1/4 preserved lemon, rind only, chopped
1/4 cup tahini
1/4 cup extra-virgin olive oil
3 tablespoons fresh lemon juice  
2 garlic cloves smashed
1/2 teaspoon ground cumin
Salt
*
Flatbreads:
Ingredients:
2 cups whole wheat flour
1 teaspoon salt
1/2 teaspoon baking powder
3/4 cup warm water
3 tablespoons extra virgin olive oil
*
Directions:
Make the hummus: 
In a saucepan cover the chickpeas (garbanzo beans) with 2" of water and bring to a boil.  Simmer over low heat until the chick- peas are tender, about 1 hour; add more water as needed to keep them covered.
*
Reserve 1/4 cup of the cooking liquid and drain the chickpeas.  Transfer the chickpeas to a food processor.  Add the reserved cooking liquid and the remaining hummus ingredients and process until smooth.  Season with salt.  
*
Make the flatbreads:
In a large bowl, whisk the flour, salt and baking powder.  Stir in the water and olive oil and knead to form a moist dough.  Cover with a kitchen towel and let rest 30 minutes.
*
Heat a 10 inch cast iron skillet.  Divide the dough into 16 blls.  On a lightly floured work surface, roll out each ball to a 6X3 inch oval.  Cook 2 flatbreads at a time in the skillet until they start to brown on the bottom, about 2 minutes.  Flip until they start to cook in spots on the other side.  Just before serving, turn each flatbread over an open flame until lightly charred, 1 minute.  Serve with Hummus!  

Friday, October 10, 2008

Spiced Pecan Toasting Bread

 
Spiced Pecan Toasting Bread
As a young child I remember going to my grandmother's home on days when she baked bread and oh, what an aroma. I love a slice of bread warm from the toaster and covered with a thin layer on melted butter. Featured in the April 2008 edition of Sunset magazine, I found a series on homemade breads. For many years I baked our bread. I am on my third bread machine which actually can be used only for mixing any longer. It could be replaced as a testimony to my passion for good bread.
Ingredients:
2 Tablespoons active dry yeast
2 Tablespoons honey
3 eggs
6 to 7 cups bread flour, divided, plus
more for shaping
1/2 cup whole-wheat flour
1/2 cup dark brown sugar
1/2 cup dried low-fat OR non fat milk
4 teaspoons salt
1 Tablespoon vanilla extract
2 teaspoon ground cardamom
1 teaspoon ground cinnamon
1/2 teaspoon freshly ground black pepper
1/4 teaspoon freshly grated nutmeg
1 1/2 cups chopped pecans
Butter for bowl and pans

Directioners::
In the bowl of a stand mixer, dissolve yeast and honey in 1 1/2 cups warm water (90 to 105 degrees). Let set until foamy, about 5 minutes.

Attach dough hook and, with mixer on medium, mix in 2 eggs, 2 cups bread flour, the whole wheat flour, brown sugar, dried milk, salt, vanilla, cardamom, cinnamon, pepper, nutmeg, and pecans. Add remaining 4 to 5 cups bread flour, 1/2 cup at a time, until dough pulls away from the inside of bowl. Knead ( with mixer on medium) until smooth and elastic, adding more flour as necessary to keep dough from sticking too much. When ready, dough should feel a bit like an earlobe when you pinch it.

Transfer dough to a large, lightly buttered bowl. Cover with a clean towel or plastic wrap and let set until doubled in bulk, about 1 1/2 hours. Meanwhile, butter two 8 inch loaf pans and set aside.

Punch down dough, divide in half, and on a lightly floured surface, shape each half into an 8-in. oblong loaf. Put dough in pans, cover, and let set until doubled in bulk, about 1 hour.

Preheat oven to 350 degrees. In a small bowl, beat remaining egg with 2 tablespoons water. Brush dough with egg wash and bake until brown, about 35 minutes. Remove loaves from pans (they are done if the sound hollow when tapped on the bottom) and cool on wire racks.
Yield 2 loaves.

Thursday, June 12, 2008

Coconut Macaroon Pancakes

Heidi's Coconut Macaroon Pancakes
These are glorious. I printed the recipe the moment I read it on 101 Cookbooks. They are something of a happy experiment for Heidi - and I can only hope she has more of them!

These aren't your light and fluffy pancakes, no sir. They are dense (yet delicate), sweet and chewy. They are everything that is wonderful about the coconut macaroon, but miraculously a pancake instead. Now, I am a big fan of the fluffy pancake, but these are certainly a treat. Dave didn't love them as much as I did, but that's because he has "texture issues" with coconut. I love him anyway.

The only real trick to these is the flipping. The shredded coconut doesn't spread as much as the batter as they cook, which means you'll have a bit of thin pancake around the periphery of the pancake... and it is a little daintier than the center - which makes it a little iffy on the flip. Take your time and you will be rewarded.

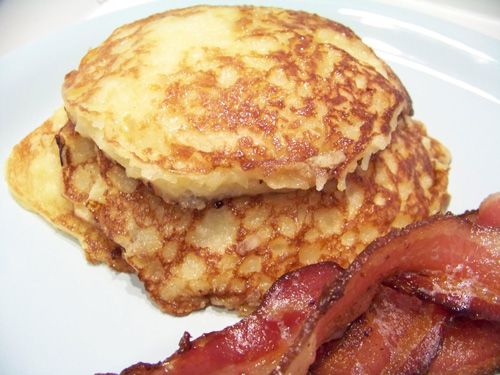
I chose not to syrup them - a little butter did me fine. With a side of bacon, these beauties made a wonderful mid-week dinner. (I even took some leftovers for lunch! Lucky me!)

Look for shredded coconut where each thread is thin and at least 1/2-inch long. Not dusty or fleck-like. If you make the batter the night before, the batter will thicken up quite a bit. Give it a stir, but dont worry about it beyond that. Drop little scoops onto the griddle - they will flatten out when they come into contact with the heat. They go from golden to burnt in a flash, so stay attentive. I prefer to use whole wheat pastry flour for this recipe but you can substitute whatever you have on hand - all-purpose flour, or regular pastry flour. Lemon zest might be a great addition, as would ginger, and/or toasted, chopped macadamia nuts.

Ingredients:
1 14-ounce can of coconut milk
2 tablespoons honey (or agave nectar)
1 /4 cup whole wheat pastry flour (or all-purpose or regular pastry flour)
3 cups unsweetened dried shredded coconut
scant 1/2 teaspoon fine grain sea salt
2 teaspoons baking powder
3 large eggs. whisked in a medium bowl
1/4 cup brown sugar

Directions:
In a small saucepan heat the coconut milk and honey, bring barely to a simmer.                                                                                                    

In a separate large bowl combine the flour, coconut, salt and baking powder. Stir the coconut milk into the flour mixture.

Whisk about 1/3 cup of the coconut mixture into the eggs. Now quickly mix the eggs back into the large bowl of coconut batter. Stir until well combined. You can do this the night before if you like.

Heat your favorite non-stick (or very well-seasoned) skillet, pan, or griddle to medium-hot and brush it with a bit of butter. Test for the right temperature. If a drop of water dropped onto the pan starts to dance, you are in the ballpark. Drop a heaping tablespoon into the skillet, sprinkle the top with a bit of brown sugar. Wait until the pancake bottom is deep golden in color, then flip with a spatula and cook the other side until golden and cooked through. Repeat with the remaining batter.

Makes dozens of silver dollar sized pancakes, or a dozen or so larger ones.