Showing posts with label Apple Cider Vinegar. Show all posts

Wednesday, July 8, 2026

No-Cook Beet and Lentil Salad

No-Cook Beet and Lentil Salad Recipe
No Cook Beet and Lentil Salad  NYT
This vibrant salad comes to life thanks to the tangy dressing of sticky pomegranate molasses and fresh orange juice and zest. Feel free to make this recipe your own by using a different combination of soft herbs and nuts. This is quite a substantial salad, but some fried halloumi would also work nicely alongside.  Serves 6
Ingredients:
1/2 small red onion sliced very thin rounds
4 teaspoons apple cider vinegar
Fine sea salt and black pepper
3 Tablespoons EVOO
3 tablespoons pomegranate molasses, divided
1 teaspoon orange blossom water, optional
1 teaspoon grated orange zest, plus 2 tablespoons juice from 1 small orange
14 oz./ 400 grams ready to eat vacuum packed red beets cut
1 cup cannned, draied, black, browner green lentils
1/2 cup walnuts, roughly chopped
2 to 3 large handfuls roughly torn fresh mint or basil, or a combination!
Directions:
In a small bowl add the thin sliced onion, vinegar. sea-salt, black pepper.  Massage the onion to soften and set aside.

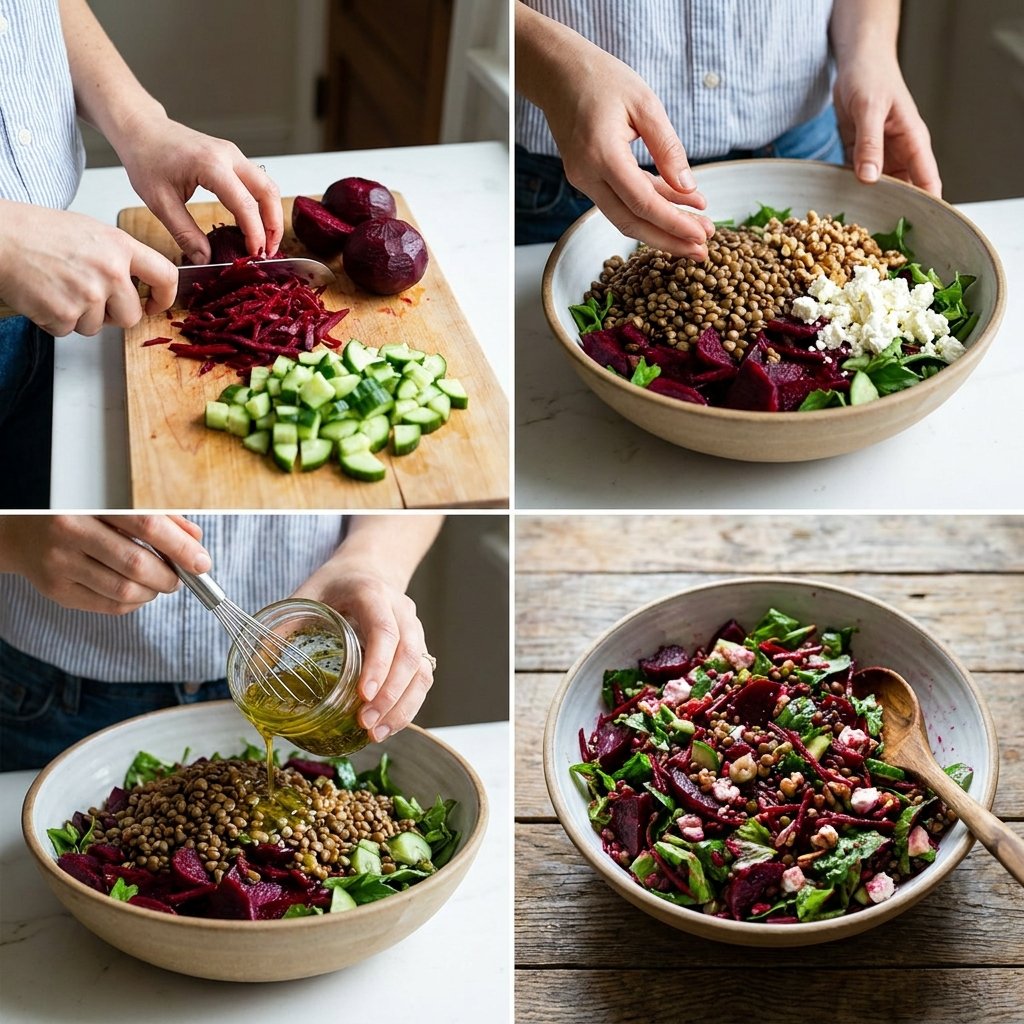
How to Make No-Cook Beet and Lentil Salad Recipe

Making this No-Cook Beet and Lentil Salad Recipe involves simple assembly steps that focus on enhancing the flavor of the fresh ingredients. Follow these instructions to assemble your No-Cook Beet and Lentil Salad Recipe efficiently and safely.

Phase One: Preparation
Dice the pre-cooked beets into small, uniform cubes to ensure they distribute evenly throughout the No-Cook Beet and Lentil Salad Recipe.

Rinse the canned lentils under cold running water in a colander until the water runs completely clear of any canning liquids.

Drain the lentils thoroughly to prevent the salad from becoming soggy during storage.

Phase Two: Assembly

Combine the cubed beets and drained lentils in a large mixing bowl to begin building your No-Cook Beet and Lentil Salad Recipe.

Whisk the olive oil, fresh lemon juice, salt, and pepper in a small jar to create a tangy vinaigrette for your salad.

Pour the dressing over the beet and lentil mixture and gently toss the ingredients to coat every piece evenly.

Fold in the crumbled feta cheese and chopped walnuts to add fat and crunch to your finished No-Cook Beet and Lentil Salad Recipe.

Garnish the top with fresh parsley before serving to make the dish pop with color.

Chef Tips for Perfect No-Cook Beet and Lentil Salad Recipe

Achieving the perfect flavor in your No-Cook Beet and Lentil Salad Recipe requires attention to hydration and seasoning balance. These professional tips will ensure your version is the best version of this classic dish.

Toast your walnuts in a dry pan for three minutes before adding them to the No-Cook Beet and Lentil Salad Recipe to amplify their nutty depth.
Marinate the lentils in half the dressing for thirty minutes before adding the beets to allow the legumes to absorb maximum flavor.
Always use fresh lemon juice rather than bottled concentrate, as it provides the brightness required for a top-tier No-Cook Beet and Lentil Salad Recipe.

Adjust the seasoning with an extra pinch of sea salt if the beets are particularly sweet to provide necessary balance to the salad.
Use room temperature ingredients if possible, as cold ingredients sometimes mask the delicate herbs included in this No-Cook Beet and Lentil Salad Recipe.

Common No-Cook Beet and Lentil Salad Recipe Mistakes to Avoid

Avoiding common errors ensures the consistency and flavor of your No-Cook Beet and Lentil Salad Recipe remain top-tier throughout the entire week of meal prep. Address the following issues to keep your dish from failing.

Leaving the lentils wet from the can will ruin the texture of the No-Cook Beet and Lentil Salad Recipe, so always pat them dry with a towel.

Over-tossing the salad causes the soft beets to break down and turn the entire mixture pink, which affects the presentation of the salad.
Ignoring salt content creates a bland experience, so taste your No-Cook Beet and Lentil Salad Recipe before serving to ensure the seasoning is correct.

Storing the dressing on the greens too early makes them limp, so add the final dressing components just before you plan to serve the salad.

Best No-Cook Beet and Lentil Salad Recipe Variations and Substitutions

Customizing this No-Cook Beet and Lentil Salad Recipe allows you to rotate your weekly menu while keeping the same fundamental preparation steps intact. Try these swaps based on your current pantry availability.

IngredientSubstitutionImpact on Flavor
WalnutsPecans or Sunflower SeedsAdds a milder, buttery sweetness
FetaGoat Cheese or Tofu FetaOffers a creamier, tangier profile
Lemon JuiceApple Cider VinegarProvides a deeper, fruity acidity
ParsleyFresh MintIntroduces a refreshing cooling sensation

Incorporating different nuts or herbs makes your No-Cook Beet and Lentil Salad Recipe feel new every single time you cook it. Do not be afraid to experiment with your favorites while making this No-Cook Beet and Lentil Salad Recipe.

Serving Suggestions for No-Cook Beet and Lentil Salad Recipe

This No-Cook Beet and Lentil Salad Recipe pairs beautifully with roasted chicken or seared fish for a complete high-protein dinner. For meat-free days, serve your No-Cook Beet and Lentil Salad Recipe alongside warm pita bread and a side of hummus for a complete Middle Eastern inspired meal.

Consider serving this dish in large bowls at a summer picnic where the vibrant purple contrast will stand out amongst other side dishes. If hosting a dinner party, place the salad on a bed of fresh arugula to add height and bitterness to the bowl of this No-Cook Beet and Lentil Salad Recipe.


Friday, July 3, 2026

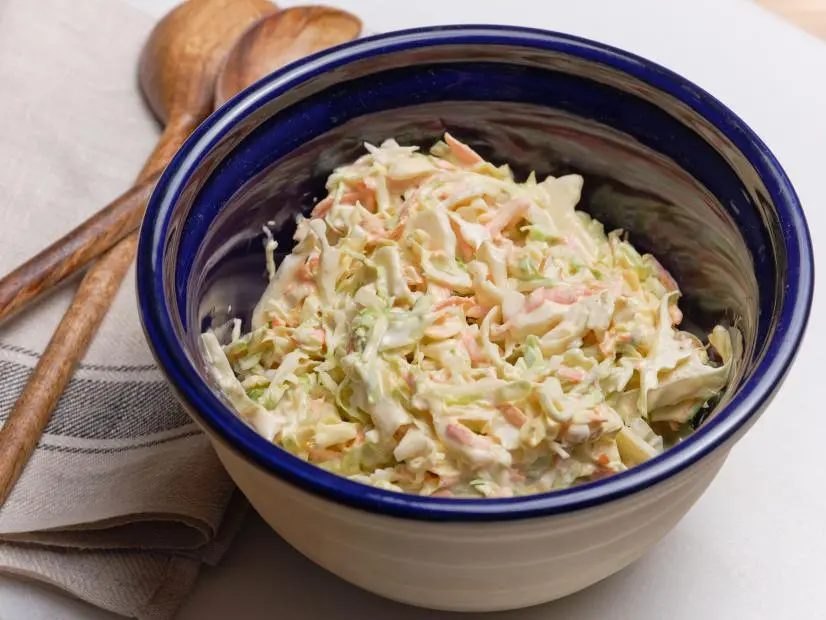
Best Creamy Coleslaw

Best Creamy Coleslaw
We made our cool, crunchy slaw with just the right amount of tang from sour cream and vinegar. A bit of honey balances the acidity. This classic summer side dish would be welcome at any picnic or backyard BBQ.
Ingredients
5 cups thinly sliced green cabbage
1 cup grated carrots
3/4 cup mayonnaise
1/3 cup sour cream
2 tablespoons apple cider vinegar
1 tablespoon Dijon mustard
1 tablespoon honey
1/2 teaspoon celery salt
Kosher salt and freshly ground black pepper
Directions
Toss together the cabbage and carrots in a large bowl.

Whisk together the mayonnaise, sour cream, vinegar, mustard, honey and celery salt in a medium bowl. Pour the dressing over the shredded vegetables and toss to coat. Season with salt and pepper. 

Cover and refrigerate for 30 minutes. Season with more salt and pepper before serving.

Friday, December 12, 2025

Cincinnati Skyline Chili

    Skyline Chili, quirky culinary tradition from Cincinnati, causes deep rift between haters ...
     Cincinnati Skyline Chili
In the city of Cincinnati, Ohio this dish is almost a religion! There are chain restaurants named for the dish. It is not unusual to find the dish on the menu at many other restaurants. You can buy the sauce in cans and sources will ship it. I found this recipe on a blog. Notice the cheese is cheddar cheese but any cheese will do that blends with the chili.  Make half of this recipe if you don't need to serve 12.  This recipe is a one pot prep.
Ingredients with Directions:
2# ground beef (85-15)
5 cups boiling water
Place meat in boiling water and with I long handled spoon, break meat into small pieces and cook.  Cook 20 minutes and when the protein surfaces skim the surface to remove this "film".  
Add each ingredient individually to layer the flavors,
2 cups onion, chopped fine
1/2 teaspoon cayenne pepper
1 large bay leaf
3 large garlic cloves, crushed
1 teaspoon onion powder
1 teaspoon garlic powder
1/2 teaspoon ground cloves
1/2 teaspoon ground allspice
1 oz. unsweetened chocolate powder
Salt to taste
3/4 teaspoon apple cider vinegar
Simmer on low for 1 hr., stirring occasionally to prevent scorching.
While the pot simmers on low, make the tomato "paste".
8 ounces tomato sauce
3 teaspoons tomato paste, stir 2 minutes
Add 2 teaspoons ground cinnamon and simmer 15 to 20 minutes.  Prepare your paste while it simmers.
Toppings:
Plenty of Cheddar Cheese. (That is required)
Optional:
Raw diced onion,  Kidney beans,  Hot Sauce
Directions:
Bring a pot of water to a boil.  Place ground beef in water and break into small bits.  Protein will surface looking like a scum.  Skim it from surface.  Continue for 20 minutes until meat is cooked. 

Layer the flavors adding each ingredient and herb stirring to blend after addition according to directions.  Simmer 1 hour on low stirring occasionally to prevent scorching. Add tomato paste and stir for 10 minutes.   Add cinnamon and simmer 15 to 20 minutes 

To make paste: In another skillet with a stick-free surface and while the mixture is simmering, place the tomato sauce and paste.  Stirring constantly for 2 minutes over a medium to medium low heat to concentrate the mixture.  When your spoon creates a division in the mixture that remains instead of returning to the pool of sauce, place in the mixture of meat and spices..

Serve over cooked spaghetti and top with plenty of cheddar cheese.


Thursday, October 16, 2025

Thyme And Dijon Seared Pork Tenderloin With Cider Pan Sauce

Thyme and Dijon Seared Pork Tenderloin With Cider Pan Sauce
Pork Tenderloin is the other "White Meat".  I enjoy pork tenderloin for many reasons, being the ease in preparation, the flavor, and the health benefits!  There is a two fold secret to create a delicious crust, then roast it in a glaze until the center is light pink.  Reducing apple cider with warm spices concentrates before the cider is mounted with butter for a Lucious pan sauce. 
Ingredients:
2 (about 1 1/4 lb) pork tenderloins, silver skin removed
2 1/4 teasoons kosher salt, divided
1 1/4 teaspoon black pepper, divided
1 tablespoon Worcestershire sauce
1/2 teaspoon grated garlic
3 tablespoons neutral cooking oil, such as avocado oil
2 tablespoons course ground Dijon mustard, divided
1 tablespoon finely chopped thyme, divided
3 tablespoons cold unsalted butter, divided
2 tablespoons finely chopped shallot
2 whole allspice
2 whole cloves
2 juniper berries (optional)
3 tablespoons apple cider vinegar
1 cup fresh apple cider (see note)
1 tablespoons finely chopped fresh chives

Directions:
Preheat oven to 350*F.  Line a linage rimmed baking sheet with aluminum foil.  Set aside.

Pat the pork tenderloin dry with paper towels.  Remove the silver skin.
Season with 2 teaspoons salt and 1/2 teaspoon pepper, set aside.  Whisk Worcestershire sauce and grated garlic, 1 tablespoon oil, 1 tablespoon mustard,  2 teaspoons thyme, 1/2 teaspoons pepper in a small bowl, set aside.

Heat remaining 2 tablespoon oil in a large stainless steel skillet over a high heat until the oil is shimmering, about 3 minutes.Add the pork turning occasionally until well browned on all sides, 6 to 8 minutes total.

Remove from heat and transfer to a prepared baking sheet.  Brush reserved Worcestershire mixture evenly over pork.  Do not wipe the skillet clean.

Bake pork until an instant thermometer-read,  inserted in the thickest portion of the pork reads 140*F,  (for medium), 15 to 18 minutes, or until desired degree of doneness.  Remove from oven, and let rest for 5 to 10 minutes.

While the pork is baking, melt 1 tablespoon butter in reserved skillet over medium-low heat.  Add shallot, allspice, cloves,  juniper berries (if using), remaining 1 teaspoon thyme, and remaining 1/4 teaspoon pepper.  Cook stirring often until shallow is softened, about 2 minutes.  Add apple cider, remaining 1 tablespoon mustard, and remaining 1/2 teaspoon salt.

Bring to simmer over medium-high heat and cook stirring occasionally  until sauce thickens and is reduced to about 1/3 cup, about 8 minutes.  Remove from heat, discard the spices.  Vigorously stir in chives and remaining 1 tablespoon butter until sauce is glossy and emulsified about 1 minute.

Transfer the pork to a cutting board and cut into 1/2 inch thick slices.  Transfer to a platter and spoon cider sauce over top.  Garnish with additional chives.


w


Tuesday, February 11, 2025

Carrot Ginger Soup

 
Carrot Ginger Soup
Warm up with a heart healthy recipe. Whether you are trying to eat healthier or incorporate more plant base foods in your diet, this recipe is worth a taste. 
Ingredients:
1 tablespoon EVOO
1 cup onions chopped
3 cups carrots chopped
2 tablespoons fresh ginger, peeled and sliced  OR
   1 teaspoon ground ginger
3 garlic cloves. chopped
4 cups vegetable broth
1 tablespoon apple cider vinegar
Cashew cream or sour cream for topping
Pumpkin seeds or hemp seeds or chopped parsley for topping
Directions:
Heat a large saucepan over medium heat, when heated, add the EVOO and chopped onions.  (*Never cook the oil ). Sauté until "transparent" or glossy, stirring frequently until tender, about 5 minutes.  Add the ginger and carrots.   Stir to coat and cook another 5 to 7 minutes.  Add the garlic cook while stirring another minute.   

Pour in the broth and bring it to a boil.  Then reduce the heat and simmer and cook for 20 to 30 minutes, or until the carrots are tender.  Remove the pan from the heat and stir in the vinegar.  Then allow the soup to cool slightly.  

Puree the soup in a blender, working in small batches as necessary.  Blend on low speed for a few seconds, then slowly increase speed to create a creamy soup.  To serve, pour the soup into bowls and garnish with desired choice.  Yield: 4 servings

TIP:  My next batch, I will use less garlic.   Otherwise the flavor is great

Tuesday, February 20, 2024

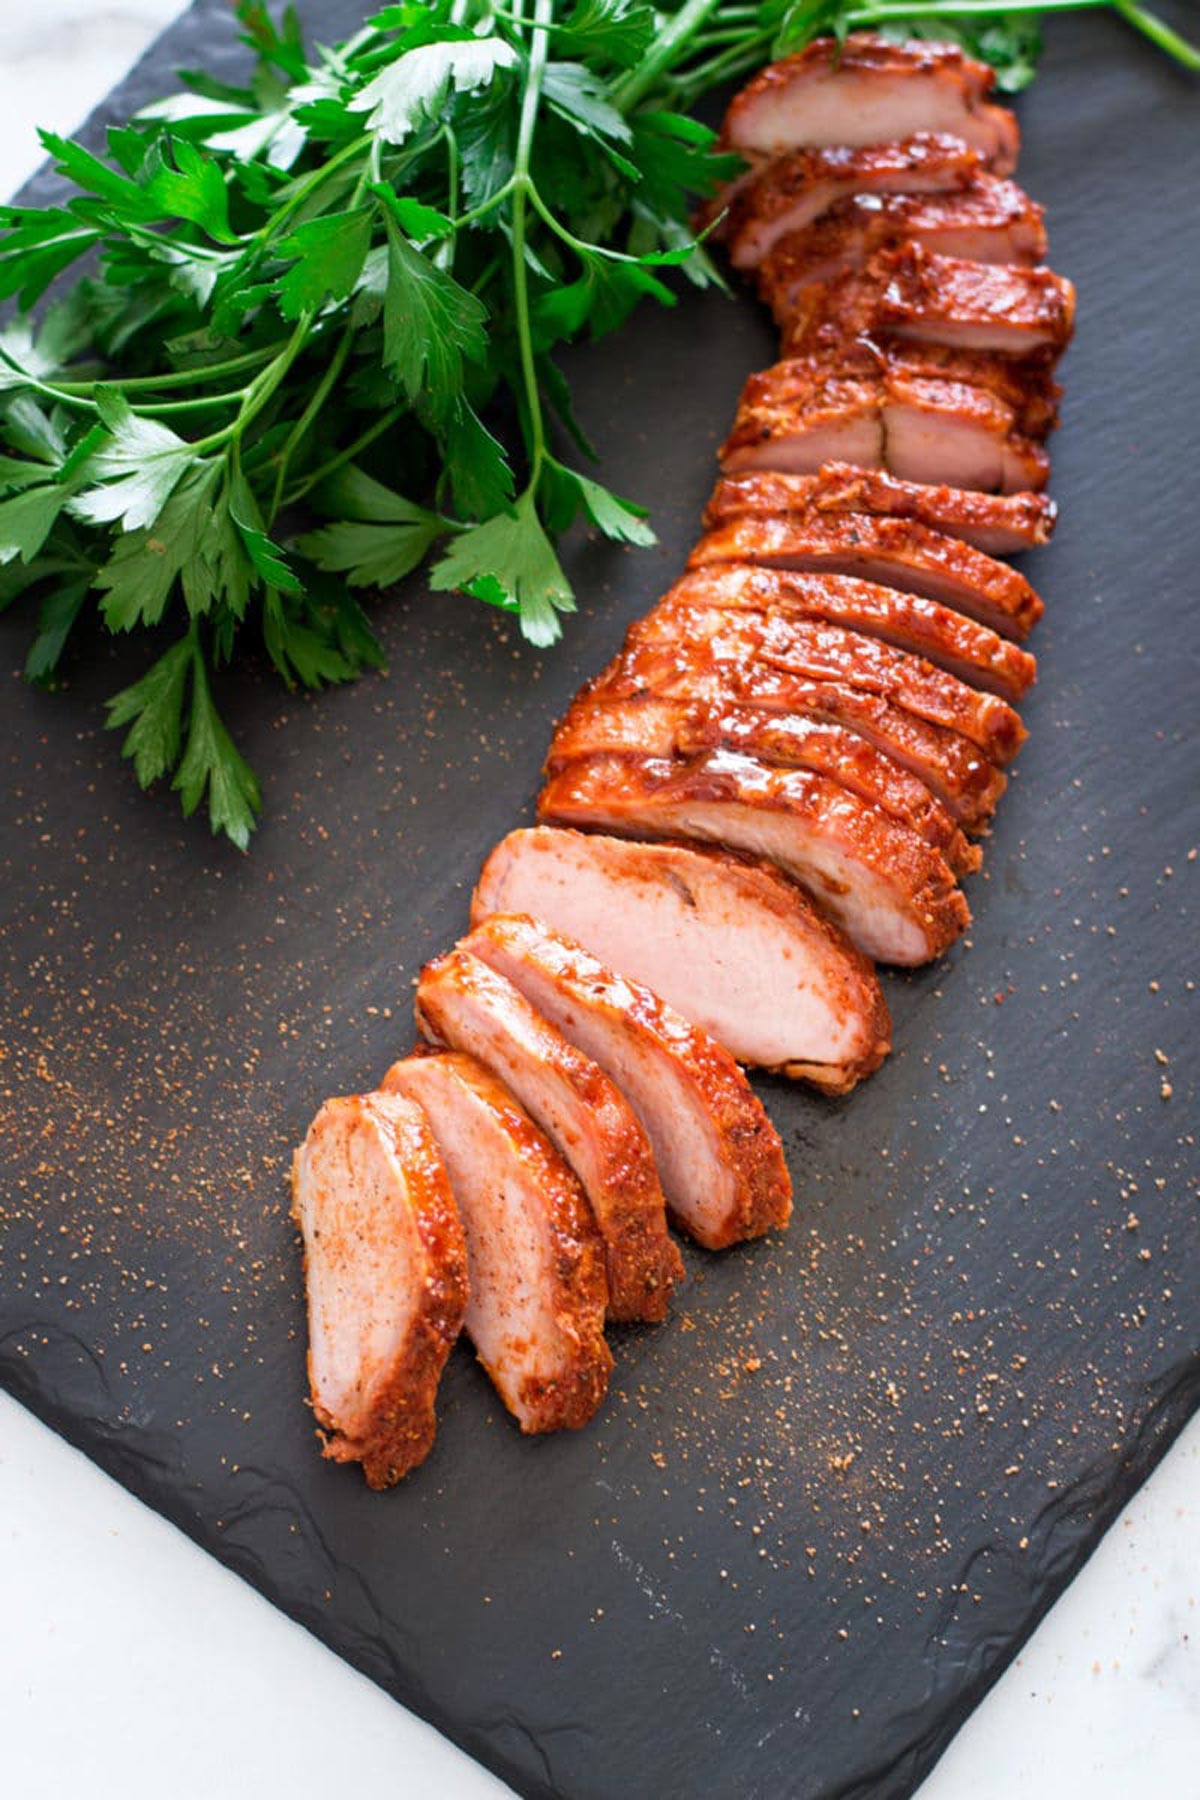
Preparing Smoked Pork Tenderloin, Marinade and Dry Rub

Smoked Pork Tenderloin
Pork tenderloin slow cooked in the smoker is the way to go! Incredibly tender and juicy, it's extremely easy to make. This smoked pork tenderloin recipe is full of flavor and will quickly become one of your favorite smoker recipes! If you've never smoked it before, you're in for a mouthwatering treat!
Why this works:

Pork tenderloin is an inexpensive cut of meat and can be easily found at your local grocery store. 


Smoking a lean cut of meat is not only extremely juicy and flavorful, but is typically quicker to smoke. It's also a myth that smoking lean meat is more tough and tends to be on the dry side. Simply not true. 

Pork tenderloin tastes amazing the next day warmed up and served in a wrap, on top of a salad, or in a sandwich! 

Ingredients You'll Need For Pork Brine
This pork brine recipe has a citrus base which helps tenderize the meat. The brining process allows the meat to absorb the liquid to not
only make the meat juicer and more tender, but to add flavor.

Orange & Lemon Slices: fresh citrus juice not only adds flavor, but the acidic level helps naturally tenderize the meat.

Apple Cider Vinegar: used to add flavor and the acidic level helps tenderize the meat.

Sugar: helps balance out the tartness from the citrus and vinegar with a hint of sweetness.

Salt: maintains the moisture level and also penetrate the food so the flavors in the brine can seep in. 

Garlic: adds a savory flavor.

Herbs: rosemary, peppercorn, and bay leaves adds layers of flavor in every bite.

Pork Dry Rub Ingredients You'll Need
Pork Tenderloin: 2-3lbs will feed 4-6 people.
Brown Sugar: adds a sweetness and helps with caramelizing the outside of the meat during the smoking process.

Byron's Butt Rub:a blend of spices that enhances the flavor of smoked meats. It has savory, smoky, and slightly spicy flavors.

Onion Powder: provides a savory flavor and adds to the depth of flavor.

Garlic Powder: pairs extremely well with the brown sugar by adding a hint of both sweet and savory.

Smoked Paprika: adds a subtle smoky flavor.

Salt & Pepper: for additional flavor enhancement.

Variations Barbecue Sauce: Skip adding this if you want to stick to only using the dry rub. The flavor is fabulous with only the dry rub, but I love adding barbecue sauce because it takes this recipe to the next level flavor-wise.
Byron's Butt Rub: If you don't have it, you can skip this ingredient. Even a small amount adds to the flavor!  

Paprika: Using smoked paprika adds a rich and smoky flavor. You can also use sweet paprika which has a mild and slightly sweet flavor. Hot paprika provides a significant kick of spiciness and is ideal for adding heat to dishes where a touch of fiery flavor is desired.

Wood Flavors: Any mild wood, such as apple or cherry provides the best flavor. Pecan is another good choice for this cut of meat.

 Preparing the Smoker   It doesn't matter what type of smoker you use for this recipe. The smoke time and methods will be the same. But depending on the type of smoker you use will depend on how you prep it.                                  

Start by lighting the smoker. Let it preheat until it reaches 225°F.   

If a water pan is being used, put a disposable pan or wrap the water bowl with aluminum foil before filling it with water. This helps ensure an easy clean up after the smoking process. During the smoking process, the meat will drip.

Depending on the type of smoker you use will determine if you should use wood chips, wood chunks, or pellets. If you use wood chips, they should last about 1.5-2 hours. Wood chunks will burn longer, about 2-4 hours.

Step-By-Step Recipe Instructions

Step 1: Start by brining the meat. Place the pork in a large 13x9 dish. 

Step 2: Combine all the brine ingredients into a large bowl and mix well. 

Step 3: Then, pour the liquid brine mixture over the pork. Cover with plastic wrap and place in the refrigerator for a minimum of 2 hours. 

Expert Tip: For best results, brine for for 10-12 hours.

The tenderloins are still going to be wet from the brine which helps the dry rub stick to the meat better. There's no need to let them marinate in the rub. 

Step 4: After the brining process, remove the pork and place it on a large cookie sheet. Do not dry it off with paper towels. It should be wet when you apply the dry rub. 

Step 5: Lather both sides of the meat with the pork dry rub. Using your fingers, firmly press the dry rub into the pork and ensure all sides are covered. 

The tenderloins are still going to be wet from the brine which helps the dry rub stick to the meat better. There's no need to let them marinate in the rub. 

Step 6: When the smoker has preheated to 225°F, put the meat directly on the smoker grates. Close the lid and smoke the meat for 1 hour.

Step 7: Open the smoker lid and using a basting brush, lather on a savory and flavorful barbecue sauce to both sides of the meat. This is the point in the smoking process when I insert the digital meat thermometer and start monitoring the internal temperature.

Step 8: When the internal temperature of the pork reaches 145°F, remove the meat from the smoker and let it rest for 3 minutes. Grab a meat carving knife, slice, and then serve. 

The key to success when smoking a pork tenderloin is smoking it low and slow. And the results are full of mouthwatering flavor everyone will enjoy! 

Expert Tip: For best results, brine for for 10-12 hours.

 Preparing the Smoker

It doesn't matter what type of smoker you use for this recipe. The smoke time and methods will be the same. But depending on the type of 
smoker you use will depend on how you prep it.

Start by lighting the smoker. Let it preheat until it reaches 225°F.

If a water pan is being used, put a disposable pan or wrap the water bowl with aluminum foil before filling it with water. This helps ensure an easy clean up after the smoking process. During the smoking process, the meat will drip.

Depending on the type of smoker you use will determine if you should use wood chips, wood chunks, or pellets. If you use wood chips, they should last about 1.5-2 hours. Wood chunks will burn longer, about 2-4 hours.

Monday, December 18, 2023

 Creole Slaw With Cajun Dressing, Shrimp, Grits, and Bacon
Ingredients
16oz coleslaw mix
3/8 cup mayonnaise
2 Tbsp Creole mustard
2 Tbsp Creole seasoning
1 Tbsp apple cider vinegar
1 tsp sugar


Directions
In a large bowl, mix together mayo, mustard, Creole seasoning, vinegar and sugar until well combined.
Add in coleslaw mix and toss well.
Refrigerate at least 30 minutes before serving.

Thursday, August 17, 2023

Brown Sugar And Nutmeg Peach Galette

Brown Sugar And Nutmeg Peach Galette
What says summer more than a peach dessert.
Ingredients:
1 3/4 cup flour

2 Tbsp granulated sugar
¼ tsp baking powder
½ cup salted butter, cold
3 oz cream cheese, cold
1½ tsp apple cider vinegar
3⅓ Tbsp heavy cream
3 cups peaches, sliced
⅓ cup brown sugar
1 tsp nutmeg

Directions:
Combine flour, sugar and baking powder in a food processor bowl. Pulse a few times to combine. Slice butter and cream cheese. Add slices 1 to 2 at a time, pulsing a few times after each addition. Add vinegar and cream. Pulse until mixture comes together into a dough.

Lightly form into a ball and place on a piece of plastic wrap. Flatten slightly and wrap securely. Place in refrigerator for 30 minutes.                      

Remove and place on a piece of lightly floured parchment. Roll dough into a ¼-inch-thick rectangle. Place the dough and parchment on a baking sheet and set aside.

Preheat oven to 350 F.

Combine peaches, brown sugar and nutmeg in a medium bowl. Toss to combine. Layer peaches on dough, leaving a 2-inch edge around the peaches. Reserve any leftover liquid.

Fold the edges in over the peaches. Bake for 45 minutes.

Brush reserved liquid over top of crust and peaches. Return to oven and bake an additional 10 to 15 minutes, or until crust is golden brown.


Wednesday, January 18, 2023

Cranberry Hot Sauce

Cranberry Hot Sauce
A sweet, sour and spicy punch of flavor that’s perfect with turkey sausage. If you like your condiments on the milder side, use a hot sauce like Frank’s RedHot in place of Tabasco.

Ingredients:
3/4 cup (175 mL) dried cranberries
3/4 cup (175 mL) apple cider vinegar
3/4 cup (175 mL) freshly squeezed orange juice
2 tbsp (30 mL) Tabasco or other bottled hot sauce
1 tsp (5 mL) garlic powder
1/2 tsp (2 mL) ground ginger
1/4 tsp (1 mL) ground clove
1/4 tsp (1 mL) ground allspice


Directions:
To make hot sauce, place all ingredients in medium saucepan and bring to boil over high heat. Reduce heat to medium-low and simmer until cranberries are very soft, about 15 to 20 minutes. Allow to cool 30 minutes.

Transfer mixture to blender and process on high speed until smooth. Pass mixture though fine sieve and store in airtight container in the fridge for up to 2 weeks. Makes 2 cups (500 mL) hot sauce

Friday, September 17, 2021

Pickled Vegetables

 Aspargus pickles in weck jars

Asparagus Pickles With Grape Leaves

The grape leaf imparts added crunch to the pickles. This recipe works for other vegetables, too. These are refrigerator pickles, not to be kept at room temperature. Allow the pickles to cure in the refrigerator for about a week for great flavor. Use any jars tall enough to accomodate the height of your asparagus. Asparagus pickle jars are especially pretty.  Recipe of Maureen Abood.


Ingredients:

2 pounds long, thicker asparagus
2 cups water
1/3 cup apple cider vinegar (white wine vinegar or standard vinegar are also fine)
1 tablespoon kosher salt
2 tablespoons sugar (or honey)
4 cloves garlic, peeled
4 small fresh grape leaves
2 sprigs fresh dill
1 teaspoon mustard seeds
Directions:
To blanch the asparagus, bring a large pot of water to boil.

Meanwhile, stack the asparagus on a cutting board and evenly cut the stems about 2 inches from the bottom. Discard cut stems.

Fill a large bowl with ice and water, stirring to separate the ice cubes. Place this near the pot of boiling water, as the asparagus will go directly from blanching into this ice bath.

Using a spider or large tongs, dip several spears of asparagus into the boiling water and hold there for 15 seconds and not longer! Repeat with the rest of the asparagus, leaving all of them in the ice bath together while the brine is made.

To make the brine, combine the water, vinegar, salt, and sugar. Bring the mixture a boil over medium heat, stirring until the salt and sugar begin to dissolve. Remove from the heat and stir until dissolved. Let the mixture cool; you can pour the brine into a glass measuring cup or a metal bowl to speed up the cooling.

Remove the asparagus from the ice bath to a board to drain. 

Place two grapeleaves in the each jar with vein-side facing in. Add two garlic cloves to each jar. Carefull fill each jar tightly with asparagus, tips at the top of the jar. Tuck a dill spear into the outer edge of each jar so it's visible. Add 1/2 teaspoon of mustard seeds to each jar. 

Using a funnel if you have one, pour the brine into the jars, half in each jar. Put the lid on the jars and refrigerate for about a week before serving. If you eat them sooner, they'll still be delicious!
Yield: 2 servings  2 Jars.


Saturday, May 15, 2021

European Soldier Beans

European Soldier Beans
Pure ivory with coffee-colored markings, European soldier beans are known as New England’s finest baking beans. The beans absorb all the rich flavor of traditional sweet and savory baking sauces.  Zursun.com heirloom beans. 
New England Baked Beans 
Ingredients
  • 1 cup dried European soldier beans
  • 2 tbsp. olive oil
  • 1 small onion, finely chopped
  • 2 cloves garlic, chopped
  • 2 slices smoked bacon, cut in one-inch pieces (optional)
  • ½ cup canned crushed tomatoes
  • 1½ tbsp. apple cider vinegar
  • 1 tbsp. maple syrup
  • ½ tsp. prepared yellow mustard
  • 1 tsp. salt (less if bacon is used)
  • ½ tsp. freshly ground black pepper

Directions:
Sort beans and soak overnight in bowl using 3 times as much water as beans. The next morning rinse beans with cold water. 

Put beans in heavy saucepan, cover with two inches fresh water and bring to a slow boil. Reduce heat and simmer uncovered until tender (35-45 minutes). Reserve some bean liquid for casserole.

Preheat oven to 325 degrees. 

In fry pan heat oil, add onion and sauté for 5 minutes. Add garlic and bacon (if using) and cook 2 minutes more. In large casserole, combine drained beans, onions and the rest of the ingredients. Mix to coat beans. 

Cover dish with lid or foil. Bake for 1 hour, checking twice for drying. If beans begin to look dry, stir in extra bean water or plain water. Serve piping hot.  
Serves 2 to 4     Buy: Zursun.com

Thursday, November 5, 2020

Salt-And-Vinegar Roasted Potatoes

Salt-And-Vinegar Roasted Potatoes
Ingredients:
¼ cup apple cider vinegar, divided
¼ cup olive oil, divided
1¼ teaspoons kosher salt
Freshly ground black pepper
2 pounds fingerling potatoes, halved lengthwise
½ cup fresh curly parsley leaves
2 tablespoons chopped fresh oregano
2 tablespoons chopped fresh dill or fresh chives
Flaky sea salt, for serving 

Directions:
Preheat oven to 425°F. 

Whisk 3 tablespoons each vinegar and oil in a large bowl until well combined. Season with kosher salt and several grinds of pepper. Add potatoes and toss to coat.

Arrange potatoes, cut sides down, in an even layer on a rimmed baking sheet.  

Bake until golden on bottoms and tender when pierced with a fork, 35 to 40 minutes. Let cool for 15 minutes. 

Toss potatoes with remaining:
1 tablespoon each vinegar and oil on baking sheet.

Fold in parsley, oregano, and dill just before serving. Top with flaky sea salt.

Tips: The finished dish can stand at room temperature for up to 1 hour.


Thursday, July 2, 2020

Saint Louis Style Ribs ~ Instant Pot

St Luis Style Ribs  ~  Instant Pot
Ingredients:
4 cups apple juice
1 cup apple cider vinegar
1/4 cup bar-b-que sauce
Spareribs

Directions:
Curl your ribs with the bones on the inside.  Set timer for 30 minutes, then natural release 10 minutes.  They will be fallking off the bones so be careful when you take them out to pllace them on a cookie sheet.  Baste with more sauce and place in an oven 350*F for 10 minutes.  


Saturday, March 2, 2019

Irish Soda Bread

Irish Soda Bread
Low Carb ~ Gluten Free

Ingredients:
2¾ cups blanched almond flour (not almond meal)
¼ teaspoon celtic sea salt
1½ teaspoons baking soda
½ cup raisins
2  large eggs
2 tablespoons honey
2 tablespoons apple cider vinegar
1 pinch caraway seeds 


Directions:
In a large bowl combine almond flour, salt, baking soda, and raisins.
In a small bowl combine eggs, honey, and apple cider vinegar. 
Mix wet ingredients into dry. 
Place dough on a parchment paper lined baking sheet 
Form into a large, flat circle 8-inches across and 1½-inches tall 
Using a serrated knife, score top of dough ½-inch deep, in shape of a cross 
Sprinkle top of bread with caraway seeds 
Bake at 350°F for 20 minutes, then turn off oven and leave bread in for 10 minutes. 
Cool for 1 hour 
Serve.  This is the most delicious Irish Soda Bread I have ever made!

How to Store Irish Soda Bread
To store this gluten-free bread, wrap in a paper towel, seal in a plastic bag, and refrigerate for up to 1 week.


Saturday, August 25, 2018

Passion Fruit Vinaigrette


Passion Fruit Vinaigrette
1/2 cup passion fruit juice
1/8 cup oil  (try flavored oils if you like)
1/8 cup apple cider vinegar
1 tablespoon honey
Salt and pepper

Mix and shake well.  Serves 4.